Android application security testing guide: Part 1
Android is a Linux kernel mobile platform that has been popular throughout its existence on a huge variety of devices, especially mobile smartphones. Most organizations, ranging from banking to telecom companies, have also come up with their apps for Android. Just like generic web applications, these mobile applications need a pen-test exercise as a part of their SDLC life cycle. This market is projected to reach a huge size by the end of 2014 with the growing demand for high end smartphone applications. Also, people generally rely too much on their Android devices, so compromising them might lead to the loss of a good amount of critical data, including passwords, mails, etc. Therefore, security testing of the applications carrying sensitive user data is very important.
This series is a solution for those who want to take a deep dive into mobile application security testing, as these articles focuses on the approach for pen-testing Android-based mobile applications. It also provides an introduction to the tool set available for the Android platform. During the whole series, we will try to understand the complete process of mobile application testing in a very comprehensive manner.

11 courses, 8+ hours of training
Speaking in general, the Android platform basically needs to be secure at two levels, i.e., the application level and the device level. For application level security, we need to uncover the bugs in applications that are going to be installed on the device. For this, we look out for server-side as well as client-side security issues in the application. For a clearer understanding of what we are going to cover, let's make an outline of this series:
- Get the APK file.
- Decompile the APK file.
- Install the APK.
- Intercept the requests.
- Check for local storage.
There are a lot of tools that we require for testing. To reduce the time for installing everything manually, we will opt for App-Use, which is a freely available distribution for Android application security testing. There is another VM, i.e., Android Tamer by @anantshri ,which also contains a lot of tools for this exercise including tools for mobile testing, pen-testing, ROM modding, etc., and can be found at his blog.
Two basic and essential things are:
- A phone emulator (Android SDK)
- A regular web application proxy (e.g., Burp Suite, Mallory, etc.)
There are already a lot of tools in this App-Use, namely apktool, smali, baksmali, manifest explorer, jdgui, dex2jar, Android SDK, adb, burp suite, etc. We will explore each of them one by one either for static or dynamic testing. Before we start off with the testing methodology, let's have a quick understanding of some important tools:
Android SDK—
This is by far the most important tool for the whole pen-test exercise. Android SDK is a mobile device simulator where you install your applications and use the application the way you use it on your mobile device. SDK gives you almost all functionalities that a mobile device will give you, except for the availability of a SIM card, which can be tweaked as well. We will discuss this tweak stuff in the later part of our series.
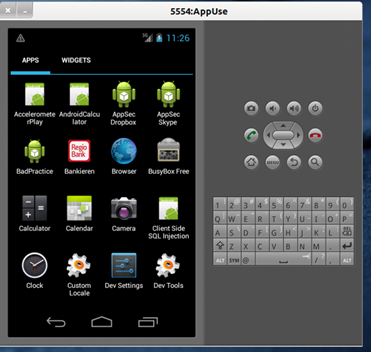
Image 1. Typical view of Android Emulator
Burp Suite—
Burp Suite is an intermediate proxy that is generally used to intercept the traffic in between your application and the end-point server. Apart from interception, it has some useful tabs, such as:
- Repeater, used for capturing a request and analyzing it in case you don't want the involvement of the browser every time.
- Intruder, used for automating customized request for attacks on apps.
- Scanner, which is more useful for some automated testing while you are manually testing the application logic.
- Sequencer, used for analyzing the randomness in random tokens being generated by the application from server side.
- Decoder, used for a quick encode/decode task when you encounter a encoded string in your assessment.
Burp Suite is mainly required in the dynamic testing phase of our penetration testing exercise.
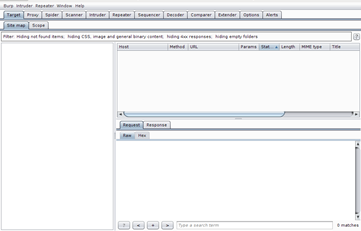
Image 2. Typical view of Burp Suite Proxy
ADB (Android debug bridge) *2—ADB is a very useful command line tool that comes along with the Android SDK. This allows you to communicate from your system to the Android device in terms of file transfers, application installations, working on device shell, etc. This has mainly three components:
- A client that runs on the main machine. As soon as you pass any adb command, a client is invoked.
- A server that runs as a background process on the main machine and manages the communication between the client and ADB daemon.
- A daemon that runs as background process on the device.
ADB gives you huge flexibility while interacting with the device. Some of the most commonly used commands that might help you are:
- adb shell—Starts a remote shell in the target emulator and you can work on device as if you are physically using it.
- adb install<apk_file>—Installs the given APK file into the device. –s will make it install on the /sdcard.
- adb push—Copies a file from machine to your device.
- adbpull—Copies a file from device to your machine.
- adblogcat—Prints log data on the screen.
Okay, enough tool talk. Time to start testing. The first step before starting the test is to download the VM image of App-Use from their website and extract the files in a folder. Open this file in VMware-player. Assign at least 1 GB of ram to the machine for to avoid system lagging while doing work and open the virtual machine.
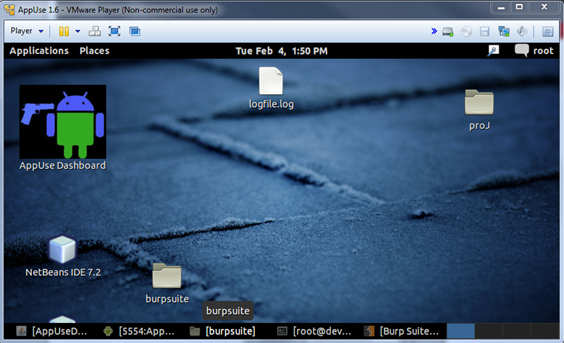
Image 3. App-Use Desktop
In order to go further, we now need the APK file. This can be either downloaded from some source, or you can directly install in the device from the Google Play store. Once installed, this will make the application come up in your application menu. And now you can browse/use the application.
To get the APK file:
- If your client / target provides you this file directly, there are no worries.
- But many organizations do not give you the APK file; they expect you to get their application from the Google Play Store. In this case, Install the file in your phone from Google Play. And the Android SDK does not contain Google Play services installed by default. To install it either you can install the Play store in App-Use itself or you can use the free version of the Genymotion emulator as well. You can easily install a Google Play store in your mobile device as well. I found the later one very comfortable for me. And if you have an Android phone, you are a lucky chap. Once you have installed the application in your device, you need another application called "App Backup and Restore" for extracting the APK file. Open the app and it will look something like:
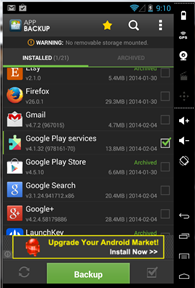
Image 4. Backup & Restore Application
To extract the APK file for any application, mark the checkbox in front of the application and click on "Backup." You can also backup more than one application at a time. Close "backup and restore," and find the APK file in the /data folder. Copy the file and get it ready for your emulator.
So we now have the APK file with us. We will divide our testing approach into two parts:
- Static analysis—In this phase, we will try to uncover the vulnerabilities on the client side, i.e., insecure storage, etc. The objective will be to find out some critical data that can be gained from the APK file itself.
So let's understand a bit about the APK file. APK files are actually zip format packages based on the JAR file format. the MIME type for Android these files is application/vnd.android.package-archive. To make an APK file, a program is first compiled and then all the contents of the program are packed into one file. Therefore, this APK file will anyway contain all the program's code (in DEX files), all resources, certificates, manifest file, etc. which we can reverse-engineer by either following a set of steps or using some tools that are available for this, as well.
If you want to try this out on a vulnerable application, App-Use contains some vulnerable apps at "/Appuse/targets/" path.
Manual approach—Copy the APK file to a new location. For instance, we are using ExploitMe.apk.
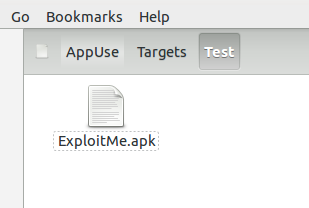
Image 5. Target APK file
Rename the file extension from ".apk" to ".zip."
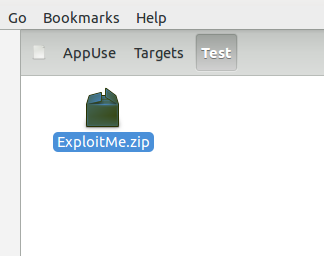
Image 6. Filename after changing the extension from apk to zip.
Extract the contents of this zip file as shown in the figure below.
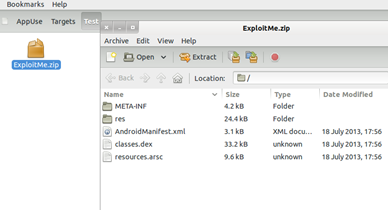
Image 7. Result of extracting the ZIP file
This will give you the contents of the APK package, which you further need to explore. But before going that, let's understand what exactly are the functions of these files and folders*1
- META-INF directory:
- MANIFEST.MF—This file simply enumerates the files that are included in the distribution, either for processing by various packaging tools, or for human use.
- CERT.RSA—The certificate of the application.
- CERT.SF—The list of resources and SHA-1 digest of the corresponding lines in the Manifest.MF file.
- lib: This directory contains the compiled code that is specific to a software layer of a processor. The directory is split into more directories within it:
- armeabi—compiled code for all ARM based processors only.
- armeabi-v7a—compiled code for all ARMv7 and above based processors only.
- x86—compiled code for x86 processors only.
- mips—compiled code for MIPS processors only.
- res: This directory containing resources not compiled into resources.arsc.
- assets: This directory contains applications assets.
- AndroidManifest.xml: This is an additional Android manifest file, describing the name, version, access rights, referenced library files for the application.
- classes.dex: The classes compiled into the DEX file format understandable by the Dalvik virtual machine.
- resources.arsc : This is a file containing precompiled resources, such as binary XML, for example.
As classes.dex contains the whole bunch of code, it's quite obvious that if must be handled with care. "Dex" stands for Dalvik executable format. As another option, these files can also be collected from the "/data/Dalvik-cache" folder.
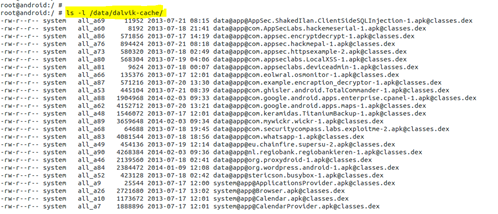
Image 8. Existence of DEX file in dalvik-cache folder.
Once you have collected all these files, the next step is to analyze this information with the Java source code. Start with android_manifest.xml; as mentioned above, this file contains the file permission for the application while accessing the Android operating system on the device. Open the file in any text editor.
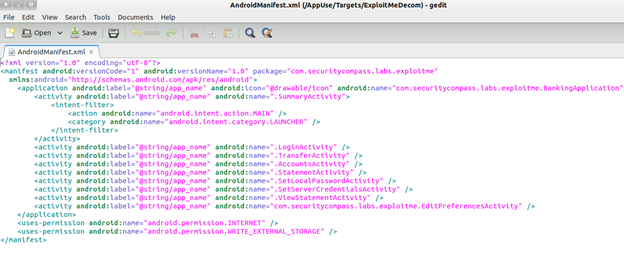
Image 9. Contents of a typical Android Manifest.xml file
We can see all the permissions assigned to each application. While exploring the application on the device, check if the website is assigned any unrequired permission. For this, we can either use dextojar for converting the Dalvik executable code to the corresponding Java code in the form of a JAR file. To use it, go to "/AppUse/Pentest/dex2jar/dex2jar-0.0.9.15/" and execute the following command:
dex2jar.sh <path_to_dex_file>
By default it will put the output in the same directory.
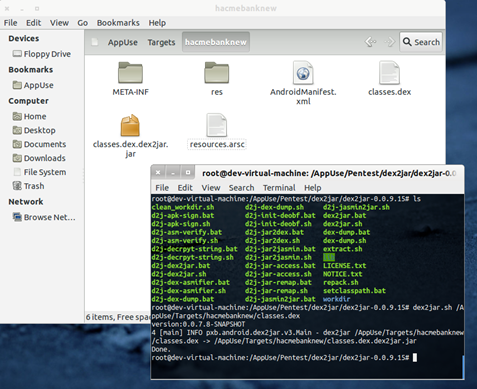
Image 10. Converting DEX file to JAR file with the help of de2jar
Now we have the JAR file, which can be analyzed for any malicious strings within the package to help us in further operations. There is a utility called jdgui that can be used for this. To open this, go to "Terminal" and type "jdgui." Once the application gets loaded, go to "open" and locate the JAR file. This will give you the whole package in a hierarchal view. Navigate manually through all these class files and check if any sensitive data is present. When I do my pen-testing exercise for clients, most commonly I found their API secret keys, sometimes internal IPs, and quite a few times the username, password, or database strings. Here is the snippet of the class files in jdgui.
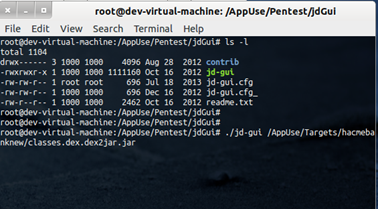
Image 11. Opening up the JDGUI to view the contents of JAR file
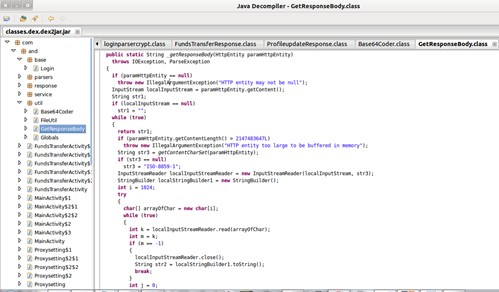
Image 12. Contents of Jar file in form of class files
Another option is to decompile the DEX file to a SMALI file, which is an assembly language specifically designed for this purpose only. This can be done by using the utility apktool, which accepts the APK file as an input and give the folder SMALI files as output. The approach of using apktool has another advantage over dex2jar, i.e., it makes it quite easy to save the changes and recompile the APK file with modified classes. Below is the basic syntax for apktool:
apktool<d><path_to_apk_file><path_for_output_directory>
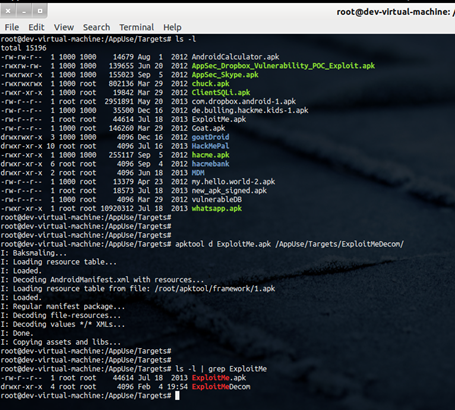
Image 13. Decompiling the apk file using apktool utility
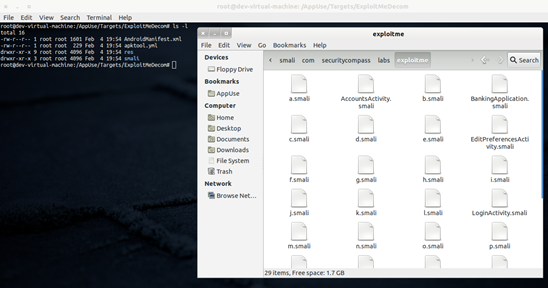
Image 14. Decompiles class files in output folder.
By now you have got all the SMALI files, which contain the Java code in clear text. So go through each of the files and check if it contains any sensitive data. But isn't there an overhead? Definitely there is. There is a small utility by teams2n called mobilizer.py to automate this stuff. The tool aims at doing all the things I mentioned above in an automated manner so, as a tester, you have to only pass the APK file and the tool will tell you any sensitive information leaking in the package. You can download it from their github page.
Run mobilizer.py and pass the filename as parameter. As of now, it only accepts the relative paths and stores the result in the file "logfile.log" in the same directory.
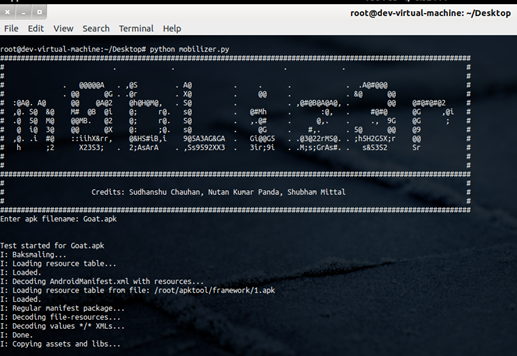
Image 15. Using m0bliz3r for automated sensitive data investigation
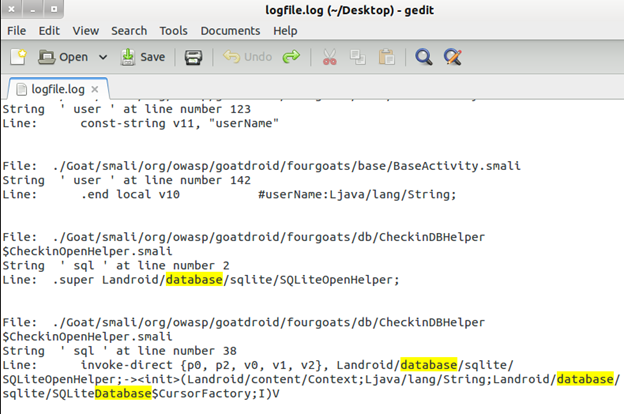
Image 16. Results from m0bliz3r in logfile
As you can see, this tool will give you a list of sensitive strings found in the APK file. One point to note is that this tool only searches for strings in a simple way and might give you results where the username was written as string and original username was not present (quite obviously).
Now we have finished our first part, i.e.. "Reverse Engineering of APK file." So far, we have discussed the techniques for decompiling and reversing the Android package manager file. This is all we need to test before installing the application into the emulator. We will discuss the techniques and challenges that come our way while doing the dynamic testing for Android applications in Part 2 of our "Android Application Security Testing Guide Series."
Stay Tuned...
Comments and feedbacks are highly appreciated for giving me more idea about what you guys want this series to cover.

11 courses, 8+ hours of training


