DevSecOps: Continuous Integration Continuous Delivery (CI-CD) tools
In the last piece, we went through the various tools that can be integrated into the DevOps Pipeline to implement security at the different stages of the software development cycle.
In this post, we will understand what CI/CD is, various CI/CD tools available, and see a sample DevSecOps pipeline implementation in Jenkins.
A word on CI/CD
To ensure faster delivery and product quality, enterprises are adopting DevOps methodologies as their software development methodology. DevOps makes this possible by automating the process of continuous integration and continuous delivery lifecycle. Hence, the name CI/CD.
Continuous integration
As the name suggests, continuous integration involves the continuous integration of code into the codebase. In continuous integration, minor code changes are merged and integrated into the codebase, thus mitigating integration issues that help developers deliver high-quality software faster.
Continuous delivery
After continuous integration comes continuous delivery. As the name suggests, continuous delivery deals with deploying incremental and frequent software changes in feature addition, UI enhancements, bug fixes etc. Continuous delivery comprises testing and deployment of the integrated code.
Continuous Integration falls under the developer's realm, while continuous delivery falls under the realm of operations. Thus, the name DevOps.
CI/CD Tools
To adopt CI/CD style of software development practice, there are many tools available in the market. Choosing the best tool will always remain challenging, and we must consider many criteria before selecting any CI/CD tool.
Here are examples of some widely used CI/CD tools:
- Jenkins
- GitLab
- CircleCI
- Bamboo
- Travis CI
- JetBrains TeamCity
- Octopus Deploy
- Opsera
Jenkins
We’ve discussed the most popular CI/CD tools; the above list does not include all the available tools. Jenkins will be the one we will learn out of all the tools mentioned above because it provides the following advantage:
- Easy OS installation and upgrading
- Community-supported open-source tool
- User-friendly, simple interface to set up
- Offers over a thousand plugins to make your work easier. You can create a plugin that doesn't already exist and distribute it to the community
- Supports master-slave architecture for distributed builds
- Supports pre-build steps that use shells and Windows command execution
- Offers support for notifications about build status
- Because it was created using Java, it can run on all the major platforms.
You’re likely already aware of Jenkins and familiar with its setup and basics. Also, you have a fair idea and understanding of writing pipeline scripts in Jenkins. If not, please refer to the following links: https://www.jenkins.io/download/ and https://www.jenkins.io/doc/book/.
Building pipeline script in Jenkins
Let’s run through the sample declarative pipeline script shown below to understand the syntax:
pipeline {
agent any
stages {
stage ('Build')
{
steps
{
echo “You are in build stage”
}
}
stage ('Test')
{
steps
{
echo “You are in Test stage”
}
}
stage ('Deploy')
{
steps
{
echo “You are in Deploy stage”
}
}
}
}
At a basic level, any declarative pipeline includes the following sections.
Agent
Which nodes the pipeline can execute on are configured in the "agent" section. Jenkins will perform the job on any of the accessible nodes if "agent any" is specified.
Stages
As the name implies, stages allow you to define different stages representing various segments when the job is executed. In the above example, we can see the build, test and deploy stages in the pipeline.
Stage
The "stages" section must define at least one "stage" section. The operations that the pipeline will carry out will be contained in it. In the above pipeline script, each stage prints the name of the pipeline's current stage. Also, since Jenkins will show each stage on its interface, the names of the stage must be appropriate.
Step
The last required section in the pipeline script is the step. Every stage should have at least one step, usually defining the command set to execute.
Now you have a basic idea of what a sample pipeline script looks like, let’s run through a real example along with the explanation of suitable actions being performed at a different stage.
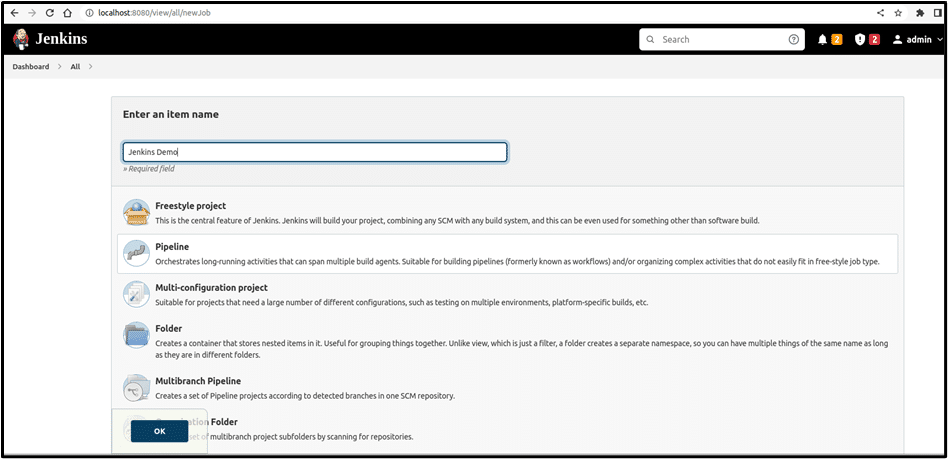
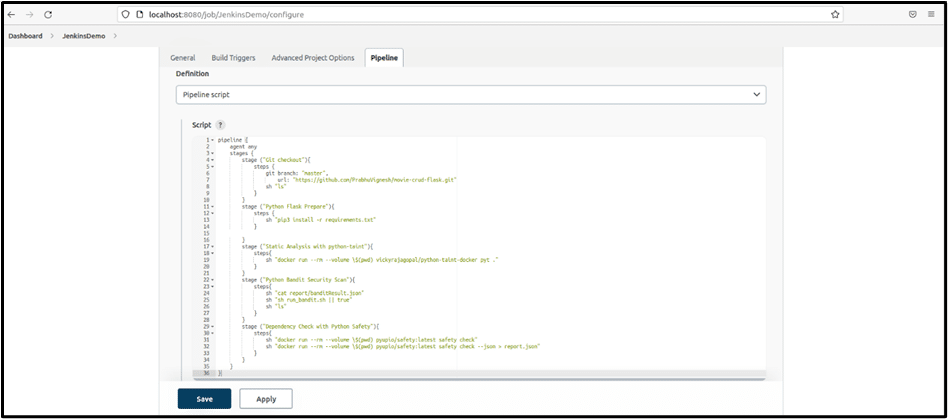
Here is the pipeline script along with the screenshot if you would like to run it in Jenkins:
pipeline {
agent any
stages {
stage ("Git checkout"){
steps {
git branch: "master",
url: "https://github.com/PrabhuVignesh/movie-crud-flask.git"
sh "ls"
}
}
stage ("Python Flask Prepare"){
steps {
sh "pip3 install -r requirements.txt"
}
}
stage ("Static Analysis with python-taint"){
steps{
sh "docker run --rm --volume \$(pwd) vickyrajagopal/python-taint-docker pyt ."
}
}
stage ("Python Bandit Security Scan"){
steps{
sh "cat report/banditResult.json"
sh "sh run_bandit.sh || true"
sh "ls"
}
}
stage ("Dependency Check with Python Safety"){
steps{
sh "docker run --rm --volume \$(pwd) pyupio/safety:latest safety check"
}
}
}
}
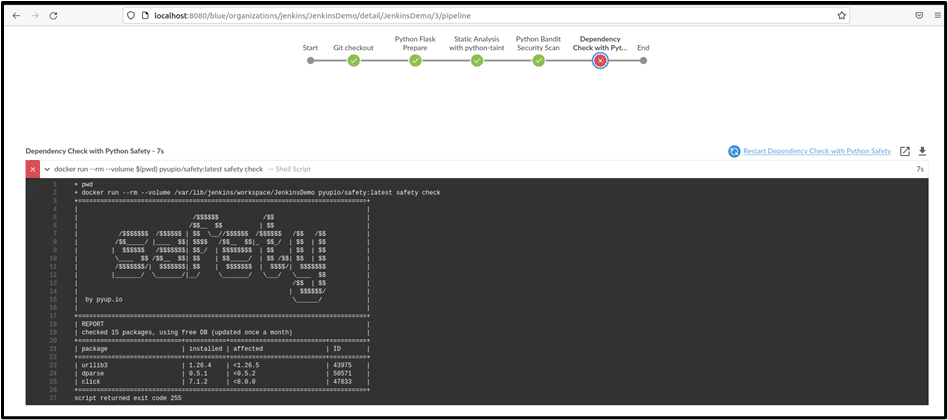
Screenshots:
The above pipeline script runs on https://github.com/PrabhuVignesh/movie-crud-flask repo and runs through various stages like Git checklist, Python Flask Prepare etc. and has a set of commands which are executed in each step of the stage.
The pipeline fails at the “Dependency Check with Python Safety” stage, as seen in the above screenshot with the findings found during the scan.

11 courses, 8+ hours of training
DevSecOps CI-CD tools
In this post, we got an insight into various CI-CD tools and ran through a sample pipeline script implementation using Jenkins as a CI-CD tool. In a future post, we will implement various tools for creating the DevSecOps pipeline.
Sources:
- Best CI-CD Tools, Simplilearn
- CI-CD Tools, Katalon
- Best CI-CD Tools, Spiceworks
- Jenkins Declarative Pipeline, Blazemeter


