Hack the Box (HTB) machines walkthrough series — Node
Today, we will be continuing with our exploration of Hack the Box (HTB) machines, as seen in previous articles. This walkthrough is of an HTB machine named Node.
HTB is an excellent platform that hosts machines belonging to multiple OSes. It also has some other challenges as well. Individuals have to solve the puzzle (simple enumeration plus pentest) in order to log into the platform and download the VPN pack to connect to the machines hosted on the HTB platform.
Note: Only write-ups of retired HTB machines are allowed. The machine in this article, named Node, is retired.

What should you learn next?
The walkthrough
Let’s start with this machine.
- Download the VPN pack for the individual user and use the guidelines to log into the HTB VPN.
- The “Node” machine IP is 10.10.10.58.
- We will adopt our usual methodology of performing penetration testing. Let’s start with enumeration in order to gain as much information as possible.
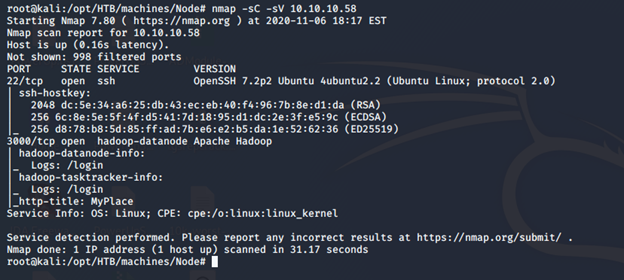
- As usual, let’s start with the Nmap scan to gather more information around the services running on this machine. [CLICK IMAGES TO ENLARGE]
nmap -sC -sV -oA Node 10.10.10.58
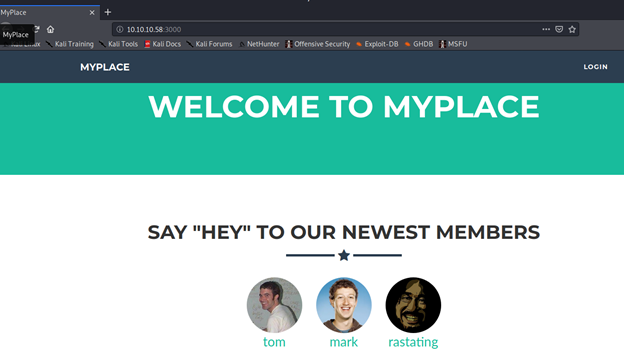
- Based on the above enumeration, we can start to look into port 3000, which shows the webpage below:
- Looking into the source code of the pages, we can see the /api/users as a path within the portal.
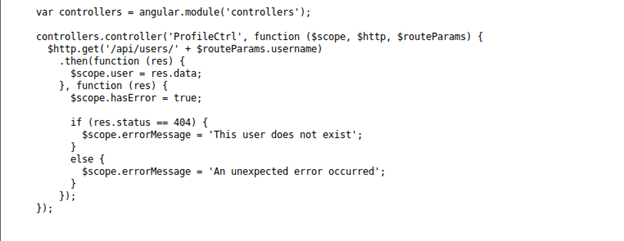
- Traversing that, we got the usernames and passwords (hashes) below:
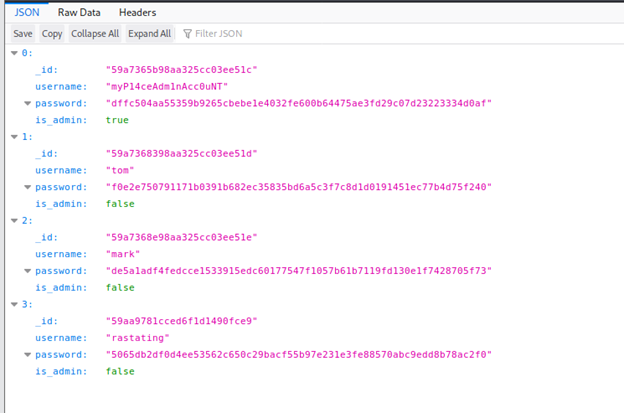
- Below is the cracked password for the myP14ceAdminAcc0unT username.

- Applying that to the login page, we got the landing page below with an option to download a backup.
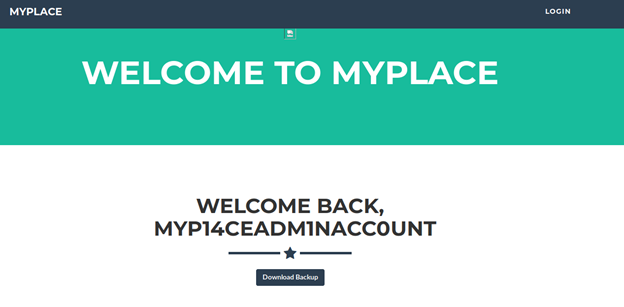
- Downloading it and base64-decoding it, it looks to be a zip file. It was protected with a password.

- Let’s use fcrackzip to crack the zip password.

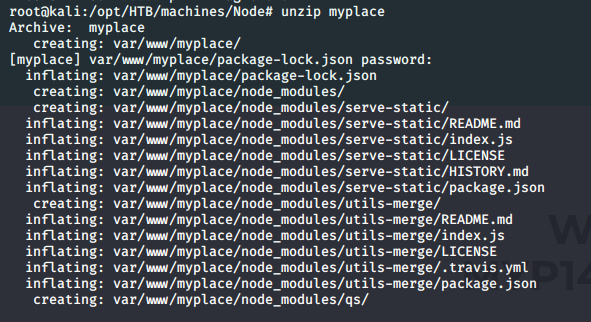
- With the recovered password, we’re unzipping the archive, as shown below:
- Looking into one of the files(app.js), we got below code that states that MongoDB is in usage. We also see the password to connect to it.
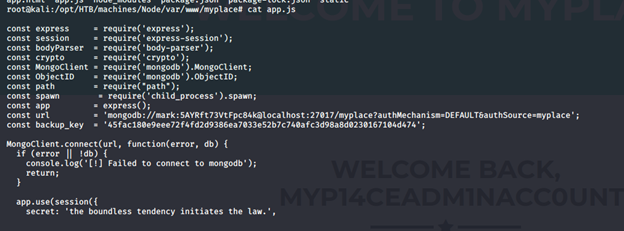
- Using the same password for user “mark” to SSH in. It worked!
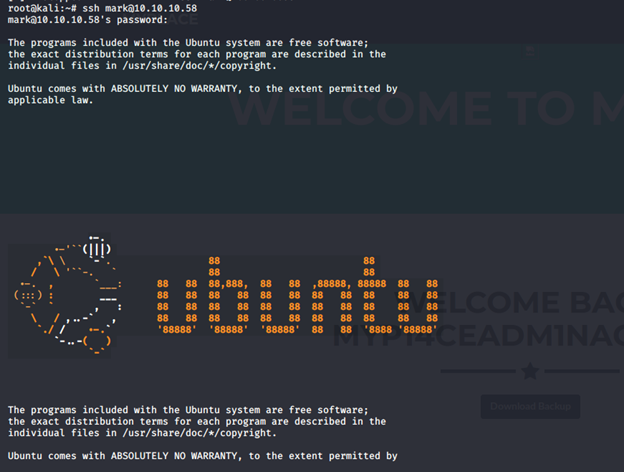
- Looking into the processes, we can see that the task names scheduler is running app.js. Looking into the code, it executes tasks directly.
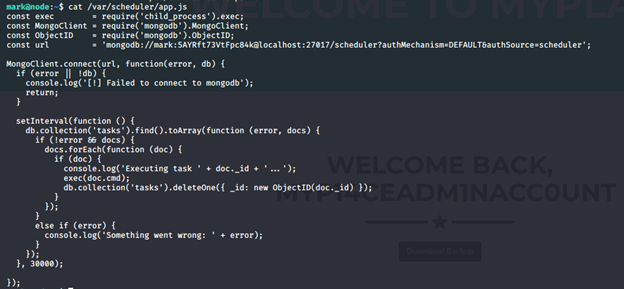
- Since we have credentials to connect to MongoDB, let’s abuse MongoDB by getting it to execute a reverse shell.
- To execute the above plan, we first created a reverse shell from msfvenom:

- Then we downloaded the reverse shell onto the target machine.

- Now, let’s connect to MongoDB using mark’s credentials and add a task to execute the reverse shell, as shown below.

- As soon as the scheduler task ran, it gave back the reverse shell with a limited shell. Using Python to gain a more stable shell:

- Now with Tom's profile, we can view the user.txt file.

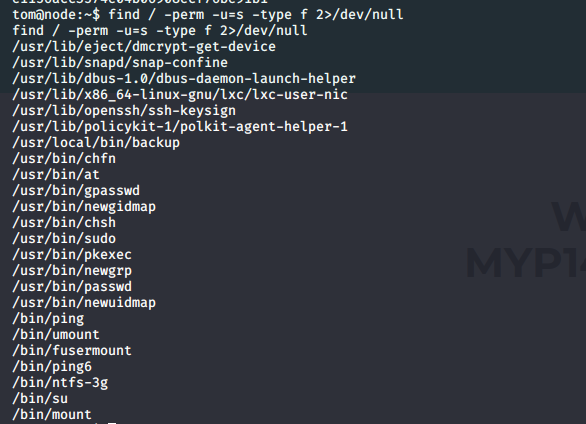
- Looking into Tom’s sudo ownership, it looks like a file backup can be executed with sudo bit set.

- Looking into the file, it has some restrictions on the root directory, requiring a backup key to execute. For backup, we can look into the initial backup file decoded; it had a backup file.

- In order to circumvent the root directory issues, we can symlink the root flag to a TMP directory.

- After the above is done, we can execute the file as shown below.

- After that, we got a similar backup file generated (similar to the one we saw earlier). We’re base64-decoding it and extracting the zip archive to retrieve the root flag.
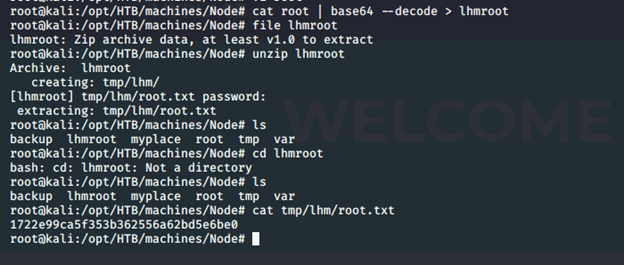
We got it!

What should you learn next?
This was an interesting box with the skills required to abuse the MongoDB and then escalate privileges from mark à tom à root.
We will continue this series with more examples of interesting HTB machines soon.

