THE PLANETS EARTH: CTF walkthrough, part 1
This is an easy-level CTF and is recommended for beginners in the field. There are two flags, including one md5 hash. Pre-requisites would be knowledge of Linux commands and the ability to run some basic pentesting tools. The torrent downloadable URL is also available for this VM; it’s been added in the reference section of this article.
Please note: I have used Oracle Virtual Box to run the downloaded machine for all of these machines. I am using Kali Linux as an attacker machine for solving this CTF. The techniques used are solely for educational purposes, and I am not responsible if the listed techniques are used against any other targets.

What should you learn next?
The steps
The summary of the steps required in solving this CTF is given below:
- Getting the target machine IP address by running the VM
- Getting open port details by using the Nmap tool
- Enumerating HTTP server
- Configuring domain in the Host file and enumerating with Dirb
- Decrypting string with the help of XOR online utility
So, as we have all the information that we need to start. Let us get started with the challenge.
The walkthrough
Step 1
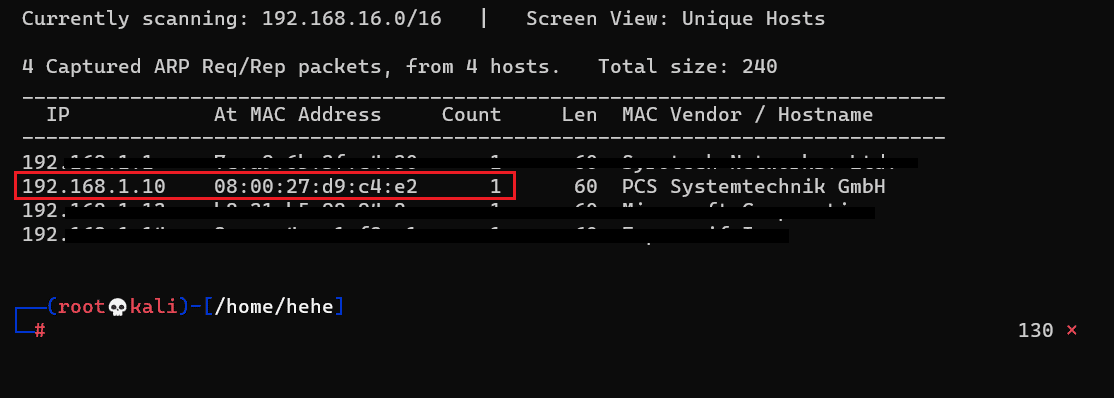
To solve the CTF challenge, we first need to identify the target machine's IP address. Since we are running the virtual machine in the same network, we can identify the target machine's IP address by running the Netdiscover command. The Netdiscover scan will list all the available devices/machines connected to our current network. The output of the command can be seen in the following screenshot. [CLICK IMAGES TO ENLARGE]
Command used: << netdiscover >>
In the above screenshot, it can be seen that we have identified the IP address of all the devices connected to our router. Due to security reasons, we have hidden the MAC address of my personal connected devices. Our target machine IP address that we will be working on throughout this challenge is 192.168.1.10 (the target machine IP address). We will be using 192.168.1.18 as the attacker’s IP address.
Note: The target machine IP address may be different in your case, as the network DHCP is assigning it.
Step 2
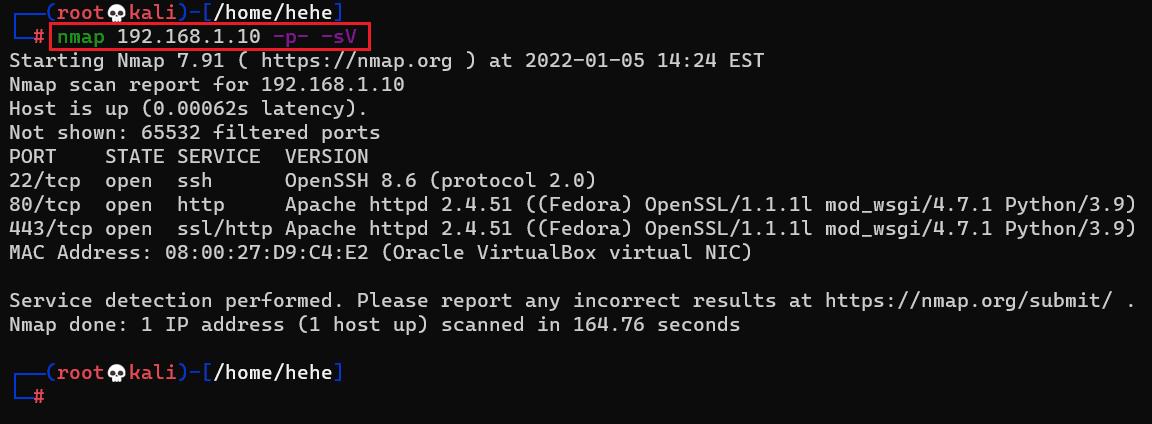
We have the target machine IP address now; the next step is to find out the open ports and services available on the machine. We will use the Nmap utility for this purpose. Nmap is one of the most popular tools to scan networks to identify available ports and services. Nmap tool is by default available on Kali Linux. The command and results can be seen below:
Command used: << nmap -p- -sV 192.168.1.10 >>
The Nmap scan identified the open ports and services, as seen in the above screenshot. We used the ‘-sV’ switch for version enumeration in the Nmap command. We also used the ‘-p-’ option for a full port scan. It tells Nmap to conduct the scan on all the 65535 ports on the target machine. By default, Nmap conducts the scan only on known 1024 ports. So, it is especially important to conduct a full port scan during the Pentest or solve the CTF for maximum results.
The Nmap output shows three ports on the target machine that have been identified as Open. Port 22, which is being used for the SSH service, is open. Ports 80 and 443 are being used for HTTP service.
Step 3
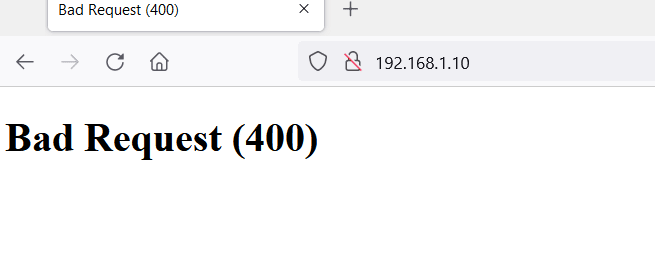
We opened the target machine IP address on the browser to see the running web application. It can be seen in the following screenshot.
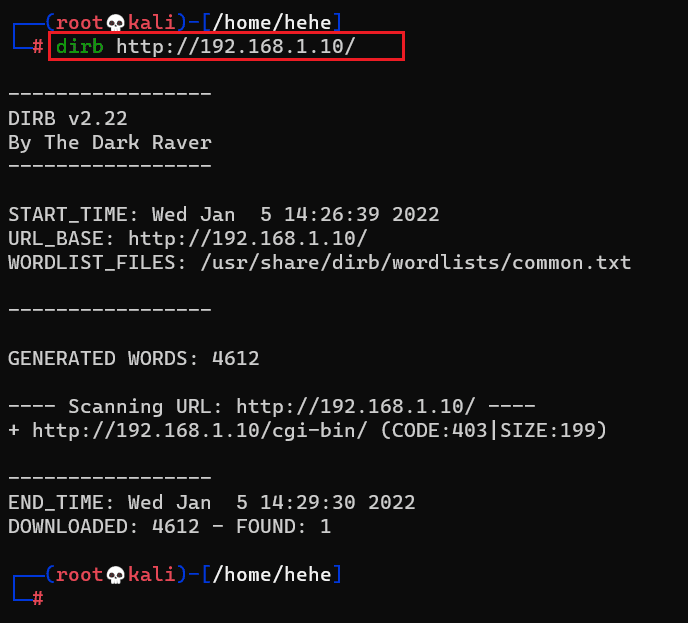
When we opened the target machine IP address into the browser, it showed a 400-error code. The 400 error means that the server could not process the request due to some client-side error. So, we decided to run a Dirb scan on the target IP address to identify any hidden paths and files. The Dirb scan command and results can be seen in the following screenshot.
Command used: << dirb http://192.168.1.10 >>
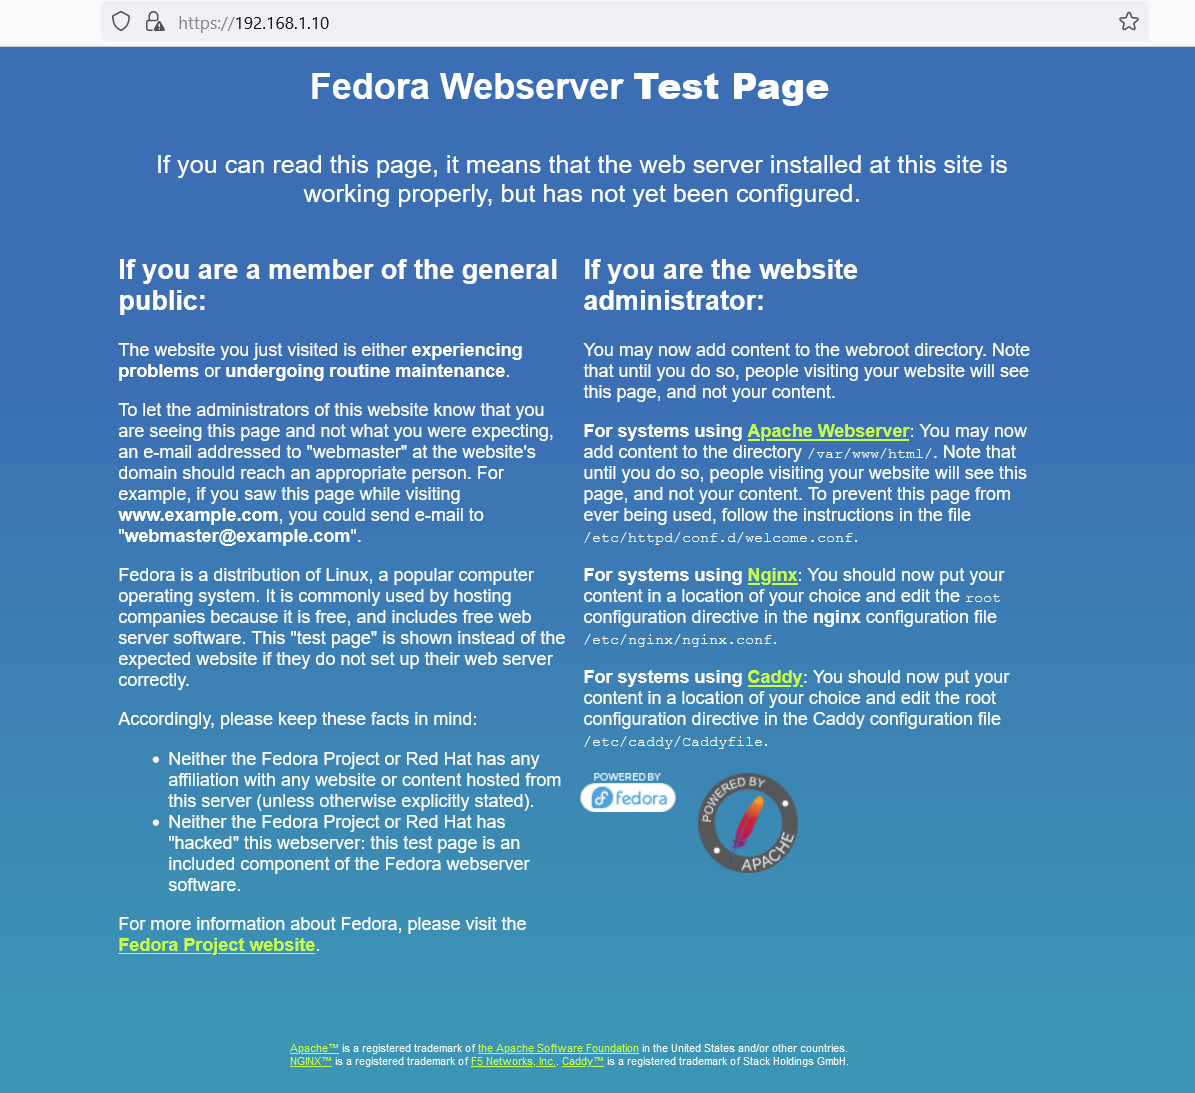
The Dirb scan could not fetch any interesting data to proceed further. As we know that the site could not open due to a client-side error, we decided to try again to access the website on the browser. We opened the target machine IP address on the browser with HTTPS. The result can be seen below.
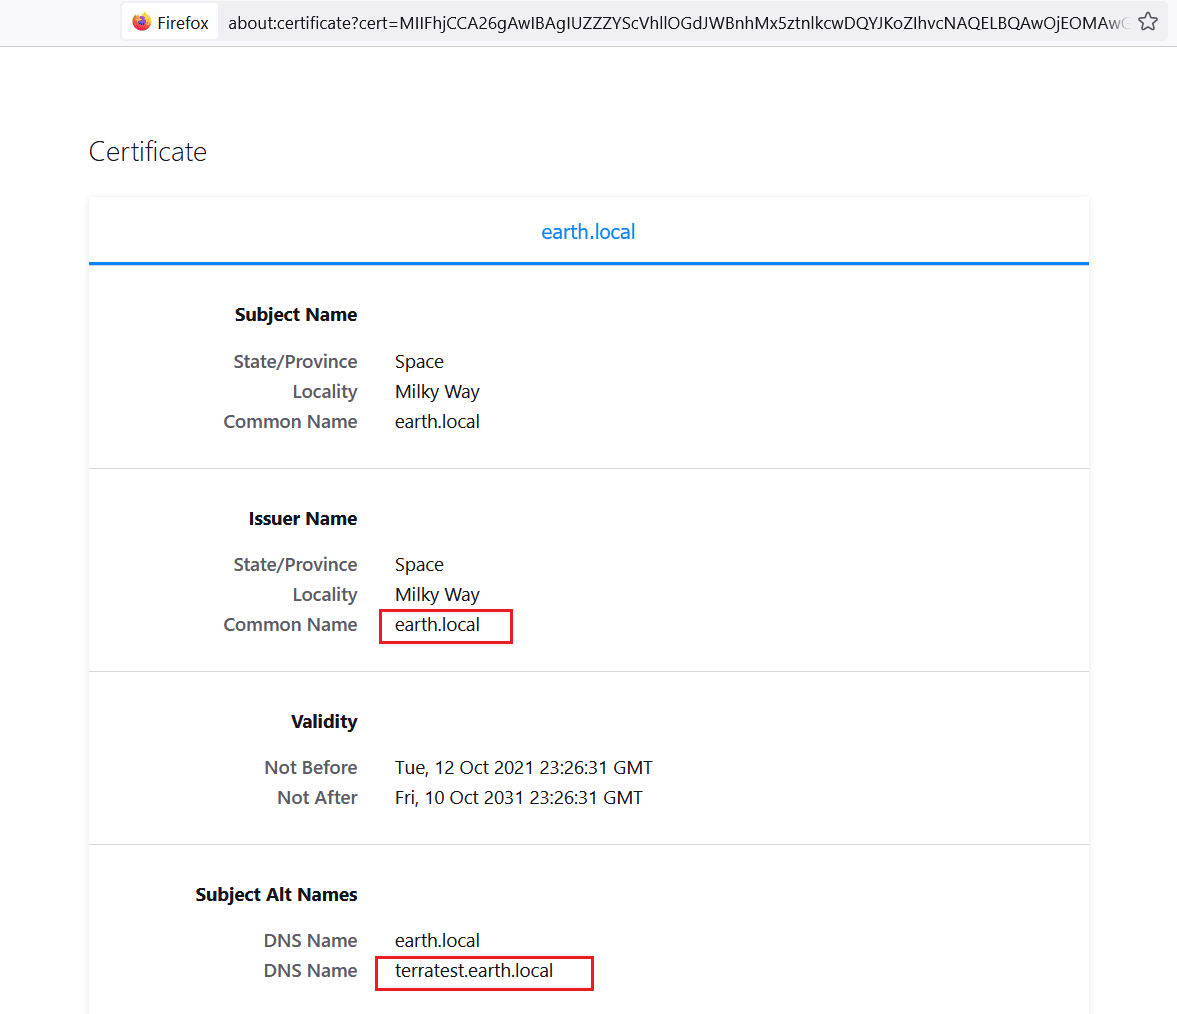
As we sent the request over a secured HTTPS connection, we received a 200 response from the server, as the server default page can be seen in the above screenshot. We checked the SSL certificate details to find more information about the SSL configuration. The SSL settings can be seen in the following screenshot.
We found the common name and DNS name for the web application running on the target machine. So, in the next step, we will make the changes in the host file to access the target machine with the domain name.
Step 4
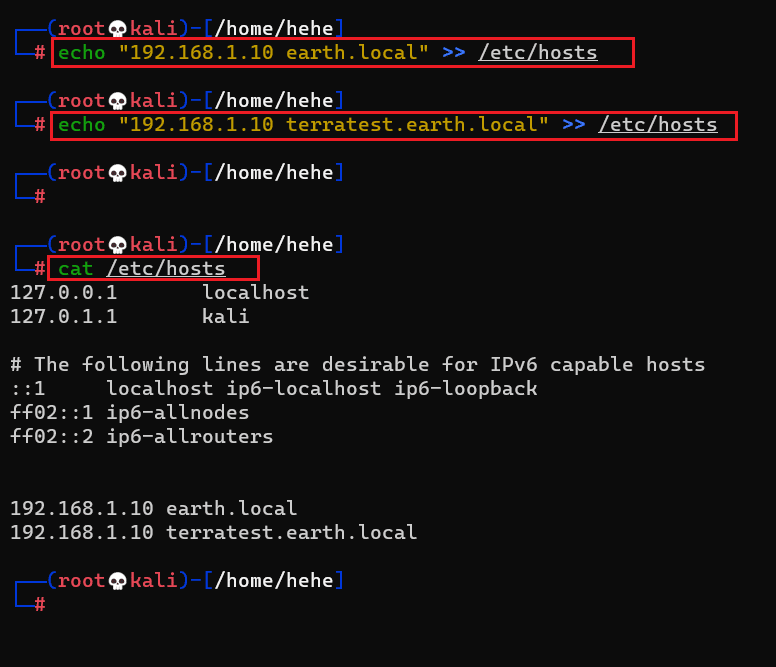
Let us make the changes on our attacker machine to access and analyze the web application. We shall add the above domains into our attacker machine's etc/hosts file. This can be seen in the following screenshot.
Command used:
- << echo “192.168.1.10 terratest.earth.local” >> /etc/hosts >>
- << echo “192.168.1.10 earth.local” >> /etc/hosts >>
- << cat /etc/hosts >>
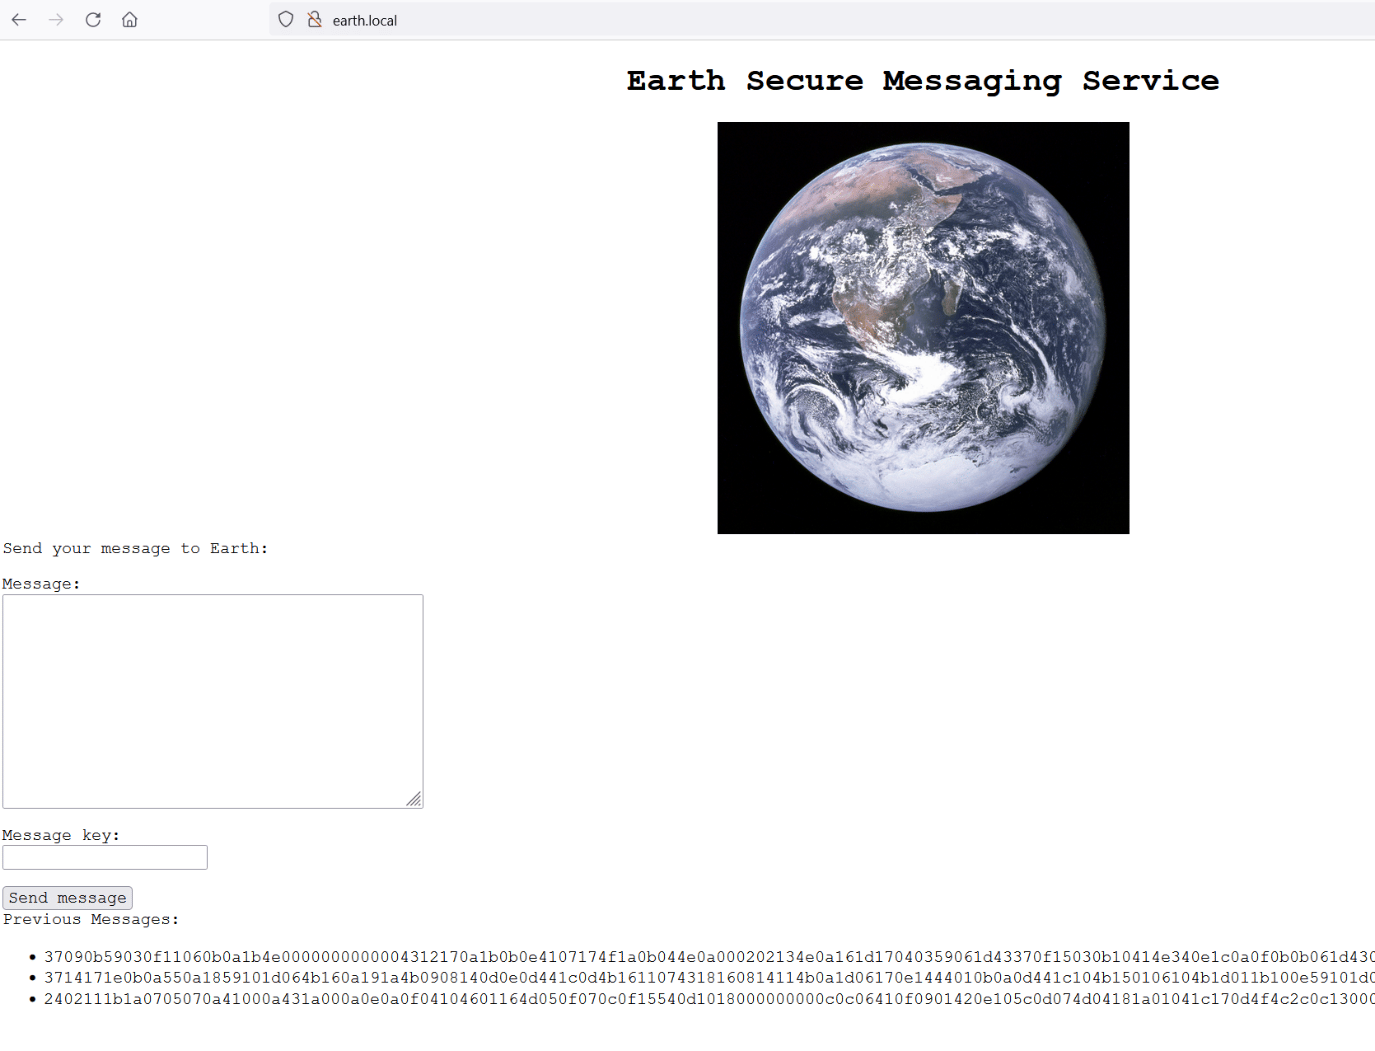
We used the echo command to add the host names corresponding to the target machine's IP address. After that, we ran the cat command to confirm whether the hosts were successfully added in the etc/hosts file. Now, we can open the web application on the target machine by using the added hosts. We opened ‘earth.local’ on the browser, which is seen below.
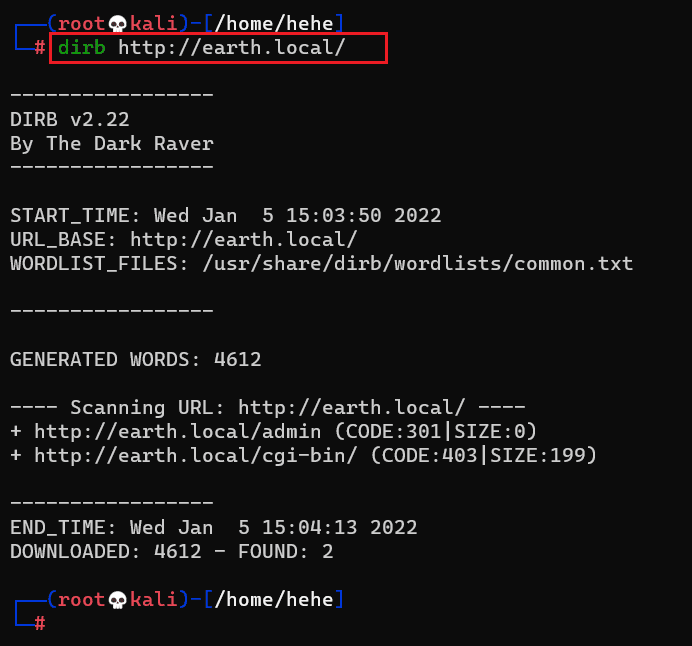
We got a messaging service web application on the browser. The application needed a message key to send the message to the ‘Earth.’ It also mentioned a few older messages in an encrypted format. We could not identify any way forward from all this information as we do not have a complete set of the required information. We decided to rerun a Dirb scan; this time, we can expect different results from the last scan as we use the correct URL for the web application. We started the Dirb scan on ‘earth.local’ URL, which can be seen below.
Command used: << dirb http://earth.local >>
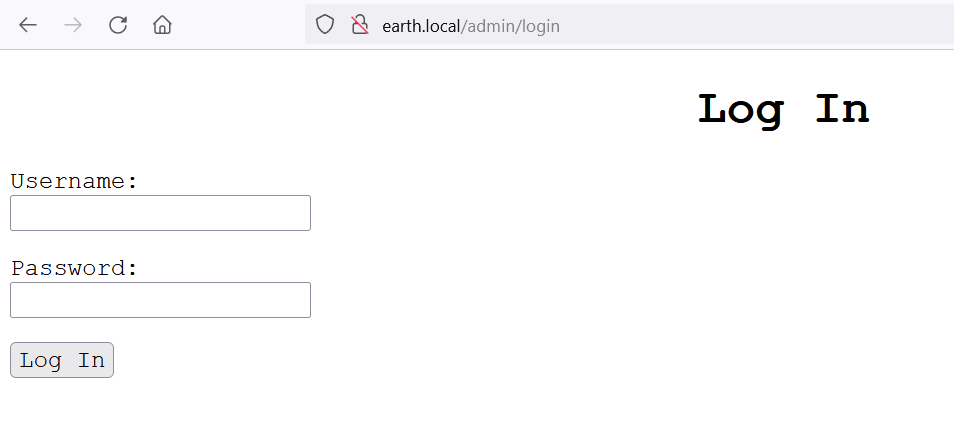
After the scan completion, we got only one useful file. The scan identified an admin URL, let us open it into the browser, which is seen below.
As we can see in the above screenshot, there is a login page that allows you to login into the admin panel of the messaging service. However, we do not have any login credentials that could work here. We tried a few commonly used credentials, but we knew that it could not be that easy. So, we left the login page here and opened the second URL into the browser.
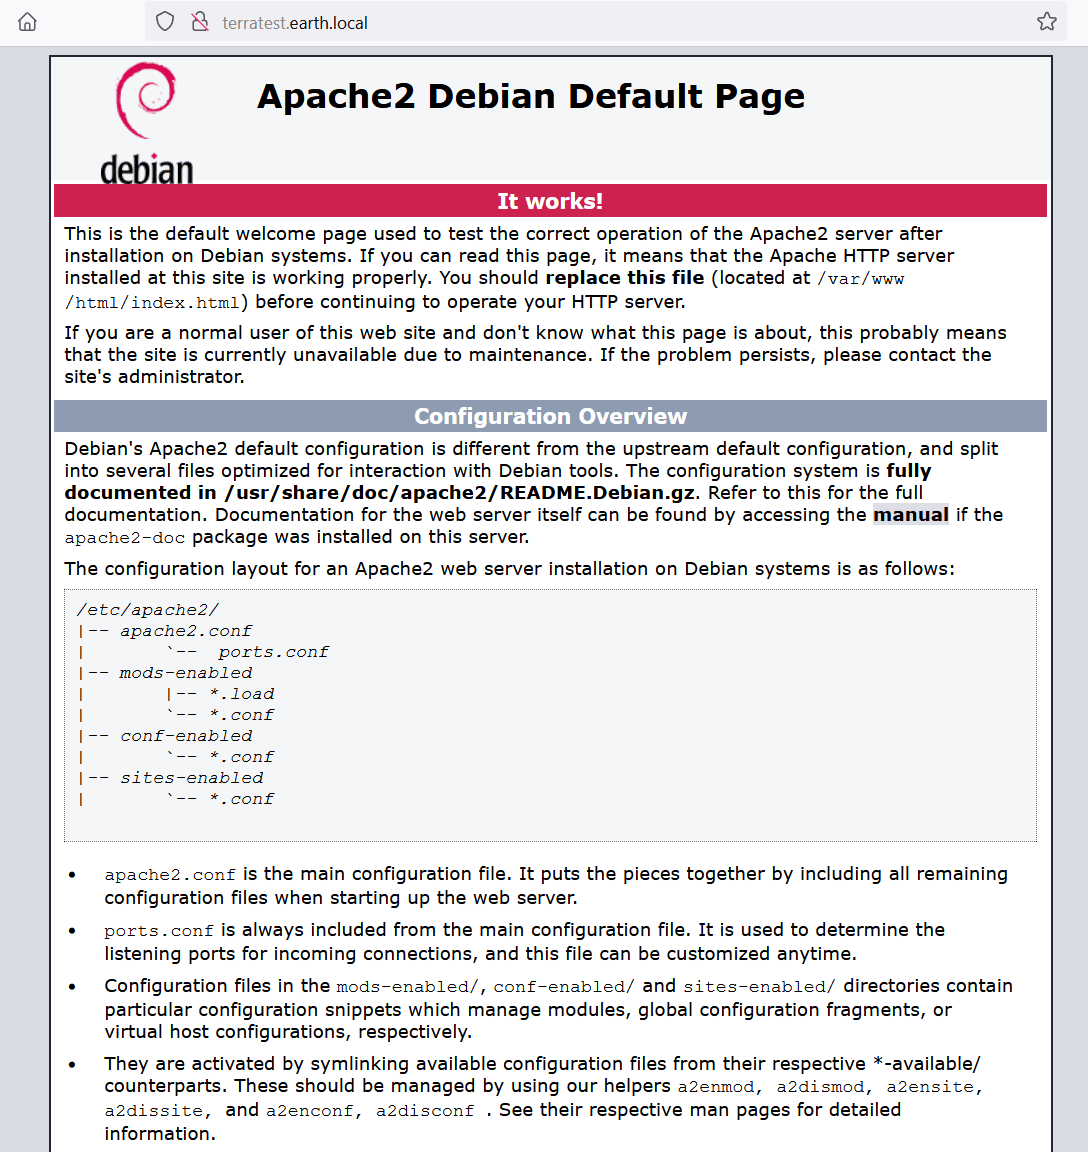
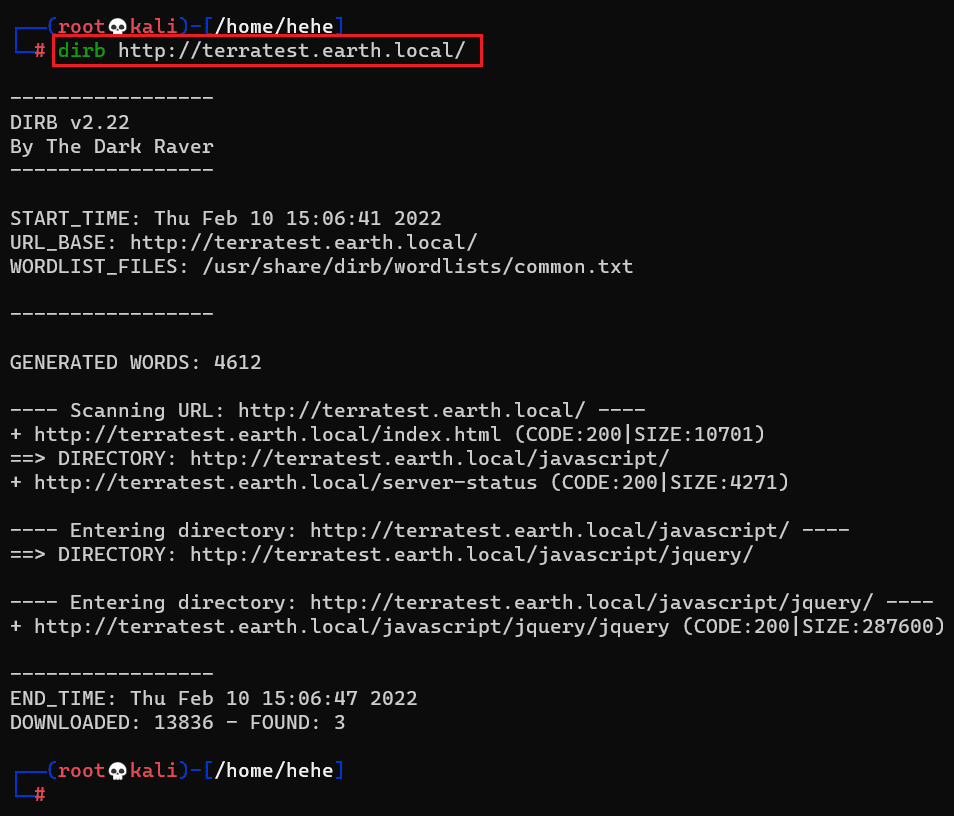
We could not get much information from the web page, so we decided to run the Dirb scan on the URL ‘terratest.earth.local’ to identify the hidden files and folders. The results of the Dirb scan can be seen in the screenshot that is given below for reference.
Command used: << dirb http://terratest.earth.local/ >>
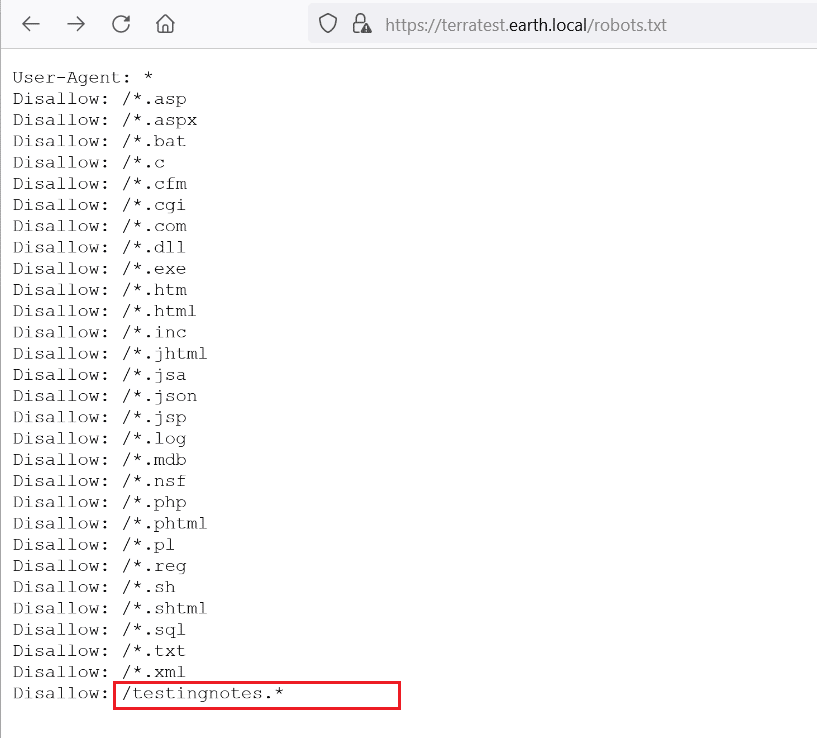
We got a few interesting files identified by the Dirb scan. We started analyzing the results by opening the identified files on the browser. Let us open the file ‘robots.txt’ into the browser.
As can be seen in the above screenshot, there are a lot of entries in the robots.txt file. There is one unusual file name that we found interesting. We opened the file on the browser to check the contents and found a hint message. This is given in the following screenshot.
The above message seems to be left during testing the application. There are a few useful points given in the message as hint. The XOR encryption algorithm is used to encrypt the password. The encryption algorithm was testing using the file names ‘testdata.txt’. We also got a valid username which is given below for reference.
Username: terra
So, let us open the identified file on the browser.
The file contains some text message which mentions nothing about encryption. However, if this file was used for testing the encryption on the target machine, this could be used as a string. So, we can use the above message to convert it into an encrypted form using the XOR encryption algorithm.
Step 5
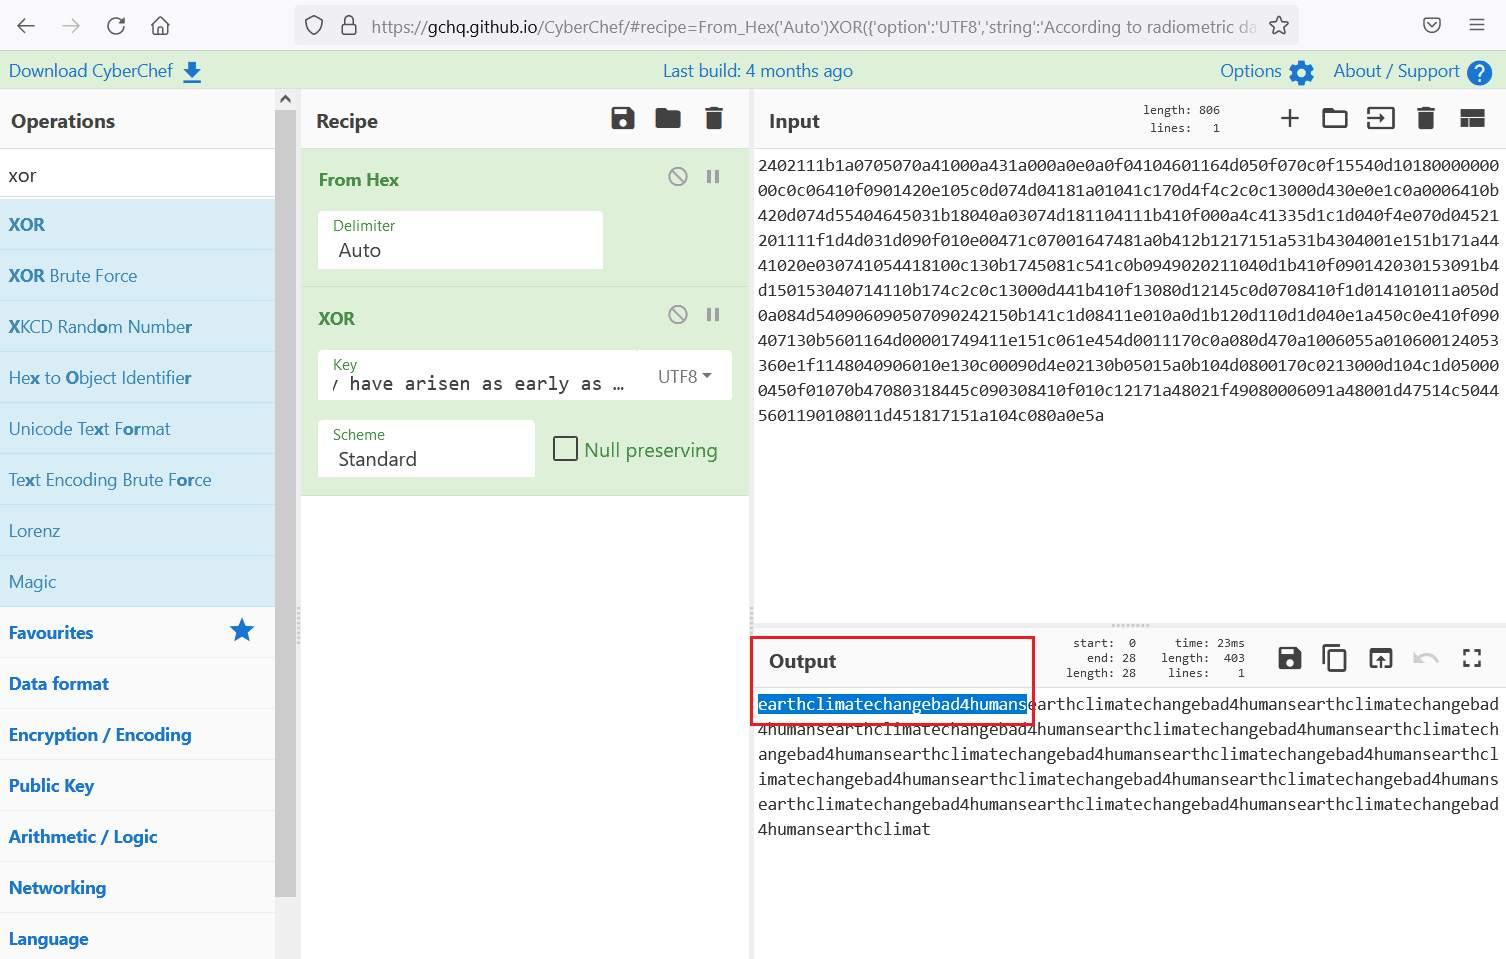
We identified an online tool that can be used for encryption. We provided the required encryption method and provided the above message as the input, which can be seen in the following screenshot.
The output shows the encrypted text. We can use this as a password to attempt to login into the admin panel identified on the ‘earth.local’ web application. The password is given below for reference-
Password: earthclimatechangebad4humans
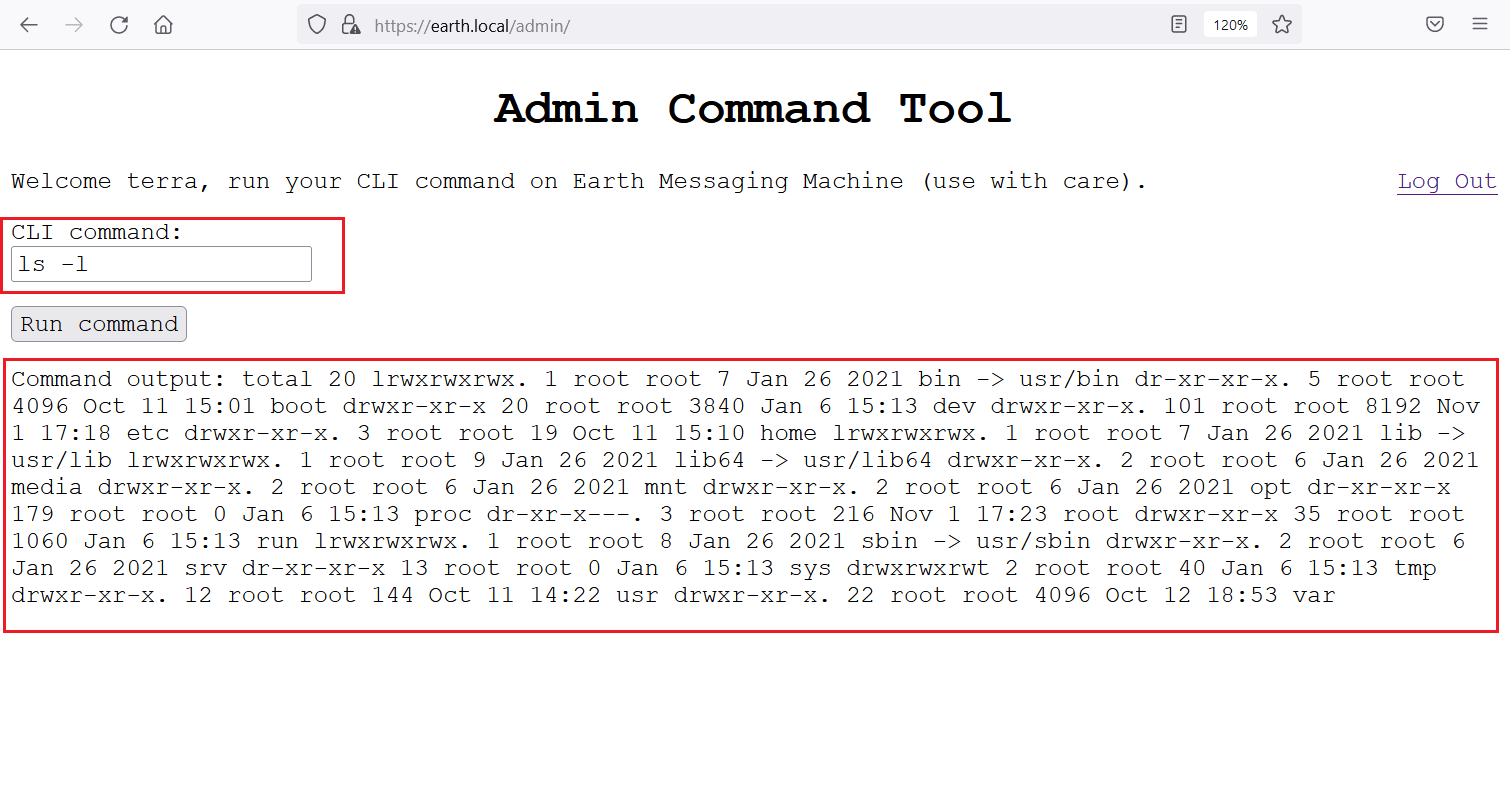
We used the above password with the username ‘terra’ on the admin panel. The credentials were successful, and we are now logged into the application's admin panel. After login, we figured that this is a command-line tool to execute commands on the ‘Earth’ machine. So, we quickly provided the ‘ls’ command in the input to test whether this was working.
As seen in the screenshot, we got the command output from the server listing all the files and folders in the current directory. This confirms that we can execute commands on the target machine.

What should you learn next?
This is getting interesting now as we can explore multiple ways to use the command-line tool to gain access to the target machine. In the next part of this CTF, we will access the target machine and complete the CTF. You shall try to proceed from here using your preferred shell or exploiting technique.

