Email forensics: Web-based clients
This article discusses how to perform forensic investigations of Web-based email clients. While many organizations use Desktop based email clients for their employees, it is not uncommon to use web based clients using browsers to access emails. We will go through the process of acquiring and analyzing emails from web based clients.
Our Goal
What is the end goal of an email investigation? This depends on what the investigation is targeting. Following are the some of the common scenarios:
- Recovering deleted emails
- Searching for specific keywords in the emails
- Reading through the emails
This article focuses on the scenarios 2 and 3.
Data acquisition from web mail client (Gmail)
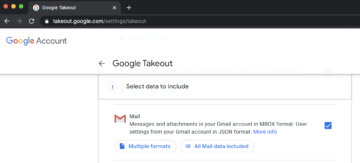
Assuming that the suspect uses Gmail, the following steps show how to perform email acquisition from the account for further analysis. Gmail offers a feature called Google Takeout, which is available at the URL: https://takeout.google.com/settings/takeout
Accessing the preceding emails shows the following.
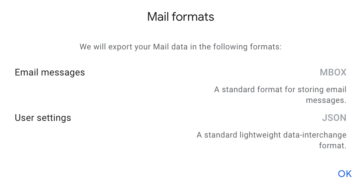
As shown in the preceding figure, select Mail to export emails. Clicking on Multiple formats, shows the Mail formats available for exporting.
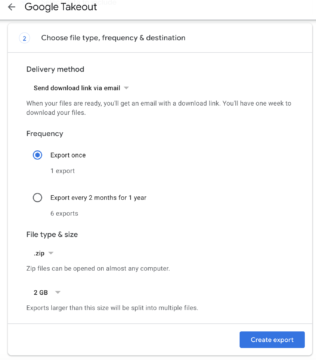
As we can notice, Email messages are available only in MBOX format. Click OK and scroll down to see how to receive exported data.
As we can notice, we are exporting once in zip format. Click Create export after choosing appropriate options as shown in the preceding figure.
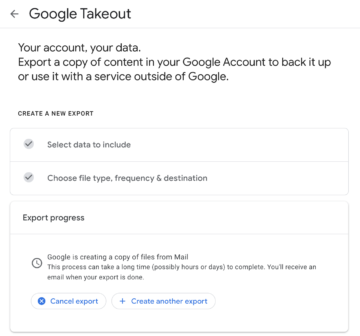
Depending on the size of the emails, it may take a few hours to days to export the data. Once done, we will receive an email with the download link. We can download the file and use it for further analysis.
Manual analysis
Let us discuss how the mbox file saved on the disk can be used to perform further analysis without directly logging into the suspects account. The exported file can be imported into an email client such as Apple Mail. Once imported, one can simply explore the emails locally using the email client without disturbing the evidence. The following steps show how to import the MBOX file into the Apple Mail client on a Mac machine.
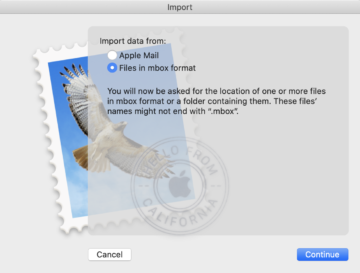
Launch Mail application and navigate to File | Import Mailboxes. We should see the following window. Choose Files in mbox format as we obtained a copy in mbox format.
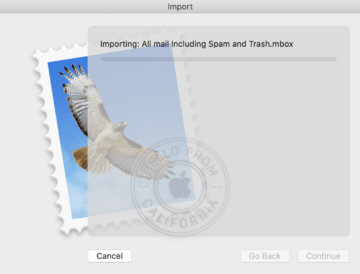
Click Continue and we should see all the emails being imported as shown below.
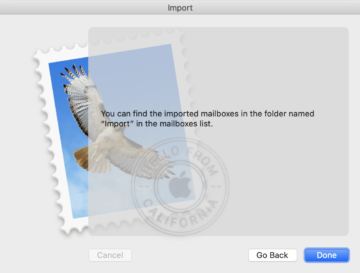
Once the import is complete, we should see the following message.
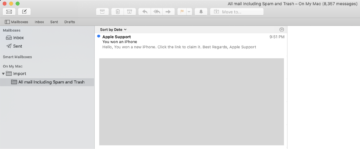
Click Done and we can now start exploring the emails in Apple Mail.
The preceding figure shows an email that claims to have come from Apple Support.
Keyword searching
Keyword searching is another commonly used approach during investigations. Mbox file format contains content in simple text format and a hex editor can be used to search for keywords. The following excerpt shows that there are several hits in the mbox file when we searched for support@apple-support.com using grep.
cat “All mail Including Spam and Trash.mbox” | grep "support@apple-support.com"
spf=neutral (google.com: 93.99.104.210 is neither permitted nor denied by best guess record for domain of applesupport@apple-support.com) smtp.mailfrom=applesupport@apple-support.com
Return-Path: <applesupport@apple-support.com>
Received-SPF: neutral (google.com: 93.99.104.210 is neither permitted nor denied by best guess record for domain of applesupport@apple-support.com) client-ip=93.99.104.210;
spf=neutral (google.com: 93.99.104.210 is neither permitted nor denied by best guess record for domain of applesupport@apple-support.com) smtp.mailfrom=applesupport@apple-support.com
From: "Apple Support" <applesupport@apple-support.com>
Errors-To: applesupport@apple-support.com
Reply-To: applesupport@apple-support.com
In addition to email acquisition and investigation using the techniques shown, there could be scenarios where an investigator is looking for deleted emails. In such cases, places like browser cache, memory can be searched as the emails accessed using webmail will not directly touch the disk.
Sources

