Forensic investigation with Redline
This lab covers how to conduct a Memory investigation of malware using Redline from FireEye.
In our lab we will analyze the Biscuit malware which is mostly used in APT's. You can find out more online by a simple google search.
1. Infecting the machine
I am assuming that you have an isolated machine. In my case, Windows XP is running with restricted access to the Internet, probably running in Virtualbox. So first, infect the malware by clicking it. After some time, it will vanish. By this time, it has done something to the machine.
Before starting with Redline, we will first perform a static analysis of the malware. We will then create an Image of the machine for memory investigation After noting some important points, I will move to the Redline
Primary analysis with String Utility:
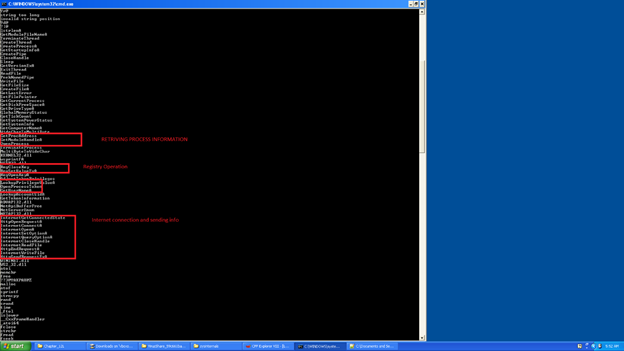
So from the above picture we have concluded that the artifacts are taking the process information and doing some registry entries; there's also some internet activity. We can conclude that it is probably sending information.
With further analysis we can see more interesting information about the artifact. See the image below.
Host,connect,Hotmail.com,index.asp,Mozilla/4.0,cmd.exe
So basically it is connecting to the host using connect API. Also, it has a specific UserAgent Mozilla/4.0 which indicates that it is checking the browser to determine whether it is Mozilla or not. If it is, it will do malicious things. It is also uploading the file, checking the system information, checking memory usage, taking system info. You can check the below images for more. We will confirm above more in Redline as well as with IDA Pro.
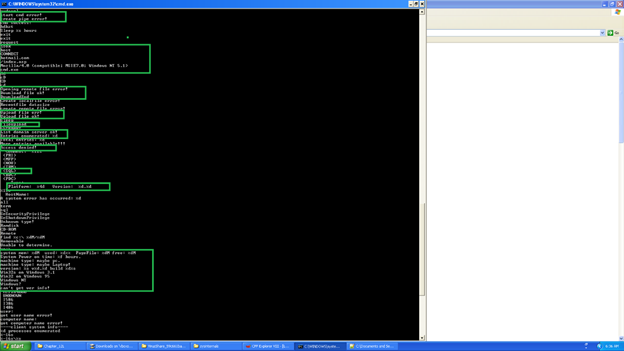
Now we will execute the malware, take the image and feed to the Redline for the further investigation.
2. Investigation using Redline collector
After Installing Redline, open it and go the collector option as below:
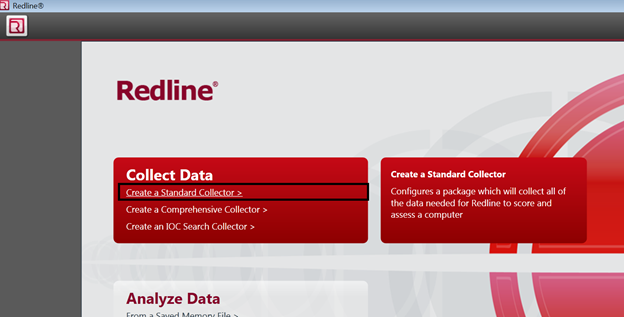
This option will create a folder which can be used for audit purpose of a victim machine in which malware(artifact) is running. This will create RunRedlineAudit.bat, which will collect necessary information that can be audited by redline. We just to create a folder on the machine where Redline is running using collector option where it will create the bat file. We have to take that batch file either by USB or shared network folder to the victim machine.
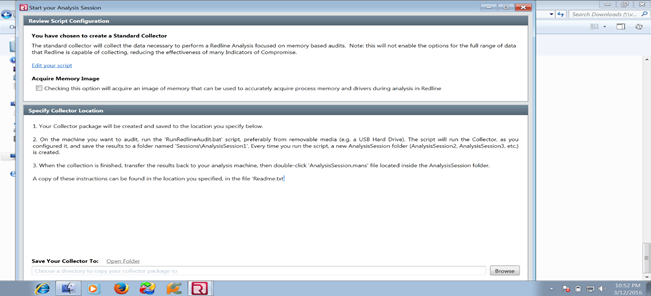
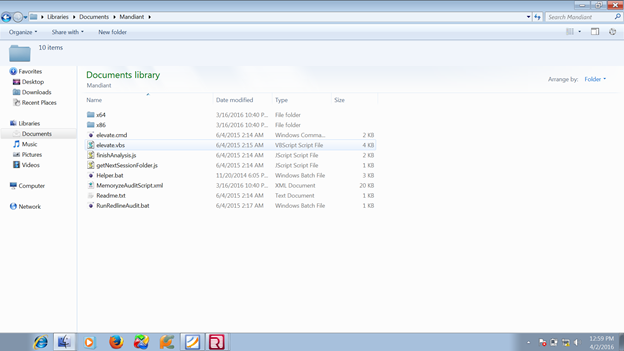
Choose a folder where you want to save the settings; after that it will create all required files in the computer for auditing. As we see, a folder named Mandiant has been created on my machine where all the necessary files are located, including the batch file. So this batch file should be run on the victim machine. Check the below image for more details:
After everything above, we will run the malware and audit the system to see what happened.
Now we will run the malware and audit the system forensically. Put the folder inside the victim machine. Run the malware and audit the program using the bat file by Redline.
It will take some time by opening a cmd where the audit program starts:
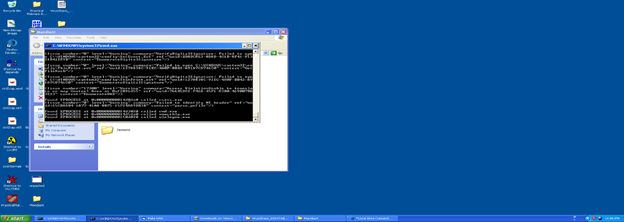
Now I will copy the session file (which was just audited by batch file in the Victim machine) to the investigation machine and we will start analyzing it.
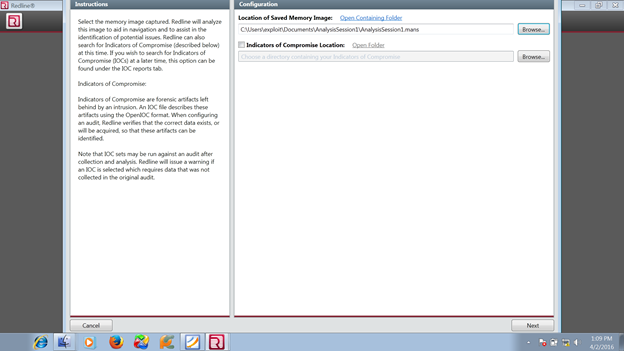
We will have a folder called Analysis1 where it creates a mandiant file (.mans extension), but we have to open with Mandiant Redline for analysis.
 We will see the below image as mine:
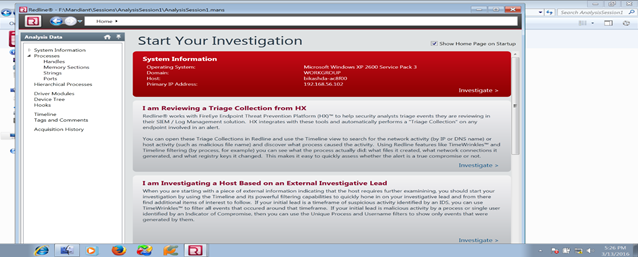
After that, we will start our full investigation as we said earlier:
But as a forensic investigator, we should go deep. For that, we have to infect the system, take the image and investigate.
Creating image of the infected machine and analyzing using Redline memory option
After infecting the machine, we will take the image of the infected machine using Memoryze tool from FireEye. We just have to run the memorize and it will create the image file for analysis. I have memorized it in my machine as shown below:

Run the memorydd.bat file which will start creating the image of the system. This file is nothing but a list of batch programs which will run the memorize application as shown below:

After 10 to 15 minutes, it will create the image.
3. Investigation using Redline memory analyzer option

As you see, there is an option where we can analyze using the memory image of an infected system for deep analysis of the memory.
After taking the image, we will analyze using Redline for further investigation. First, we will place the image into Redline: choose IOC. For IOC, you first have to download it. I have downloaded it from FireEye as one of the biggest APT1. I will share the IOC:
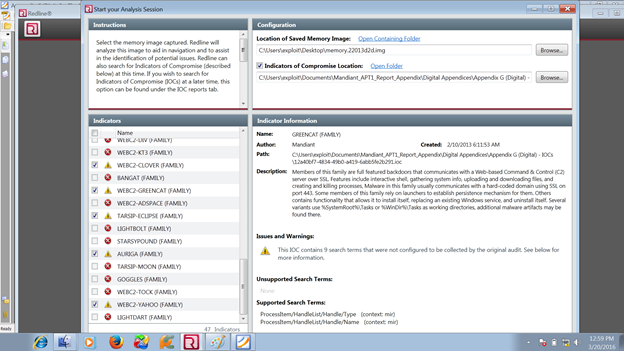
Go to the Memory image where you have put IOC. I am using Mandiant's APT! as IOC. Select Full Response Analysis to start.
The first thing that drew my attention was in the Processes filter where the svchost.exe was redlined with a malware risk index (MRI) score 93. The MRI score allows me to prioritize the investigation. The higher the score, the more likely this process is involved in a potential compromise.
If I am going to that svchost .exe by clicking IOC report button, it will show the pie chart with factors of reason:
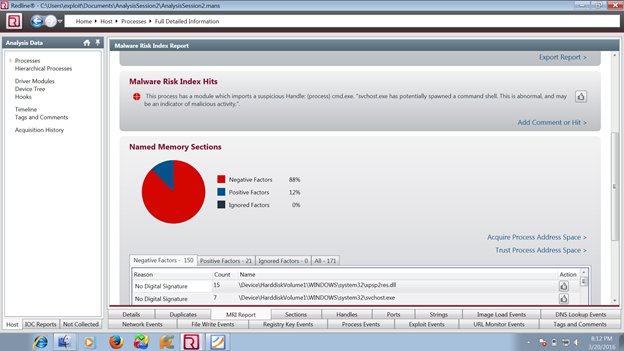
Now I am acquiring the process address space to conduct a deeper analysis, which will acquire an address from the image so that we can again investigate it.
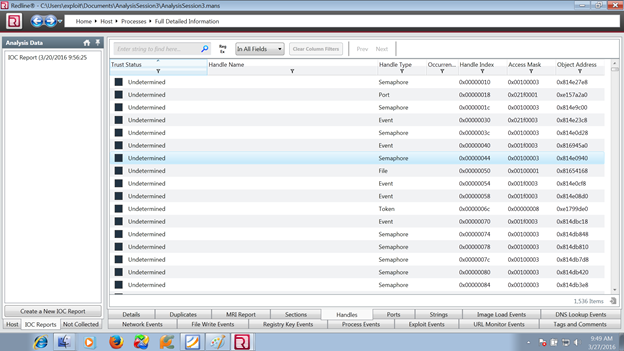
We get lots of semaphore attention. This is important as shown below - the point of investigation:
4. Verifying with IOC
In this step, we will create the IOC and compare the IOC downloaded by us. There is a button called "Create IOC" which will do this for us. We have to go there and compare the malware family.
The data was evaluated and executed in the background. It took around 30 minutes to finish. When the analysis was done, I could browse the IOC report. In the report, I could see details about the IOC, such as the definition and author. Hits associated with each file correspond to an IOC. Detailed information about each hit and the number of indicators that generated hits.
5. Verifying with volatility framework
Now we will go with deep analysis implementing Volatility Framework. Using the malfind option we can see which processes are injected for hooking with disassembly option.
Volatility –f imagename malfind
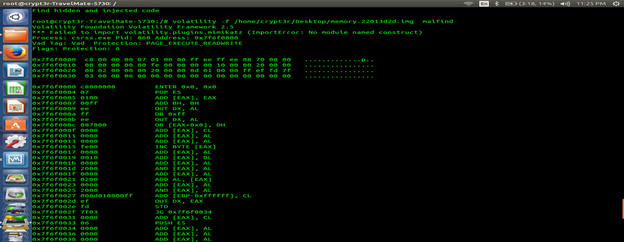
Memory sections marked as Page_Execute_ReadWrite, which allows a piece of code to run and write itself, are indicative of code injection and are easy to identify. Code injection is a very common technique for malware to maintain persistence and ensure that the malicious code continues to run.
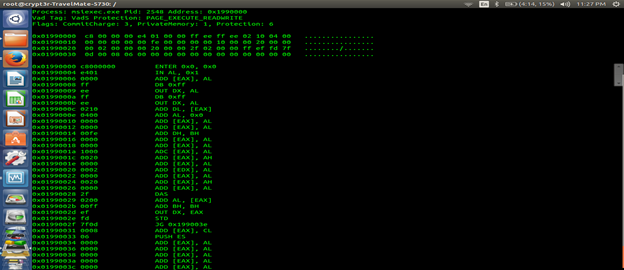
So there are two sections which are hooked or where injection happens are csrss.exe and msiexec.exe.
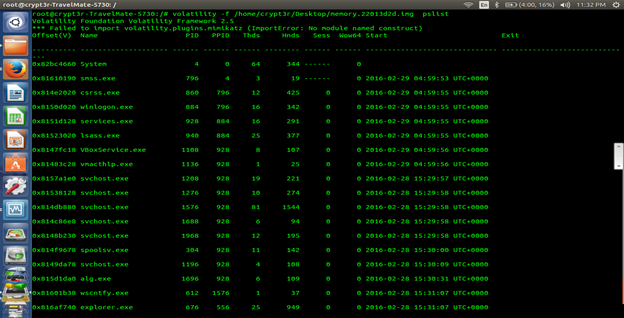
Viewing the process as shown below are
Volatility –f imagename pslist
Using psxview will show the presence of a rootkit operation which will look for the hidden process. Look for the TRUE condition which explores the hidden process:
volatility –f filename psxview
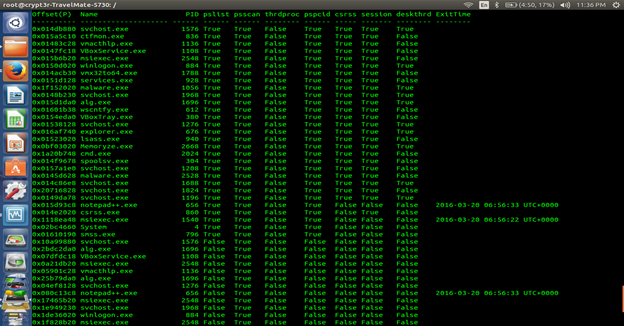
If we saw svchost.exe which have been identified by MRI rank using Redline, Volatility also confirms about that.
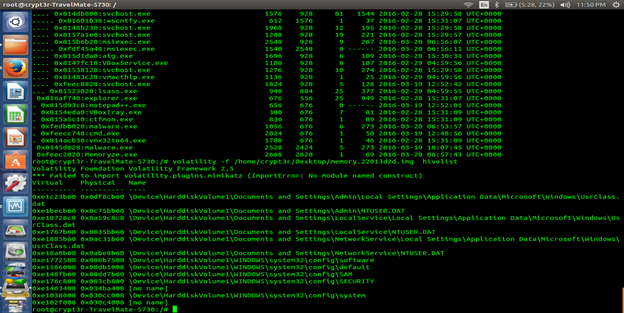
We can also see the registry operation has happened after running the Malware or Artifacts. We can also see this by Volatility hive option:
IDA PRO Analysis:
Upon analyzing malware in IDA Pro, we see the following things:
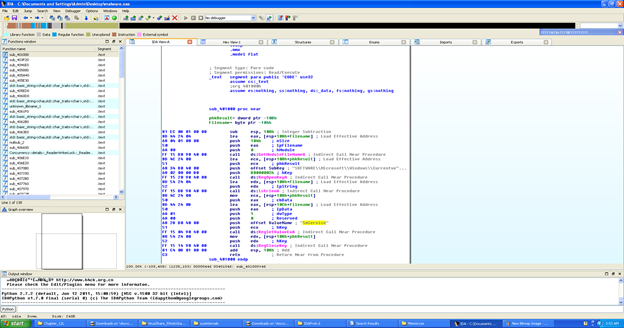
Taking the registry "SOFTWAREMicrosoftWindowsCurrentversionRun"
Set the key with 02 value and smservice process.
So the smservice process is created.
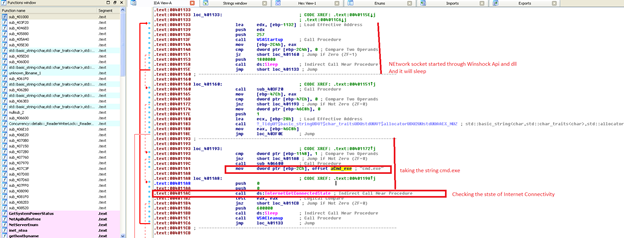
In the above image, it is also checking network connectivity, starting with the network connection.
It also tries to connect to a specific page and with specified useragent. Check the image below:
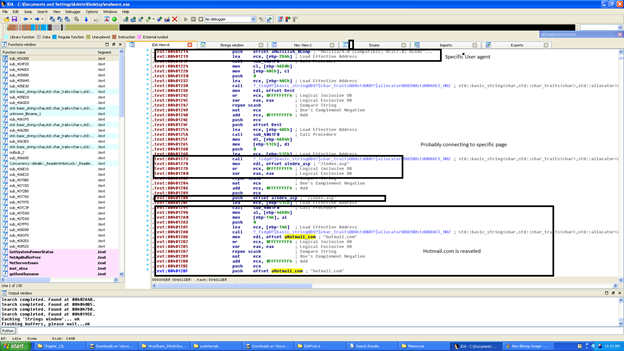
Persistence: the malware itself installs as a service and the path will be stored in registry below:
"SOFTWAREMicrosoftWindowsCurrentversionRun"
Malware creates copy of svchost.exe and cmd.exe
The above list of items indicates the maliciousness of the file. It also enumerates all the process disabling privileges and many more things. Details of reverse engineering of malware is out of scope here.
Virustotal Analysis: here
Also, the same result we can find using Online Analysis by Payload Security as below: here
Conclusion
So Mandiant's Redline is a great tool for forensic investigation as it is very useful for investigating useful info like Process Injection, Mutex, Semaphore, etc. in the system. Also, this tool classifies the threats as per the MRI score.


