A guide to installing and using the Nessus vulnerability scanner
Nessus is an automatic vulnerability scanner that can detect most known vulnerabilities, such as misconfiguration, default passwords, unpatched services, etc.
From the following picture, we can see that Nessus can be classified as a vulnerability scanner, which is in turn part of the automatic scanners.

What should you learn next?

What should you learn next?

Installing Nessus
To install Nessus we must run the following command:
# apt-get install nessus
Afterwards we need to add an administrator that will be in charge of the Nessus configuration. We can do that with the command below:
# nessus-adduser
Login : admin
Login password :
Login password (again) :
Do you want this user to be a Nessus 'admin' user ? (can upload plugins, etc...) (y/n) [n]: y
User rules
----------
Nessusd has a rules system which allows you to restrict the hosts that admin has the right to test. For instance, you may want him to be able to scan his own host only. Please see the nessus-adduser manual for the rules syntax.
Enter the rules for this user, and enter a BLANK LINE once you are done: (the user can have an empty rules set)
Login : admin
Password : ***********
This user will have 'admin' privileges within the Nessus server
Rules :
Is that ok ? (y/n) [y] y
User added
We can see that we created a new user with username admin and password admin (which cannot be seen, because it's not shown on the screen for security purposes), and we specified the user to be administrator.
If we try to update our Nessus installation to include all the latest plugins, we need to run nessus-update-plugins command, which won't succeed at this current time. This can be seen here:
# nessus-update-plugins
Fetching the newest updates from nessus.org...
Could not validate this nessus-fetch.rc file - has it been copied from another system?
The error message says that there is no nessus-fetch.rc file present. This file is automatically created when we activate our Nessus installation with an activation code. To obtain an activation code, we must visit Nessus Activation Code and choose "Using Nessus at Home", which is shown in the picture below:
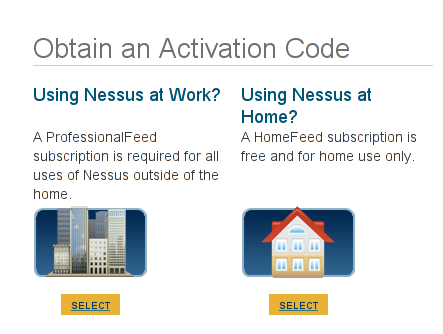
We need to click on the "Select" button and agree to the Subscription Agreement, after which we'll need to provide our first name, last name and email address. We need to enter the right information as shown in the picture below:
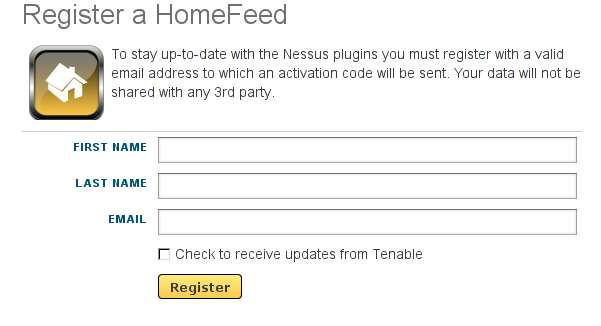
When we input the required information into the web form, we need to click on Register to register ourselves. Shortly after registration we'll receive the following email in our inbox:
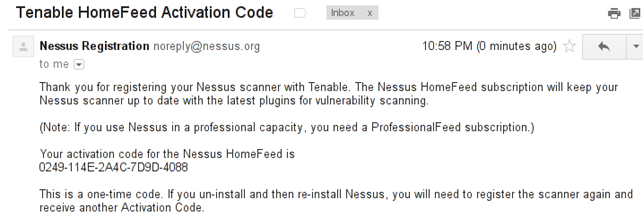
We can see that we've successfully registered and obtained an activation code, which is 0249-114E-2A4C-7D9D-4088. To register the Nessus installation and download all the latest plugins, we need to run the command below:
# nessus-fetch --register 0249-114E-2A4C-7D9D-4088
Your activation code has been registered properly - thank you.
Now fetching the newest plugin set from plugins.nessus.org...
Your Nessus installation is now up-to-date.
If auto_update is set to 'yes' in nessusd.conf, Nessus will
update the plugins by itself.
The command nessus-fetch updates all the newest plugins from the official Nessus plugins page. Now we can also run nessus-update-plugins, which should basically do the same as nessus-fetch above – download the newest plugins.
To start Nessus now all we need to do is run one of the following commands:
# /etc/init.d/nessusd start
# nessus-service -D
# /usr/sbin/nessusd -D
The nessusd init.d script essentially runs the nessusd or nessus-service command manually, so I guess the second option is best if something goes wrong, because it allows us to see what's happening when Nessus is starting.
Using Nessus
After Nessus has been started, we can choose between two ways to connect to the Nessus server. The first one is by using the Nessus web interface and the second one by using the Nessus client from the command line.
Using the Nessus web interface
Nessus web interface uses port 8834. To check whether Nessus is listening on this port, we can execute the command below:
# netstat -luntp
tcp 0 0 0.0.0.0:8834 0.0.0.0:* LISTEN 3872/nessusd
The port 8834 is in LISTENing mode, as it should be. We access the Nessus web interface by connecting to an address https://127.0.0.1:8834/ in a web browser. When opening Nessus in a web browser, it will take some time to initialize, so we'll have to wait a little bit. After initialization, the Nessus login screen will pop-up, where we can login with our admin username we previously created. The Nessus login screen will look like the picture below:
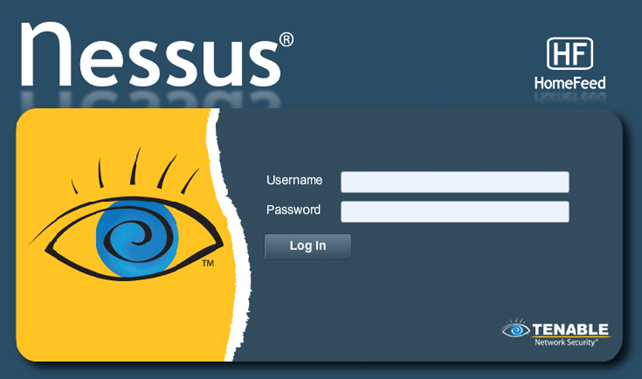
When we login with the previously configured username and password admin:admin, we'll see the Nessus default user interface, which can be seen in the picture below:

Currently nothing has been configured so far, so it's just a plain simple web interface. There are four tabs present: Reports, Scans, Policies and Users.
Using the Nessus command line
We can also communicate with Nessus using the command line tool nessus and connecting to the Nessus NTP port 1241 and not its XMLRPC port 8834. First we must verify that the correct port is opened and LISTENing for incoming connections:
# netstat -landtp
Proto Recv-Q Send-Q Local Address Foreign Address State PID/Program name
tcp 0 0 0.0.0.0:1241 0.0.0.0:* LISTEN 1555/nessus
Then we can use the nessus command line tool to connect to Nessus server and run the scan. Before actually running the scan we must define a filename, which specified the targets we would like to scan. To scan the target Google we can save the appropriate hostname into the filename results.txt:
# echo "http://www.google.com" >> results.txt
Afterwards we can run the Nessus scan from command line with the command below:
# nessus -q localhost 1241 admin admin targets.txt results.txt
We used a bunch of options with the nessus command line tool. The -q option tells Nessus to operate in batch mode. What follows is the Nessus server's hostname, port number, username and password. At the end is our existing filename targets.txt that specifies the targets we would like to scan and the filename results.txt where the results will be saved after the scan is complete.
Nessus reports
When the scan is finished, it will be added to the Reports tab where we can view the results of the scan. We can also export the report in various formats to be viewed by other people.
Nessus scans
Here we can create a new scan by defining the hostname of the target website and the policy the scan will use. This can be seen in the picture below, where the target website is http://www.google.com and the scan policy is one of the defaults ones, the "Web App Tests" policy.
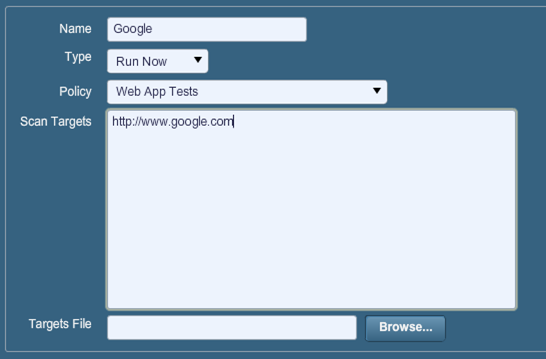
When the scan is started, it will be added to a list of all scans already done or currently pending still in the Scans tab. There are various actions we can take with each of the scans: stop it, pause it, delete it, etc.
Nessus policies
Nessus policies specify what Nessus will do when the scan is being run. Default Nessus policies are External network scan, Internal network scan, PCI-DSS audits, and Web application scan, as we can see in the picture below.

When adding a new policy a new screen will be displayed as follows:
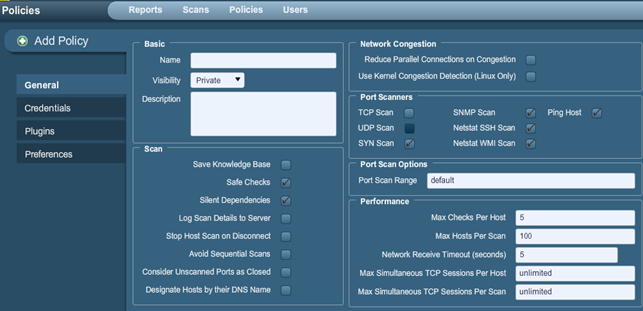
There are a couple of settings we need to know about. The Add Policy tabs are listed below.
General
The Basic field in General tab allows us to name the scan policy, define its visibility and describe the policy.
The Scan field has the following options:
- Save Knowledge Base: save the gathered information (open ports, discovered services, etc.) about the web page for later use.
- Safe Checks: enable/disable all the checks that may crash the web server.
- Silent Dependencies: do not include the list of dependencies in the report.
- Log Scan Details to Server: save the scan information into the log file.
- Stop Host Scan on Disconnect: stop scanning if the web site becomes unavailable, because of DoS, IDS, etc.
- Avoid Sequential Scans: scan the list of IPs randomly, not sequentially.
- Consider Unscanned Ports as Closed: if port is not scanned, it's considered closed.
- Designate Hosts by their DNS Name: use hostnames instead of IPs, which is better if we're working with virtual hosts.
In Network Congestion we can specify options that reduce the network load being sent to the testing web server if congestion is detected.
The Port Scanners specify the scan methods used to detect if the port is opened or not. Available options are: TCP scanner, UDP scanner, SYN scanner, SNMP scan that guesses the right SNMP name, netstat ssh scan that issues the netstat command over the SSH connection, netstat wmi scan that issues the netstat command over the WMI connection, and ping scan that pings the target machine.
Next, there are Port Scan Options where we can specify the ports the Nessus will scan. We can input the ports manually as a comma-separated list of values. Alternatively we can choose between two already defined options: default and all. The default option scans around 5000 standard ports, whereas all scan all available ports.
The Performance field uses options that do not need to be further described.
Credentials
The picture below shows the Credentials options:
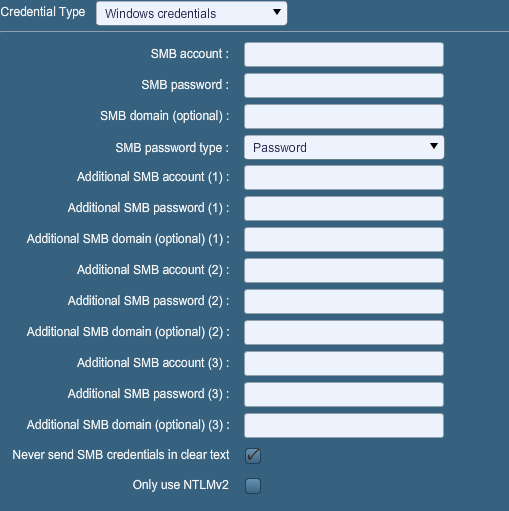
We can use credentials to login into several services automatically by Nessus, which should determine if security patches are applied and if the latest version of software is being used. In the drop-down menu we have the option to choose one of the following options: Windows credentials, SSH settings, Kerberos configuration or Cleartext protocol settings. All of these allow us to input the credentials for the following services: SMB, SSH, Kerberos, telnet, rsh and rexec.
Plugins
Allows us to choose a specific security checks to be performed against the target website. On the picture below we can see the enabled category FTP that will try to detect an anomaly in the FTP server; it will do that by checking the existing FTP server against all the defined plugins on the right that represent all currently known vulnerabilities in FTP servers:

Preferences
The Preferences tab allows us to further set our scanning options. We can input as much information as we know about the target system. This enables the Nessus scanner to perform the scans more accurately and quickly. We can specify the type of database being used, its username and password, how the report should be generated, what user agent the requests should impersonate, the client certificate to use against the target website and much more.
When we've set all the options we want, we can save the new policy and start a new scan with our new policy defined.
Nessus users
This tab is where all users applicable to login to the Nessus web interface are kept. By default, there is only user admin as can be seen by the picture below:

Become a Certified Ethical Hacker, guaranteed!
Get training from anywhere to earn your Certified Ethical Hacker (CEH) Certification — backed with an Exam Pass Guarantee.
Conclusion
We've seen the functionality the Nessus scanner provides. It's up to us whether we want to choose Nessus or some other security scanner to scan our network for vulnerabilities. But we shouldn't rely only on the network scanner itself; we should contact a penetration testing company to do an actual penetration test on our website or whole network. Only then can we feel pretty safe. Of course only after we resolved all the detected vulnerabilities.
The advantages of using Nessus are:
- Enabled default remote access.
- Simple to use even to a non-experienced user.
The disadvantages:
- Requires Flash.


