Quick and dirty BurpSuite tutorial
In this article we look at BurpSuite, a framework of tools that can be used during penetration testing. We’ll cover the latest release of BurpSuite, version 2.0, getting our hands dirty with the OWASP Juice Shop vulnerable Web application.

What should you learn next?
Overview
This article is intended for penetration testers and bug bounty hunters as well as software developers who find it important to have security as a component of their development.
BurpSuite has three editions that you can select from:
- BurpSuite Enterprise
- BurpSuite Professional
- BurpSuite Community
We’ll be making use of the BurpSuite Professional Edition v2.0 Beta for the course of this article.
It’s worth noting also is that BurpSuite Community (free) Edition comes bundled with Kali Linux. You will have to pay for the Pro Edition if you need extended functionality. With the Pro Edition, the intruder function will not be throttled, functionality of Extenders, Discover Content, CSRF PoC and Project File saving will all be supported, and your payloads and plugins will be available.
OWASP juice shop initial setup
Installing the OWASP Juice Shop can either be done from sources using node.js, on a Docker container, Vagrant, on an Amazon EC2 instance or on an Azure Container instance. The detailed steps to achieve this can be found here.
Our preferred method will be using node.js. Our setup is running on Ubuntu 18.04 LTS with node.js installed.
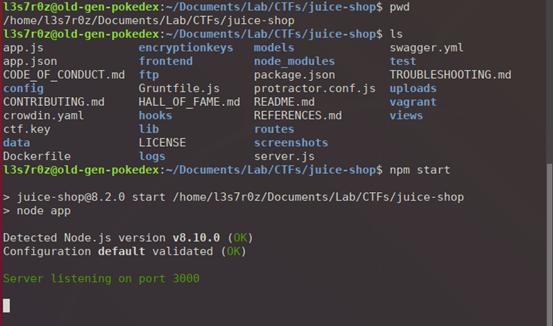
For our setup, the very first step is to run npm start within the juice-shop directory. The server will begin listening on port 3000. It is important to ensure that no server is already listening there before you begin. See below:
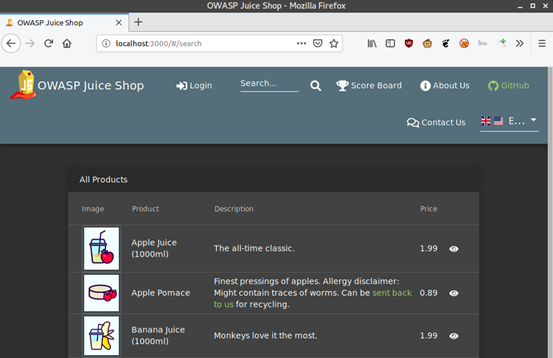
When you load http://localhost:3000 on your browser, you will see the default juice-shop page. The idea is basically to have an “online” shop where shoppers can shop for different types of juice. You basically shop and add your products to cart and check out.
On loading the application, you will see different juices going for different prices and their descriptions. See below:
We will be attacking this application after completing our BurpSuite setup.
Firefox browser initial setup
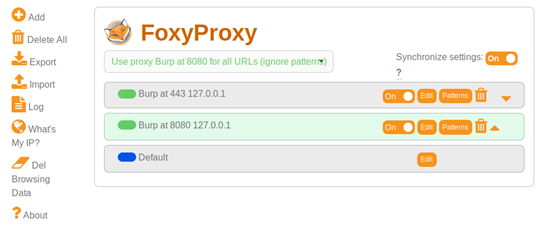
In order to capture requests and send them over to Burp, we need to set up the FoxyProxy add-on. We have set up ours to forward traffic to 127.0.0.1 and at port 8080. We shall later configure Burp’s proxy also to 127.0.0.1 at 8080 in order to accept traffic from Firefox.
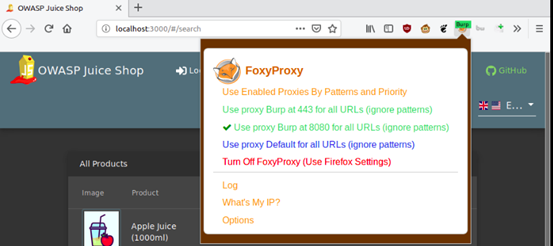
After this setup, we enable the proxy on FoxyProxy as shown below:
Initial BurpSuite setup and configuration
Here we will set up BurpSuite in preparation for our attacks on the juice-shop.
Creating a project file
Creating a BurpSuite project file is a feature that is only supported in the Pro Edition, an important thing to remember. Follow the following steps:
- On your drive, create a BurpProjectFiles directory
- Launch Burp, click on “New project on disk,” click on the “Choose file” button and navigate the directory created above. While there, create a project file called Juice-Shop-Non-Admin.burp
Click “Next” and “Use Burp defaults,” then select “Start Burp.”
BurpSuite launches and you are greeted with the default panel. Everything we do will now be saved in the Juice-Shop-Non-Admin.burp file.
Setting up the Proxy, Spider and Scanner options
To set the Proxy:
- Click on the Proxy tab and ensure “Intercept is off” by toggling that button
- Click on the “Options” tab. Here, you want to ensure the proxy is checked as “running” and the interface is pointing to 127.0.0.1:8080
- Scroll down to “Intercept Server Responses” and check-to-enable the box that says “Intercept responses based on the following rules”
- Scroll further down to “Response Modification” and check-to-enable the option “Unhide hidden form fields”
To set the Spider and the Scanner options, follow the steps below:
- Click on the “Target” tab then add a target URL for scanning. Burp gives you an option to even directly paste the URL. As can be seen below, Burp then asks you whether or not to log out-of-scope items. Answer “Yes” to maintain a smaller Burp save file
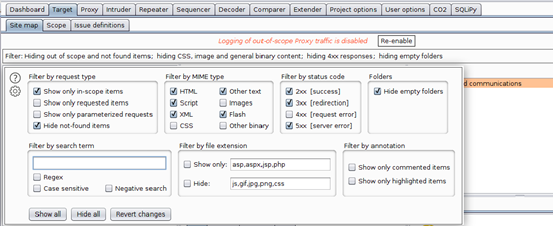
- The target has now been added to scope. You can further restrict items shown on the sitemap by clicking on the filter bar and enabling the checkbox that says “Show only in-scope items.” See below:
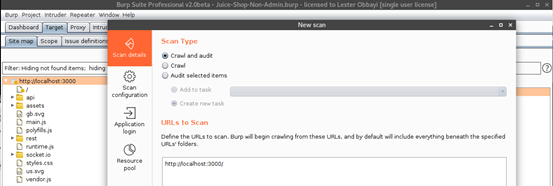
- Now it’s time to configure our Scanner or Spider Options. Right click on the target within the sitemap and select “Scan.” Burp will present the screen below, requiring that you configure appropriate “Scan details.” From this screen, you are able to determine whether you want to Crawl (Spider) or Audit (Scan) your target for resources and vulnerabilities. As shown below, we selected both a crawl and an audit of the resources discovered within the URL:
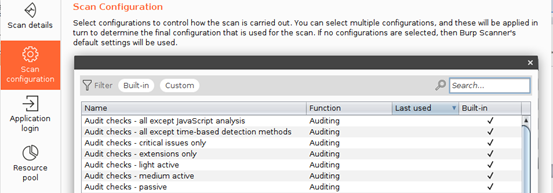
- We then configure our “Scan configuration,” allowing us to select a proper template for either an audit or scan or both

These template options allow you to determine the intensity and duration of your scan or audit.
If you don’t want to go with the templates provided, you can also select a “New” configuration where you can manually specify drilled-down options — for instance, determining Crawl Limits and Crawl Optimization settings:
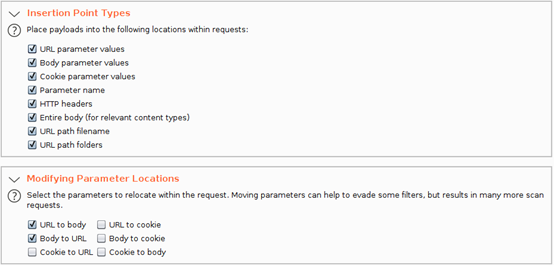
If you decide to manually configure your options, remember to have “URL path filename” and “URL path folders” since we will be working with REST calls. Also, check “URL to body” and “Body to URL” so that we can be able to check whether any POST requests can be sent as GET requests. See below:
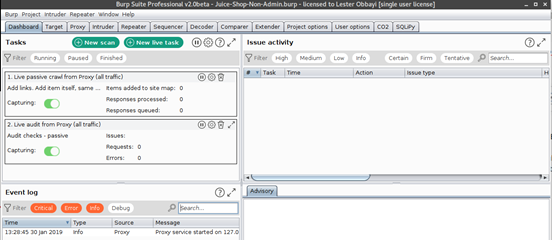
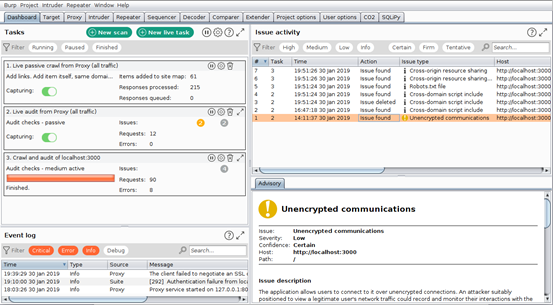
Once you launch your scan, Burp 2.0 includes a new dashboard which you can use to visualize and manage your scans as they run. Using the dashboard, you can now pause and resume individual scans, see descriptions of issues found in real-time and even monitor the event log of the different running scans.

What should you learn next?
See the dashboard in action below:
Attacking the OWASP juice shop lab
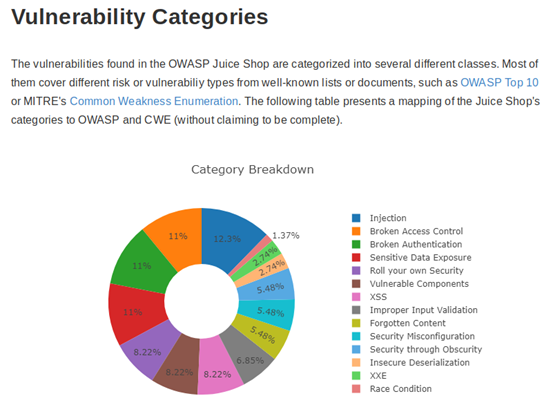
Juice Shop is intended to be a vulnerable Web application. It has multiple classes of vulnerabilities and a scoreboard where challenge scores are recorded to help you keep track of what you have solved. These are all classified according to their level of difficulty. The chart below is from the developer, showing the vulnerability categories tested in the application:
Let’s now discuss BurpSuite’s features: the Intruder, Repeater and Decoder.
Burp Intruder
Burp Intruder is used to automate repetitive tasks such as checking for SQLi. To check for SQLi, we shall click on the Login button on the top bar on our juice shop. On our login form, we input dummy credentials and proceed to examine the HTTP history. We decided to enter admin@gmail.com as the username and pass123 as the password.
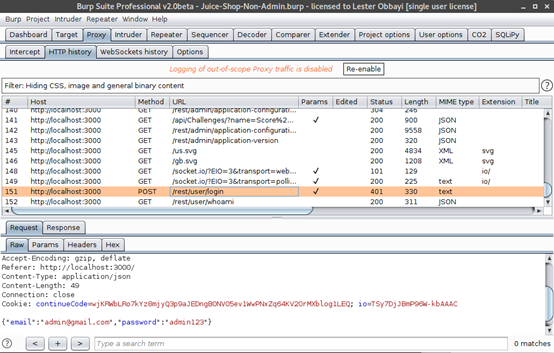
The screenshot below shows the request that was sent to the server.
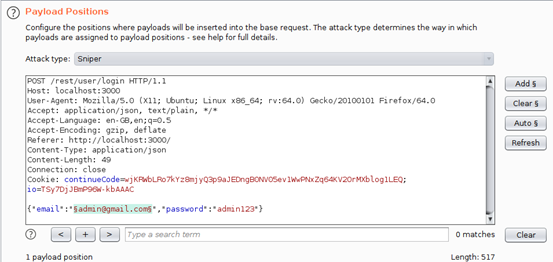
Notice at the bottom we have the credentials we fed into the application. We right-click on the request at the bottom and “Send to intruder.” Now navigate to the “Intruder” tab and “Positions.” Here you will see the email and password highlighted. This means that Burp Intruder is trying to identify the injection point for the SQLi payloads.
Hit “Clear” on the right-hand side, then double-click on the email address (admin@gmail.com) and hit “Add.” It should now be highlighted and padded at the beginning and end as shown:
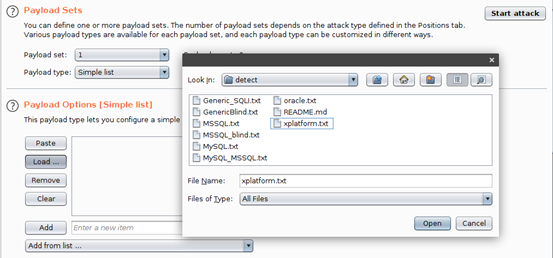
We shall then navigate to the “Payloads” tab and hit “Load.” What we are doing now is loading a payload list for use in detecting for SQLi. For this demonstration, we are using the payload list xplatform.txt from FuzzDB.
Finally, scroll down and un-check the option “URL-encode these characters,” since these characters are actually used during checks for SQLi. See below.
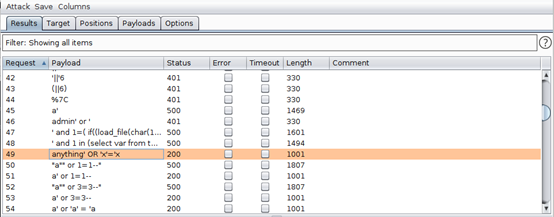
Once you are done with all these configurations, hit “Start attack.” Once the attack has run, check the results and monitor the response status codes.
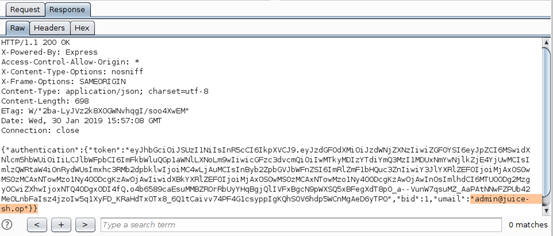
As can be seen above, the payloads anything’ OR ‘x’=x and a’ or 1=1-- are among those that returned a status code of 200. This means the request was accepted, and we logged in as the admin. Examining the response shows an authentication token and admin email address, as highlighted below.
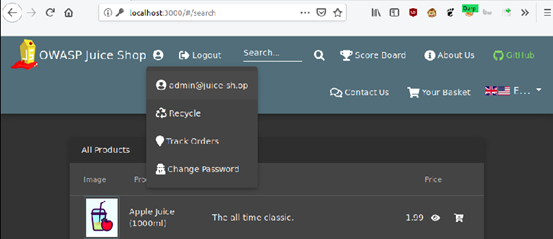
This means that if we use the payloads that returned the status code 200, we stand a chance of being able to log in as an admin. Sure enough, using username a’ or 1=1-- and any password, we are able to log in:
Burp Repeater
Burp Repeater allows you to resend requests in order to monitor the behavior of the application based on specific requests. A good way to see this in action is by testing for the same SQLi above but using different payloads.
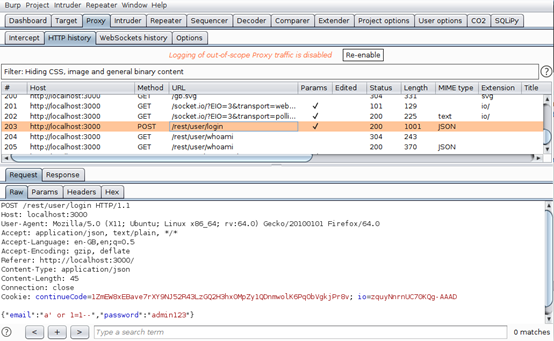
- From the “HTTP history” tab, find the POST request that was submitted during our successful login (or any login for that matter). Ours is shown below:
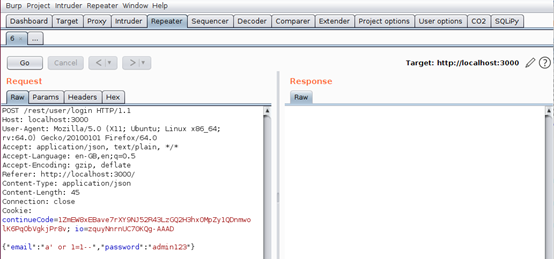
- Right-click on the request and “Send to Repeater.” Your “Repeater” tab should resemble ours as shown below:
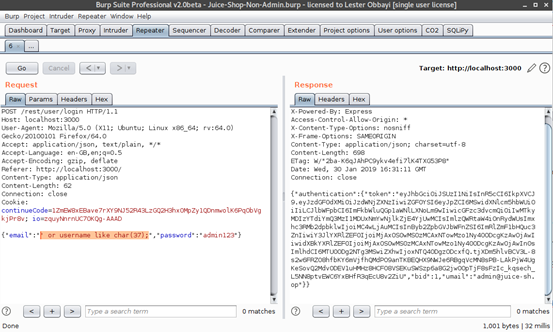
- We can now attempt different payloads, replacing a' or 1=1-- with each of the following. All seemed to return a status code of 200:
anything’ OR ‘x’=’x
a’ OR 3=3--
a’ OR ‘a’=a’--
‘ or 1 --’
‘ or 1/*
‘ or 1=1 /*
‘ or username like char(37);
Sure enough, all the payloads we used above were accepted by the server, and we are logged in as admin.
Burp Decoder
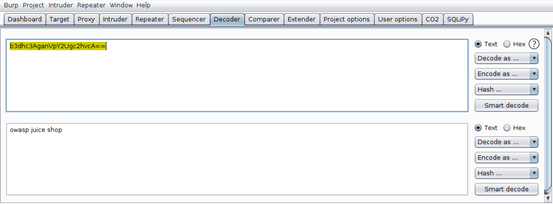
Burp Decoder is a very simple yet useful functionality that allow us to encode and decode URLs, ASCII, Octal, Binary, Hex, HTML and even hashes such as Base64.
For instance, the hash b3dhc3AganVpY2Ugc2hvcA== can be decoded using Burp Decoder. It decodes to owasp juice shop. See below:
This can really come in handy, especially during a pentest or bounty-hunting exercise where time is of the essence.

What should you learn next?
Conclusion
This has been a hands-on article, discussing BurpSuite features while experimenting with the OWASP Juice Shop vulnerable Web application. This article has covered the common basic features of Burp but has in no way exhausted them all. Burp is capable of really advanced features, thanks to its Extender feature that allows third-party scripts to be written and loaded into Burp for extended functionality such as automating attacks. Nevertheless, the features discussed make Burp one of the most common tools pentesters.
Sources
- OWASP Juice Shop Project, OWASP
- Pwning OWASP Juice Shop, Björn Kimminich
- juice-shop, GitHub

