WPScanner: Automated Security Testing Tool for WordPress
WordPress is the popular content management system and blogging platform being used by millions of websites. This is the reason hackers are targeting WordPress. Although the WordPress community is very active and they keep working to make it secure in the best possible ways, most of the time third party themes and plugins make WordPress vulnerable. Sometimes zero day vulnerabilities hit WordPress, and as a result, we see mass hacking attacks on WordPress. This is the reason WordPress users should always try to keep their WordPress website safe from hackers.
According to the reports published a few months back, more than 70% of WordPress websites are vulnerable to various attacks. The number of hacked WordPress websites is growing every year.

What should you learn next?
Generally, people think "why would someone hack my website?" and "I have nothing to lose." But this is not true. If you have a less important website, hackers are not interested in your data. But they are interested in your server, and they can use it to send spam emails. If you have important data, then they will hack into your website and steal it.
Most of the big companies hire security analysts who keep on finding vulnerabilities and patch them before hackers get in. But what about users who have a lower budget? If you have technical knowledge, you can make your WordPress secure by using known security plugins. And there are few tools which help us find vulnerabilities in a WordPress installation. By knowing the vulnerabilities, you can take action on patching those vulnerabilities. In this article, I am going to write about a less popular but effective tool called WPScanner. WPScanner is the WordPress security scanning tool developed by a well known company, WebSecurify. I already wrote an article on the WebSecurify vulnerability scanner. You can read that previous article to know how it works.
Note: Before reading more about this tool, you should know that this tool only identifies and summarizes the vulnerabilities found in WordPress. Listed vulnerabilities will be sorted from the higher to low security. Reports can also be exported in various formats.
Why did WebSecurify develop this tool if it already has the scanner?
Actually the reason was pretty simple. The company said that they made a separate tool for WordPress because there was the need for a WordPress optimized tool. There are millions of websites running on it, and users are less techy. So, a WordPress optimized tool was needed. This tool only needs a URL and no complicated configuration.
Now come back to WPScanner. This is not a standalone tool but a browser extension. But this browser extension works with WebSecurity Browser Extension (install it if it asks). It automatically identifies your browser and then asks to install WebSecurify if needed.
When you open this tool in a browser, you will see a simple interface which is quite similar to the WebSecurify tool's interface. There is a big text box at the top to enter the target URL. And at the left side, a few options.
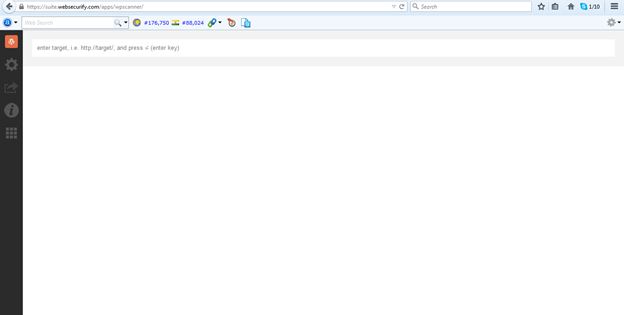
Figure 1: WPScanner interface
If we take a look at the options on the left side, you will see five big icons for five different options. The first option having the WordPress icon is the homepage for this tool. Clicking on this will open the tool in a new tab. So there is nothing in this.
The second option, which has a gear icon, is for the settings of the tool. This is the important section which you must take a look at before going to use this tool.
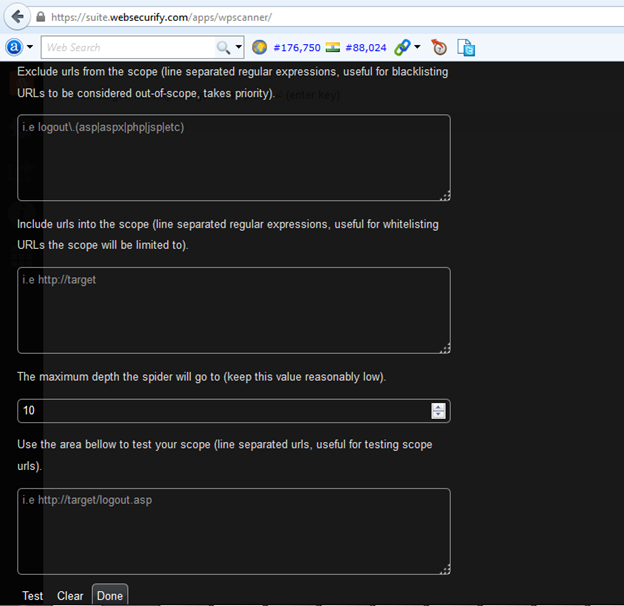
Figure 2: WPScanner settings page
The first settings option is to exclude URLs from the tool's scope. If you want to to ignore a few URLs, you should write them here in separate lines. URLs like log out and search can be included in this, as they have no impact or may be the reason for false results.
The second option is to include URLs which must be in the scope of the tool. So, you should add those URLs which are most sensitive here.
The third option is to set the maximum depth of URLs to which the spider of the tool should go. Keep this low, because adding this to a high value will have an impact on your server, and it may take your server down.
The last option is to test the scope. So, add those URLs where you want to test this tool first.
The third icon is for exporting the reports. You can export a vulnerability report in HTML, XML, JSON and CSV formats. Use this item when you are done with scanning your website. Then forward this report to a security guy, or if you can, check by yourself.
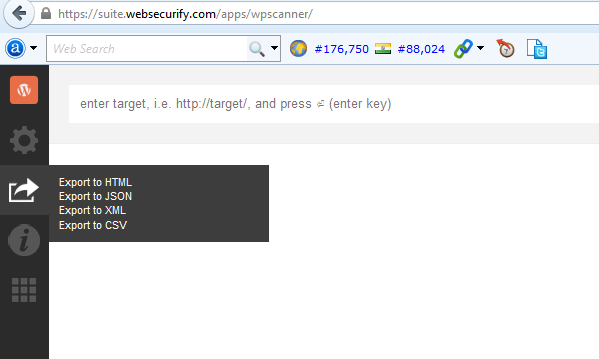
Figure 3: WPScanner Export options
The fourth icon is help, which has nothing to help at all.
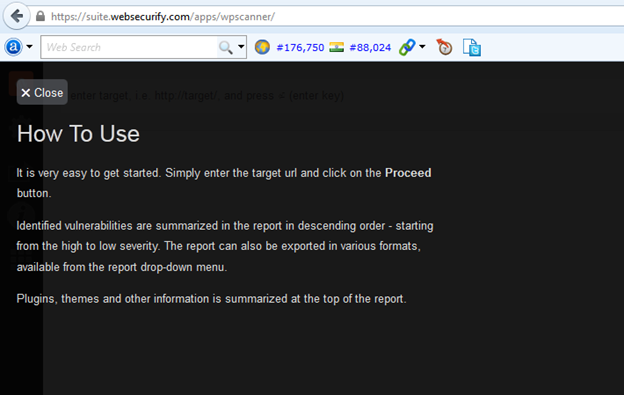
Figure 4: WPScanner help page
The last option is the global menu, which links to all the WebSecurify web apps. You can check other security apps by WebSecurify. I will try to write about those apps in the next few articles.
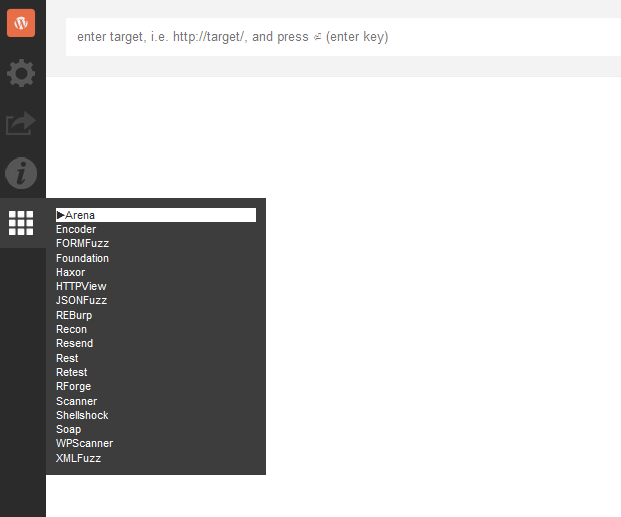
Figure 5: WPScanner's other apps
The overview of the article has come to an end. Now, we will enter the target and try to scan it to find the potential vulnerabilities in it.
When you try to start scanning, it will ask you to understand and confirm that this can damage your application. It is because the crawler will hit your website to scan. If your server has low configurations, it may add enough of a load to take it down.
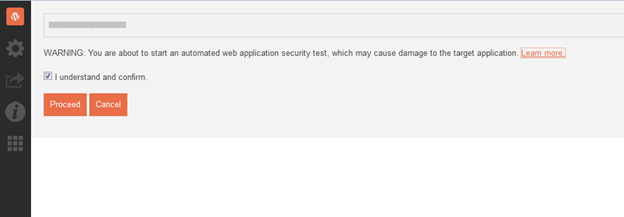
This is because automated security testing tools send arbitrary data to find security vulnerabilities in application. This is why we recommend creating a demo copy of your product if it is running. Running it on a live environment may harm your application. It may also lead to a Denial of Service attack. And in the worst case, if your application handles complicated tasks related to money, you may get a big financial loss. So, be careful.
Once the scan has been started, it will start showing you information related to the WordPress theme and plugins. You can see the progress bar to check how much of the operation has been performed.
Before every finding, it also shows the severity marked as Low, Medium or High. It also lists the text to read about impact, solution, details and references to know more about that specific vulnerability.
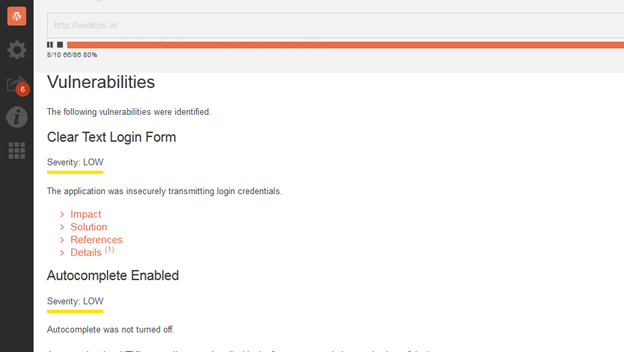
Few vulnerabilities listed will be marked as Informational. You do not have to think about those.
Now sit down and relax. The scan will take enough time based on the size of your website. It will crawl all the pages of your website and scan against its vulnerability database. It uses the existing vulnerabilities to match against the pages of your website and find the vulnerabilities. So, the newly found zero day vulnerabilities are not included.
You can pause or stop the scan any time you want. And once you are done, you can export the report in available formats.
How to patch vulnerabilities found by WPScanner
Now, when we have the list of known vulnerabilities of the website, the big question is how to start. So let me explain the thing in short. First of all, you will have to filter the informational details from the report, because you do not need to take action on those informational vulnerabilities. Those are only for information purposes.
Now, start with high severity vulnerabilities. This tool already offers the possible solution and reference links. You can use the listed solution and read the references to read more about the vulnerability and its effects. If you already know much about security, I am sure you will be able to understand how this vulnerability will affect you. Otherwise, you will have to take the help of any of your friends who can understand this.
You should always try to get rid of these high and medium severity vulnerabilities as soon as possible. If the vulnerabilities are in the plugin, then deactivate that plugin and do not activate it until the update is available to patch the vulnerability. Similarly, you should also change the theme if there is any vulnerability in the theme.
Additional steps to make your WordPress website safe from hackers
If you are WordPress user, you should try the above tool to find the vulnerabilities in your WordPress blog. But this is not the end. You should also follow some more steps to tighten the security of your blog.
- Keep your WordPress version, themes and plugins up-to-date. WordPress regularly pushes updates which also contains the security fixes. Themes and plugins also push similar updates to patch the known bugs and security fixes.
- Don't use the default username "admin". Hackers generally try bruteforcing, and this name can be guessed. By using this common username, you are making the hacking process easier for hackers.
-
Protect the WordPress Admin area wp-admin or wp-login.php file. You can use htaccess to only allow this file from a specific IP address. You can do this by adding this code in htaccess.
<Files wp-login.php>
order deny,allow
Deny from all
# allow access from my IP address
allow from xxx.xxx.xxx.xxx
</Files>
Add your own IP address in xxx.xxx.xxx.xxx. If you think that this is not possible, you can then limit login attempts of your WordPress blog. You will find many tutorials on this.
- Use a strong password for your WordPress account. I know you already know this, and all the time people repeat this. But you should believe me that this is the must-follow step. The stronger the password you use, the more difficult it is for hackers to hack into your website.
- Use only trusted sources to download themes and plugins. I recommend never to go with nulled themes and plugins, because they may contain malicious codes. These kinds of plugins or themes with malicious codes can open a backdoor on your website. So, please stay away and download or purchase themes only from reputable sources.
- Sometimes, your server may expose your website to hackers. So make sure that you are using a secure web server. If you are using managed hosting, then it is possible that the web hosting company is working to make it secure. But if you are using an unmanaged server, then you have to do it yourself.
- Use correct file permissions on your server. Setting a directory with 777 permissions may allow a malicious script to upload a file or modify existing file on the server. So, take care of the permissions. All directories should have 755 or 750 permissions. For files, make sure they have 644 or 640. Wp-config.php is the most sensitive file and it must have 600 file permissions.
- At last, I want to add that you should backup your website often. This is a must-follow step. That way, you will have the backup always ready to recover your website in case something bad happens.
Conclusion
WPScanner is a nice scanning tool for WordPress which can help you in identifying the vulnerabilities on your website. Like other automated scanners, it can also list all the potential vulnerabilities of your website. Now it is up to you to manually verify the listed vulnerabilities and then fix if they really exist. Because most of the time, automated scanners list false vulnerabilities due to a few reasons.
I tried this tool on a few websites and found it useful. But don't rely on this tool alone. And follow the security steps I added at the end of the post. These steps will help you in keeping the hacker away from your website. Always update your blog's WordPress, theme and plugins. And at least you can do this whenever the update is available. A few other security plugins also claim to help. I will be reviewing those plugins in upcoming posts.
Please comment below if you have any doubt or any question regarding WordPress security or WP Scanner. I will try to respond as soon as I can.
References
http://codex.wordpress.org/Hardening_WordPress
https://suite.websecurify.com/apps/wpscanner/

FREE role-guided training plans


