Threat hunting with Kolide and osquery
Introduction
In this article, we’ll discuss how we can use Kolide Fleet for threat-hunting purposes. This article is not intended to be an introductory piece, but rather a write-up showing the capabilities of Kolide Fleet in threat-hunting. We will therefore not cover basic installation, but the main features and capabilities of Kolide.
Become a certified threat hunter
Overview
Kolide Fleet is a flexible control server that can be used to manage osquery fleets. Using Fleet, we can be able to query multiple hosts on-demand. We can also create query packs and build schedules.
With Kolide, you can manage your fleet of osquery hosts more easily through a web interface. The following are some of the things that you can be able to query:
- Running processes
- Kernel modules loaded
- Active user accounts
- Active network connections
The web interface makes it very easy to use Kolide if you already understand SQL syntax and have interacted with osquery. The extensiveness of the queries that you can use depend on how conversant and comfortable you are using SQL. For instance, just like in SQL, osquery allows you to perform joins, limits and aggregates within your queries.
Running the Fleet
Before you can run Kolide, you need to ensure that you have prepared the database. This can be done using the command “fleet prepare db” as shown below: [CLICK IMAGES TO ENLARGE]
Figure 1. Preparing the database
Once complete, you should get a message reading “Migrations Completed.” We, however, need to generate some self-signed certificates by following the three steps given below:
These steps involve the:
- Creation of the server.key key file
- Creation of the server.csr csr file
- Creation of the server.cert cert file
Step 1
In this step, we are generating the private key to the certificate. The command used and output is shown below:
Figure 2. Generating the server.key key
Step 2
In the step below, we generate a certificate signing request file. The command and output are shown below:
Figure 3. Generating the server.csr file
Step 3
In this step we are generating the signed certificate. The command and output are shown below:
Figure 4. Generating the server.cert file
After you are done with the above steps, you can now serve the application using the command shown below:
Figure 5. Serving the application
Once the server is running, you should be able to see the following on your terminal where you started the server from. The output below shows traffic as the application is being run.
Figure 6. Traffic streaming from served application
Notice that for every instance that you serve the application, you will be required to provide a unique --auth_jwt_key. This is a unique, randomly generated key that you will need to provide before the application can be served.
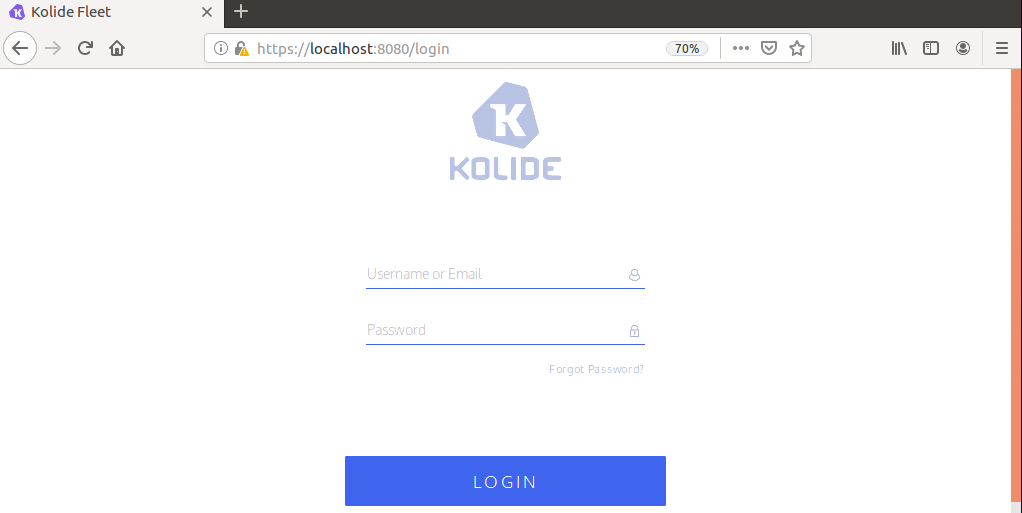
You should then be able to navigate to your fleet server either on localhost or using the server IP address if you have managed to set it up within your network of osquery hosts. See below:
Figure 7. Kolide login panel
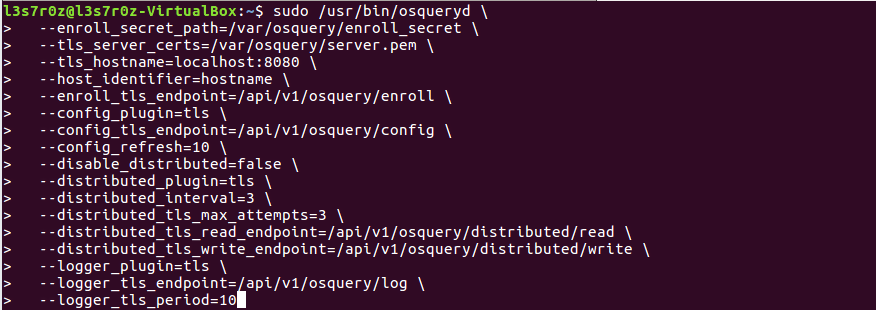
Do not forget to run your osquery, or else once inside the Fleet management console, your osquery install will appear offline. We launched our osquery instance as shown below:
Figure 8. Running osquery for the instance to come online
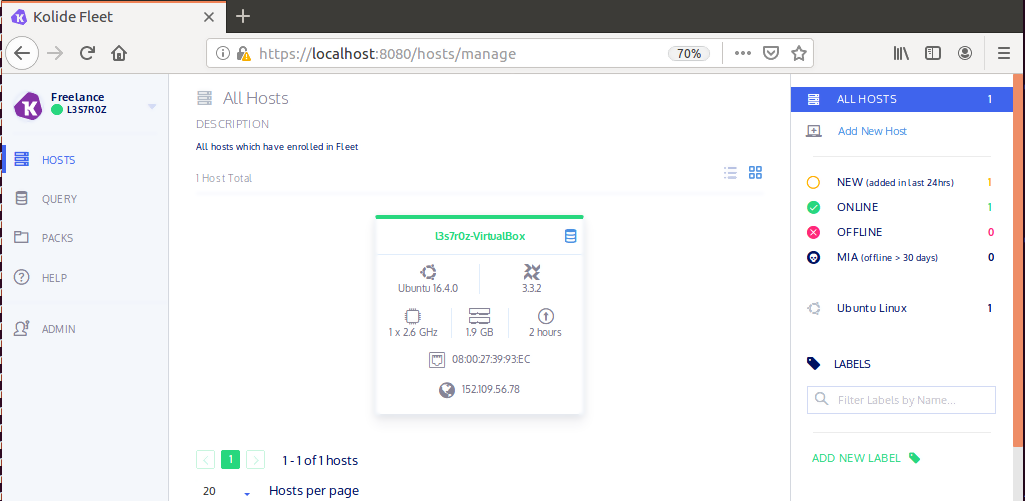
Once the application is served and the instance in which osquery has been installed has reached Kolide, it should appear online within the dashboard. Any asset in green means it has reached Kolide and is live. This is shown in the screenshot below:
Figure 9. Kolide hosts manager dashboard with grid-view online host
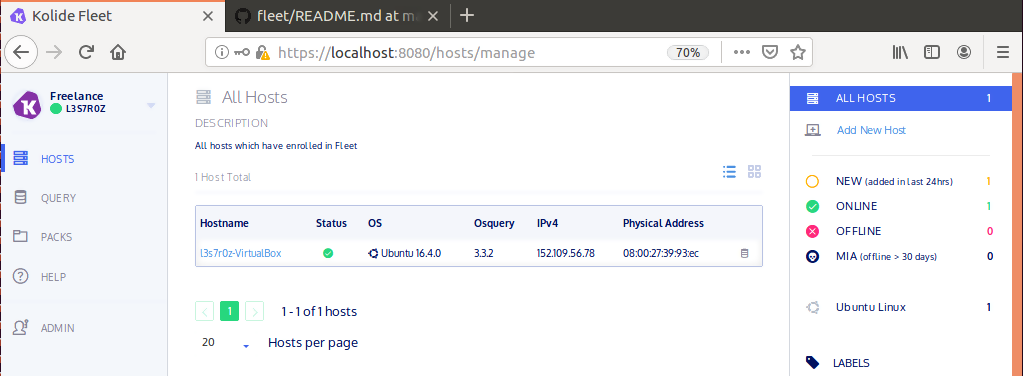
There are two main ways that we can list or have an overview of the available hosts. The screenshot above shows a grid view of the online host, and the one below shows a list view of the online host.
Figure 10. Kolide hosts manager dashboard with list-view online host
Next, we’ll discuss how we can manage our osquery instances using Kolide Fleet to perform certain queries to inform our threat-hunting exercise.
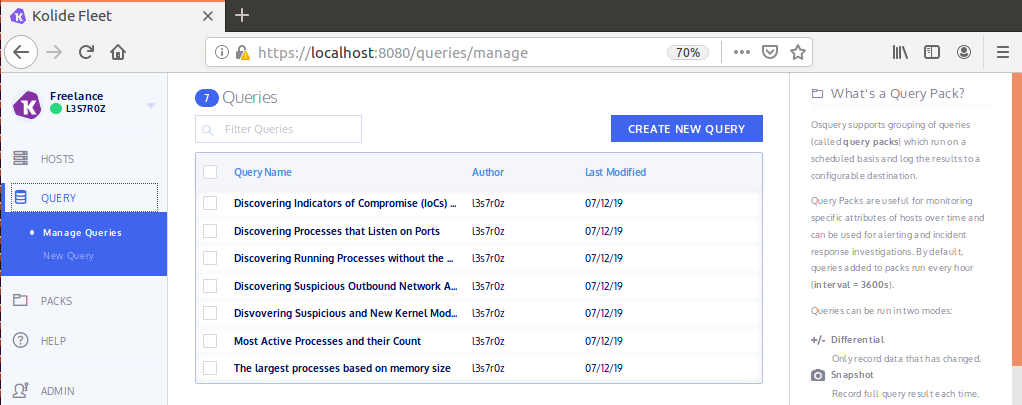
We built a list of queries that we will be discussing in the sections below. The following screenshot shows the list of queries that we created.
Figure 11. List of osquery queries within Kolide
In the following sections, we’ll discuss possible scenarios that Kolide and osquery can be used to make advanced queries for your threat-hunting needs.
Scenario 1: Querying the largest processes based on memory size
Sometimes, malware may consume heavy system resources. By way of example, we infected our system with a resource-intensive malware. The malicious process, named “Web Content,” can be seen below with the ID 2658. This process takes a significant amount of RAM, competing with more relevant processes, and ends up freezing the system.
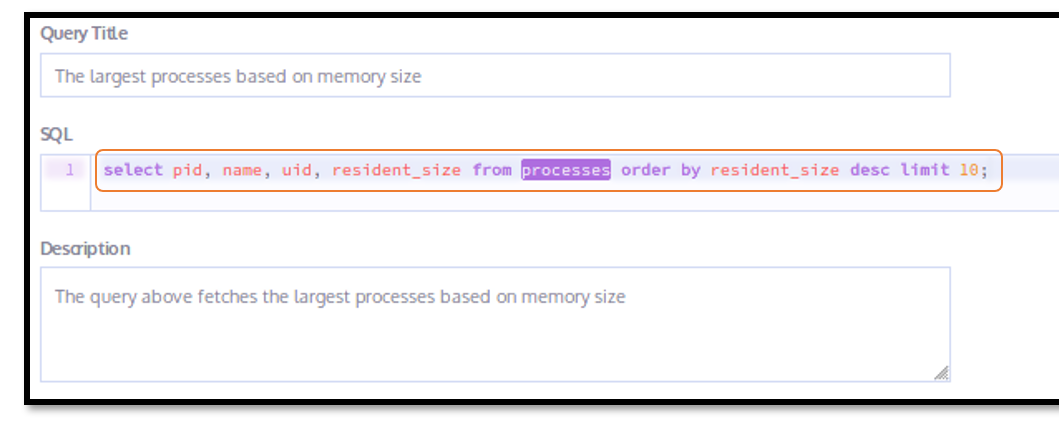
We used osquery to query for the process ID, process name and the process size in memory. We decided to limit our query to 10 responses. The following query was used:
select pid, name, uid, resident_size from processes order by resident_size desc limit 10;
We built the query as shown in the screenshot below, then ran it. The screenshot below highlights the command we used:
Figure 12. Building the largest process query
The following is the screenshot showing the malicious process on our infected Linux system:
Figure 13. Listing of largest processes based on memory size
We wanted to determine the most active processes and their count in order to understand the behavior of malware. In the following query, we decided to query the process count, process name and determine the top 10 most active processes. We can be able to identify our malicious process, “Web Content.” The following was the query used:
select count(pid) as total, name from processes group by name order by total desc limit 10;
The screenshot below highlights how we built the query within Kolide.
Figure 14. Building the most active process query
We then ran the query and received the following output. Notice the malicious process called “Web Content”:
Figure 15. Listing of the most active processes
Scenario 2: Discovering processes that listen on ports
A lot of malicious software today communicates remotely with command-and-control servers on the internet. We created a malicious rogue redis-server instance on our server. In order for us to identify this rogue redis instance, we ran the following query on Kolide:
SELECT DISTINCT process.name, listening.port, listening.address, process.pid FROM processes AS process JOIN listening_ports AS listening ON process.pid = listening.pid;
The highlighted section below shows how we built the query within Kolide:
Figure 16. Building the query to discover listening processes
On executing the query, we received the following result. Notice the rogue redis-server instance running on our server. The process connects to the remote port 57092.
Figure 17. Result from listening processes
Redis servers should not be left openly connected to the internet, since they are easy to infect. Kolide allows for the identification of available redis instances that you could assess for breaches.
Scenario 3: Discovering suspicious outbound network activity
Attackers have devised many strange ways of making malware fool antiviruses, heuristics and security departments. However, a keen eye can determine suspicious behavior even in the absence of specialized and advanced software and tools.
We used Kolide to identify two malicious ports that we had opened on our compromised MySQL server. In order to fool security personnel, we elevated MySQL ports from 3306 to 50180 and 50182. You can, however, use Kolide to detect this behavior by analyzing suspicious ports and outbound connections using the following command:
select s.pid, p.name, local_address, remote_address, family, protocol, local_port, remote_port from process_open_sockets s join processes p on s.pid = p.pid where remote_port not in (80, 443) and family = 2;
The following was the output we received. Notice the highlighted malicious MySQL processes, with outbound connections and elevated ports:
Figure 18. Results from outbound network activity
Scenario 4: Discovering running processes without the binary on disk
Attackers quite often delete malware binaries from the disk, forgetting that the malware is still running within memory. You could use the following query to determine any processes that do not have their exe files on disk.
SELECT name, path, pid FROM processes WHERE on_disk = 0;
A discovery from this query might indicate the possibility of malware. We ran the query but received the following output, indicating the absence of malware.
Figure 19. Empty results indicating the absence of malware
Scenario 5: Discovering indicators of compromise (IoCs) in memory and disk
Security teams can use osquery to determine indicators of compromise within memory by running queries that determine the existence of specific types of malware. For instance, the following queries have been provided by Facebook to allow security researchers to query for the hacking team's OSX backdoor. The way these queries work is by discovering the mechanisms that the backdoor achieves persistence.
select * from file where path = '/dev/ptmx0';
select * from apps where bundle_identifier = 'com.ht.RCSMac' or bundle_identifier like 'com.yourcompany.%' or bundle_package_type like 'OSAX';
select * from launchd where label = 'com.ht.RCSMac' or label like 'com.yourcompany.%' or name = 'com.apple.loginStoreagent.plist' or name = 'com.apple.mdworker.plist' or name = 'com.apple.UIServerLogin.plist';
We ran the queries above on our osquery instance and did not find any malware. Below is the response we got once we ran each of the commands above.
Figure 20. Empty results showing abscence of backdoor
Scenario 6: Discovering suspicious and new kernel modules
Since attackers are able to inject malicious code (rootkits) into kernels, the following query enables threat hunters to determine whether kernel modules have been successfully loaded and whether there have been any changes to them.
We infected our two kernel modules, “glue_helper” and “cryptd,” with rootkits and were able to identify them using Kolide. We made use of the following command:
select name from kernel_modules;
You need to be familiar with modules installed and loaded within your sensitive systems and be able to identify any recent changes that might have occurred. The following screenshot highlights the two malicious kernel modules:
Figure 21. Results showing new kernel modules
Challenges with osquery
The main challenge with osquery is that Just like any running process, the osquery process can be interfered with by malware, even killing it. The osquery process does not provide any security measures to safeguard itself against accidental closure or termination.
What are the other alternatives out there?
- Doorman is an alternative to Kolide and can be found here
There are also numerous alternatives to osquery. They include:
- Carbon Black: This is a commercial tool that is available for both Windows and Linux
- Threat Stack: This is a commercial tool for Linux only
- Auditd: This is an open-source Linux only alternative as well.
Conclusion
In this article, we have discussed the various capabilities of Kolide in managing a fleet of osquery hosts within the network. Threat hunters are able to issue create multiple commands and run them against multiple hosts within the network. Even though we have not discussed query packs, it is important to note that Kolide provides this function.
Become a certified threat hunter
Sources
- Elk + Osquery + Kolide Fleet = Love, Jordan Potti
- PART 2A: INTRO TO THREAT HUNTING WITH KOLIDE FLEET, OSQUERY, POWERSHELL EMPIRE, AND CALDERA – SETUP ENVIRONMENT, HoldMyBeer
- osquery Across the Enterprise, Palantir Blog
- kolide/fleet, GitHub
- CLI Documentation, GitHub
- Infrastructure Documentation, GitHub
- Monitoring macOS hosts with osquery, Kolide
- Introduction to osquery for Threat Detection and DFIR, Rapid7 Blog
- Introducing osquery, code.fb.com


